2.13 Configuring Network Settings
Before configuring the network settings, you need to setup access to SecureSync web user inter-
face ("Web UI"). This can be done by assigning a static IP address, or using a DHCP address.
For more information, see "Setting up an IP Address" on page44.
Once you have assigned the IP address, login to the Web UI. For more information, see
"Accessing the WebUI" on page53.
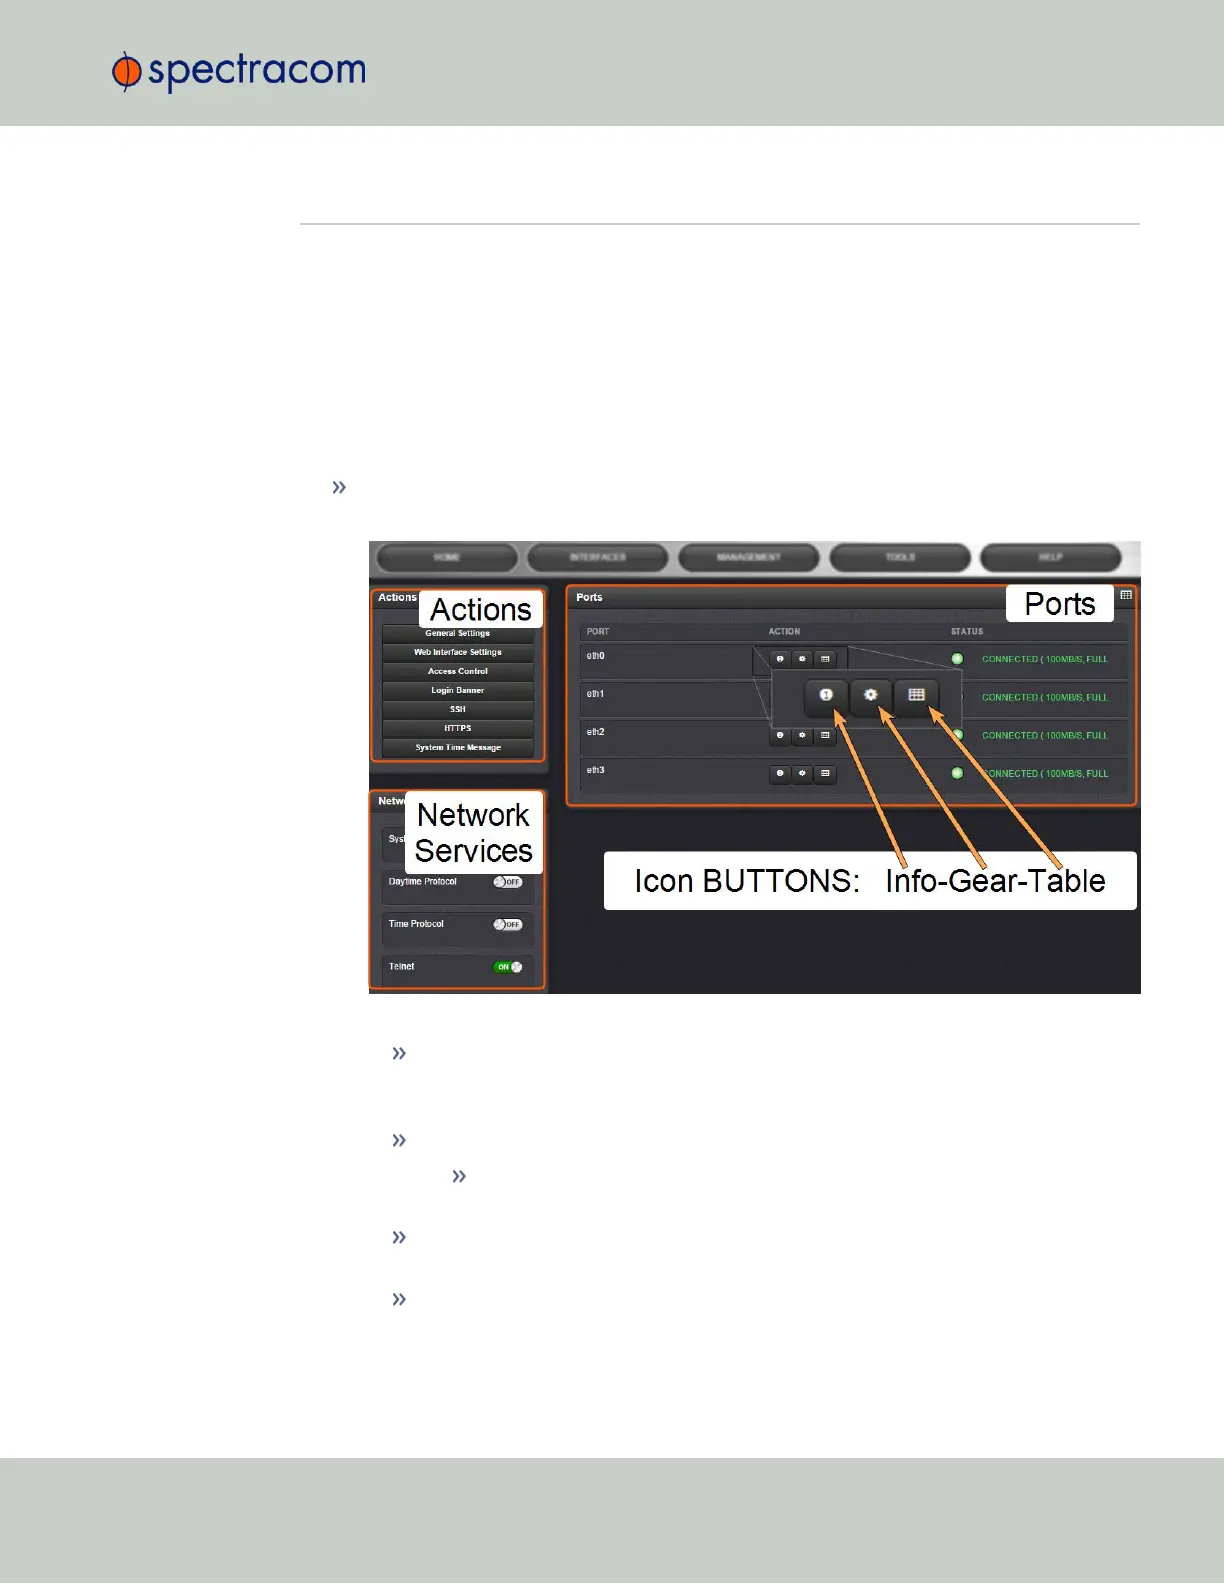
To configure network settings, or monitor your network, navigate to SecureSync's Network
Setup screen.
To access the Network Setup screen:
Navigate to MANAGEMENT > Network Setup. The Network Setup screen is divided into
three panels:
The Actions panel provides:
General Settings: Allows quick access to the primary network settings necessary to
connect SecureSync to a network. See "General Network Settings" on the next
page.
Web Interface Settings:
Web interface timeout: Determines how long a user can stay logged on.
For more information, see "Web UI Timeout" on page268.
Access Control: Allows the configuration of access restrictions from assigned net-
works/nodes.
Login Banner: Allows the administrator to configure a custom banner message to
be displayed on the SecureSync Web UI login page and the CLI (Note: There is a
2000 character size limit).
2.13 Configuring Network Settings
CHAPTER 2 • SecureSync User Reference Guide Rev. 26
55