5.
In the Upload File window, click Choose File. Using the Explorer window, navigate to the
location mentioned under the first step, select the license file, and monitor the installation
progress in the Status Upgrade window until the application has rebooted.
6.
Refresh the browser window, and login to the Web UIagain. Re-navigate to Tools >
Upgrade/Backup, and confirm that the newly installed Option is listed in the System Con-
figuration panel.
4.7 Resetting the Unit to Factory Configuration
In certain situations, it may be desired to reset all SecureSync configurations back to the factory
default configuration. The GNSS location, any SecureSync configurations and the locally
stored log files can be cleared via the Web UI.
Caution: It is not possible to clear the Authentication logs and NTP logs.
Note: Restoring configurations (reloading a saved configuration), erasing the
stored GNSS location and clearing the log files are separate processes. You may
restore one without restoring the others.
If SecureSync was assigned a static IP address before cleaning the configurations, it will be
reset to DHCP after the clean has been performed. If no DHCP server is available after the
clean operation, the static IP address will need to be manually reconfigured. See "Assigning a
Static IP Address" on page45.
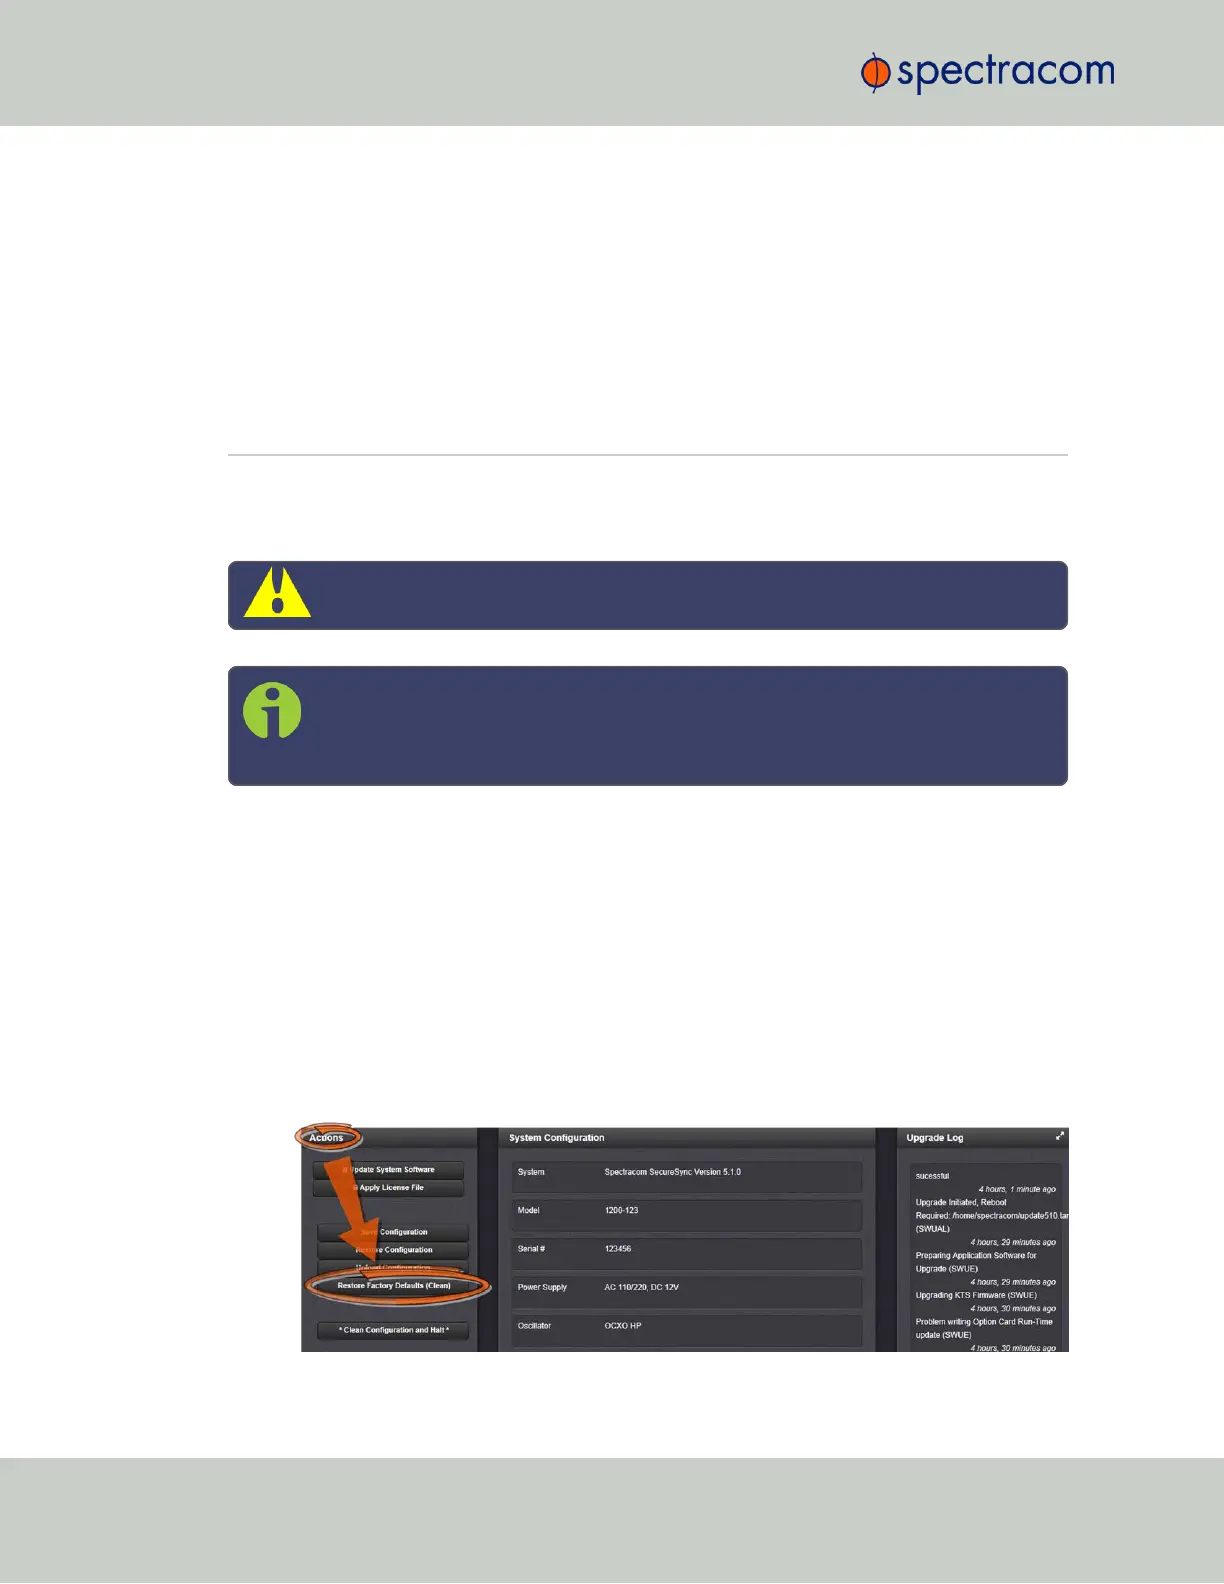
4.7.1 Resetting All Configurations to their Factory Defaults
To restore the configuration files to their factory defaults:
1.
Navigate to TOOLS > SYSTEM: Upgrade/Backup.
2.
In the Actions panel, click the Restore Factory Defaults (Clean) button.
322
CHAPTER 4 • SecureSync User Reference Guide Rev. 26
4.7 Resetting the Unit to Factory Configuration