EasyManuals Logo

Spectracom SecureSync User Manual

Spectracom SecureSync
599 pages
To Next Page IconTo Next Page
To Previous Page IconTo Previous Page
Page #373 background imageLoading...
Page #373 background image
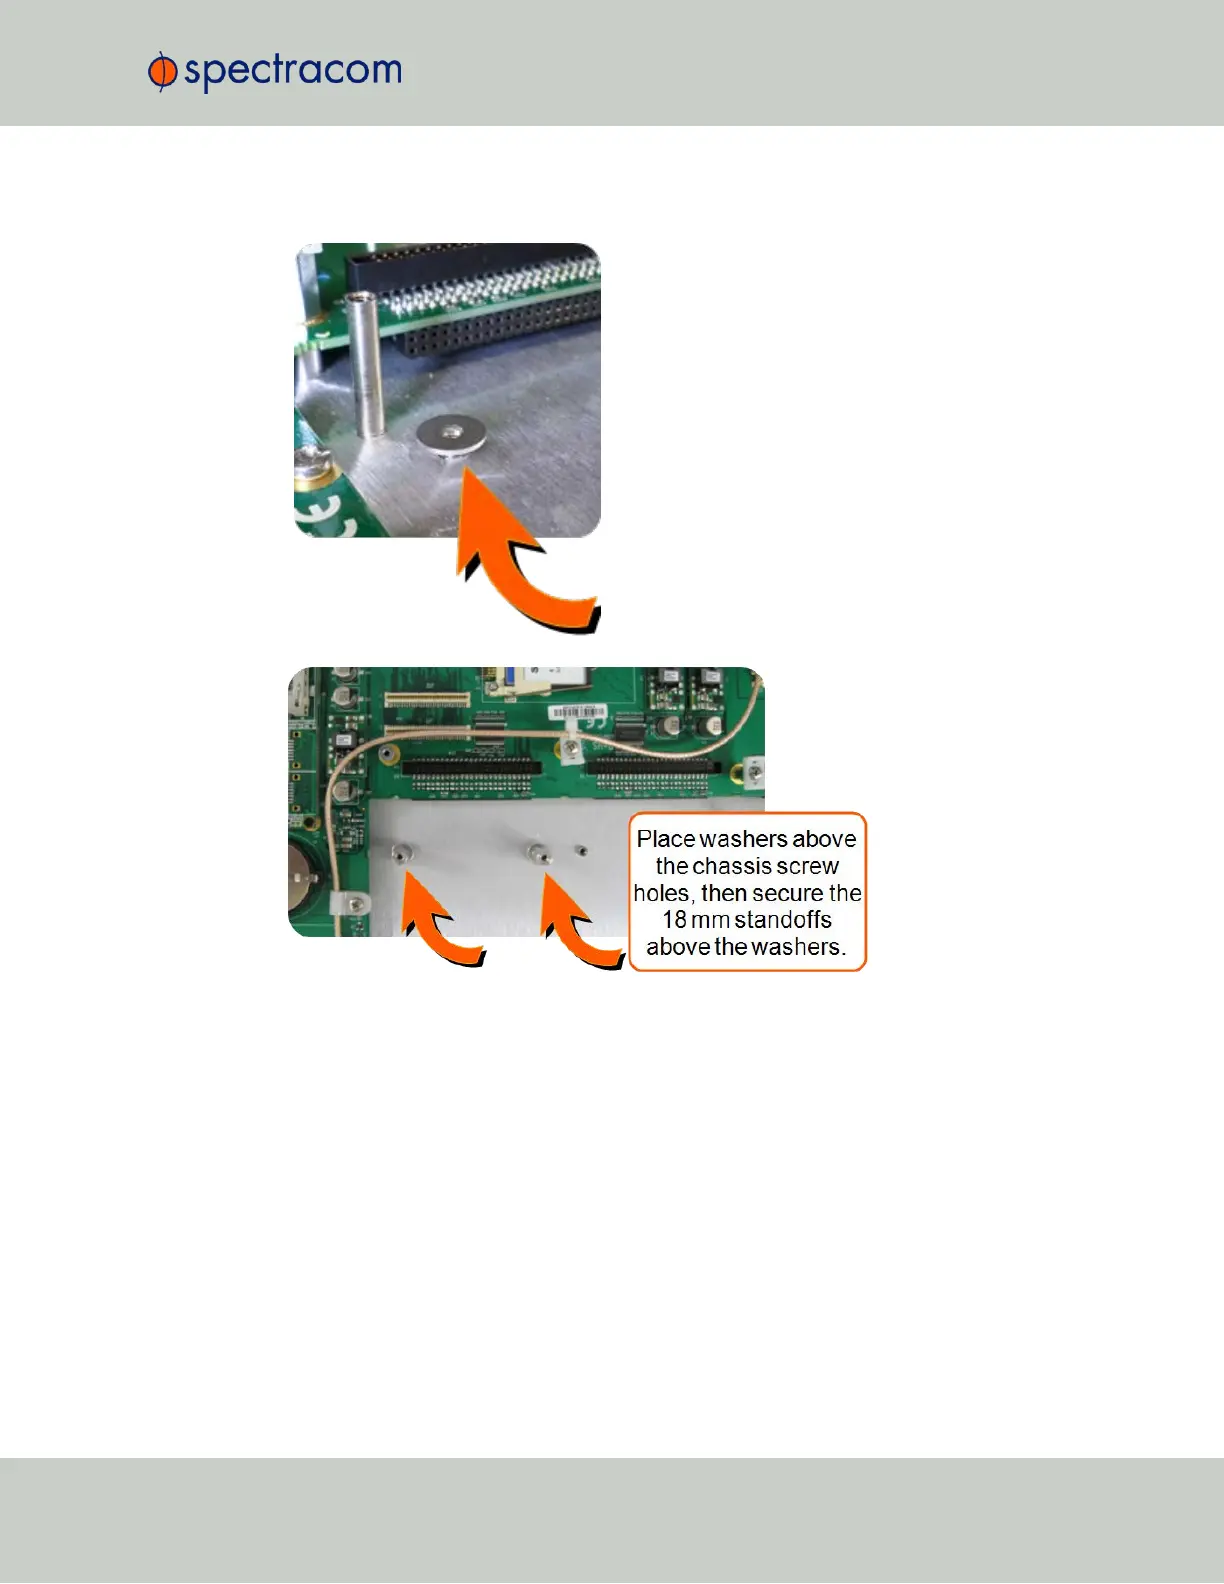
Figure 5-4: Washers & standoffs secured to chassis screw holes
d.
Insert option card into the slot, lining up the screw holes on the card with the standoffs.
e.
Using the supplied M3 screws, screw the board into the standoffs, and the option card
plate into the chassis, applying a torque of 0.9Nm/8.9in-lbs.
f.
Take the supplied 50-pin ribbon cable and carefully press it into the connector on the
mainboard (lining up the red sided end of the cable with PIN 1 on the mainboard), then
into the connector on the option card (see Figurebelow).
SecureSync User Reference Guide 357
APPENDIX

Table of Contents

Questions and Answers:

Question and Answer IconNeed help?

Do you have a question about the Spectracom SecureSync and is the answer not in the manual?

Spectracom SecureSync Specifications

General IconGeneral
ModelSecureSync
Time ReferenceGPS, GLONASS, BeiDou, Galileo, IRIG, NTP, PTP, 1PPS
DisciplinesGNSS, IRIG, PTP, NTP, SyncE
InputsGPS, GLONASS, BeiDou, Galileo, IRIG, NTP, PTP, 1PPS
OutputsNTP, PTP, 1PPS, IRIG
ProtocolsPTP, NTP, SNMP, SSH, HTTPS
Form Factor1U Rack-mount
RedundancyOptional redundant power supply
Security FeaturesPassword protection, access control lists, SSH, HTTPS, SNMPv3, NTP authentication, PTP authentication
Power Supply100-240 VAC, 50-60 Hz
Operating Temperature0°C to +50°C
Dimensions44.45 mm (H) x 482.6 mm (W)

Related product manuals