EasyManuals Logo

Spectracom SecureSync User Manual

Spectracom SecureSync
599 pages
To Next Page IconTo Next Page
To Previous Page IconTo Previous Page
Page #378 background imageLoading...
Page #378 background image
d.
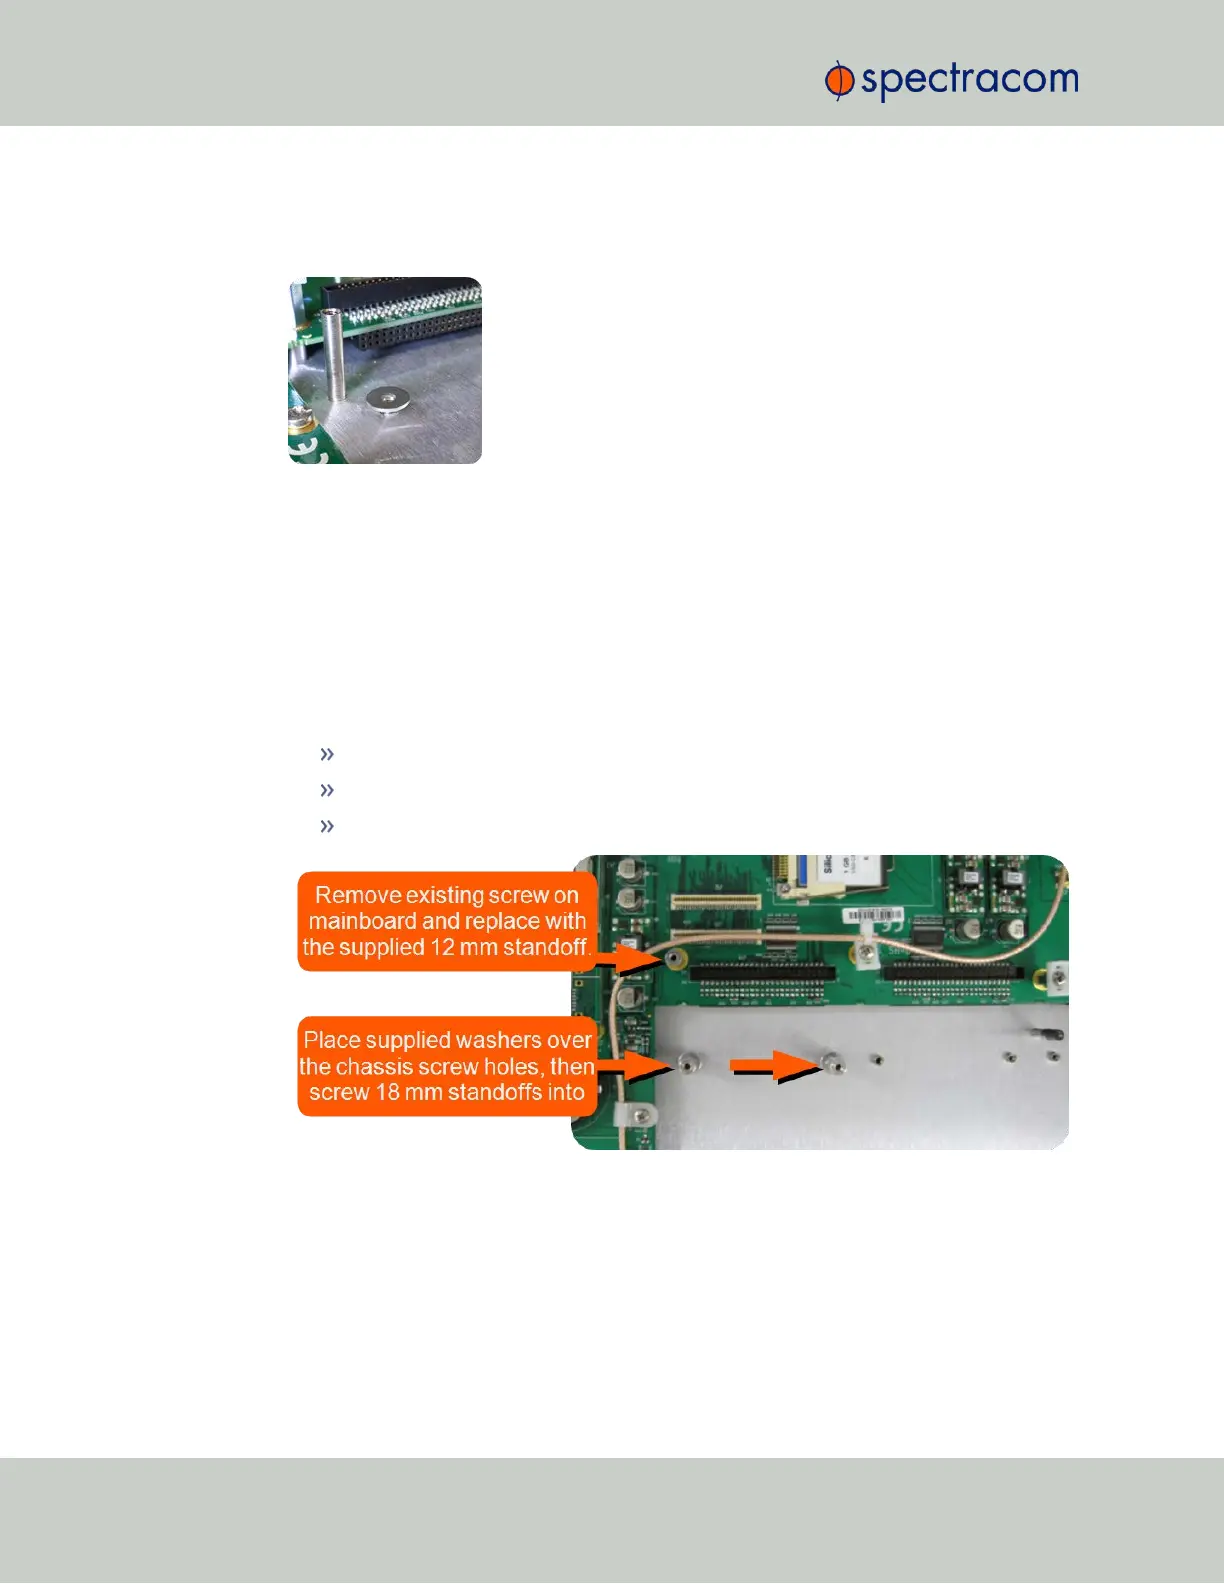
Take the supplied washers and place them over the chassis screw holes (see figure
below).
Figure 5-9: Washer placement
e.
Screw the supplied 18-mm standoffs into place above the washers (see figure below),
applying a torque of 0.9Nm/8.9in-lbs.
f.
On the SecureSync mainboard, remove the screw located under the J11 connector and
replace with the supplied 12-mm standoff (see figure below).
g.
Insert the Gigabit Ethernet option card into Slot2, and carefully press down to fit the con-
nectors on the bottom of the Gigabit Ethernet card to the connectors on the mainboard.
h.
Secure the option card by screwing the supplied M3 screws into:
both standoffs on the chassis
the standoff added onto the mainboard
and into the rear chassis. Apply a torque of 0.9Nm/8.9in-lbs.
Figure 5-10: Gigabit Ethernet option card installation
362 SecureSync User Reference Guide
APPENDIX

Table of Contents

Questions and Answers:

Question and Answer IconNeed help?

Do you have a question about the Spectracom SecureSync and is the answer not in the manual?

Spectracom SecureSync Specifications

General IconGeneral
ModelSecureSync
Time ReferenceGPS, GLONASS, BeiDou, Galileo, IRIG, NTP, PTP, 1PPS
DisciplinesGNSS, IRIG, PTP, NTP, SyncE
InputsGPS, GLONASS, BeiDou, Galileo, IRIG, NTP, PTP, 1PPS
OutputsNTP, PTP, 1PPS, IRIG
ProtocolsPTP, NTP, SNMP, SSH, HTTPS
Form Factor1U Rack-mount
RedundancyOptional redundant power supply
Security FeaturesPassword protection, access control lists, SSH, HTTPS, SNMPv3, NTP authentication, PTP authentication
Power Supply100-240 VAC, 50-60 Hz
Operating Temperature0°C to +50°C
Dimensions44.45 mm (H) x 482.6 mm (W)

Related product manuals