7 Concurrent I/O (Input/Output)
7.8 I/O Allocation and EtherNet/IP Configuration
7-45
HW1485509
HW1485509
7.8.4 EtherNet/IP Scanner
Adding an EtherNet/IP Scanner to the YRC Controller allows the YRC
Controller to communicate with devices such as Network I/O, Grippers,
etc… Up to 32 Scanners can be added to the YRC Controller.
Before adding or configuring a Scanner, the following information is
needed:
– IP Address of device (should be configured from the device, not
Smart Pendant)
– Input/Output/Configuration Instance Numbers. These numbers will
be provided by the device manufacturer.
– Input/Output/Configuration Sizes (in bytes). These numbers will be
provided by the device manufacturer.
Before configuring the device, it is a good idea to “ping” both the YRC
Controller and the device from the PC on the same network to ensure the
network is configured properly.
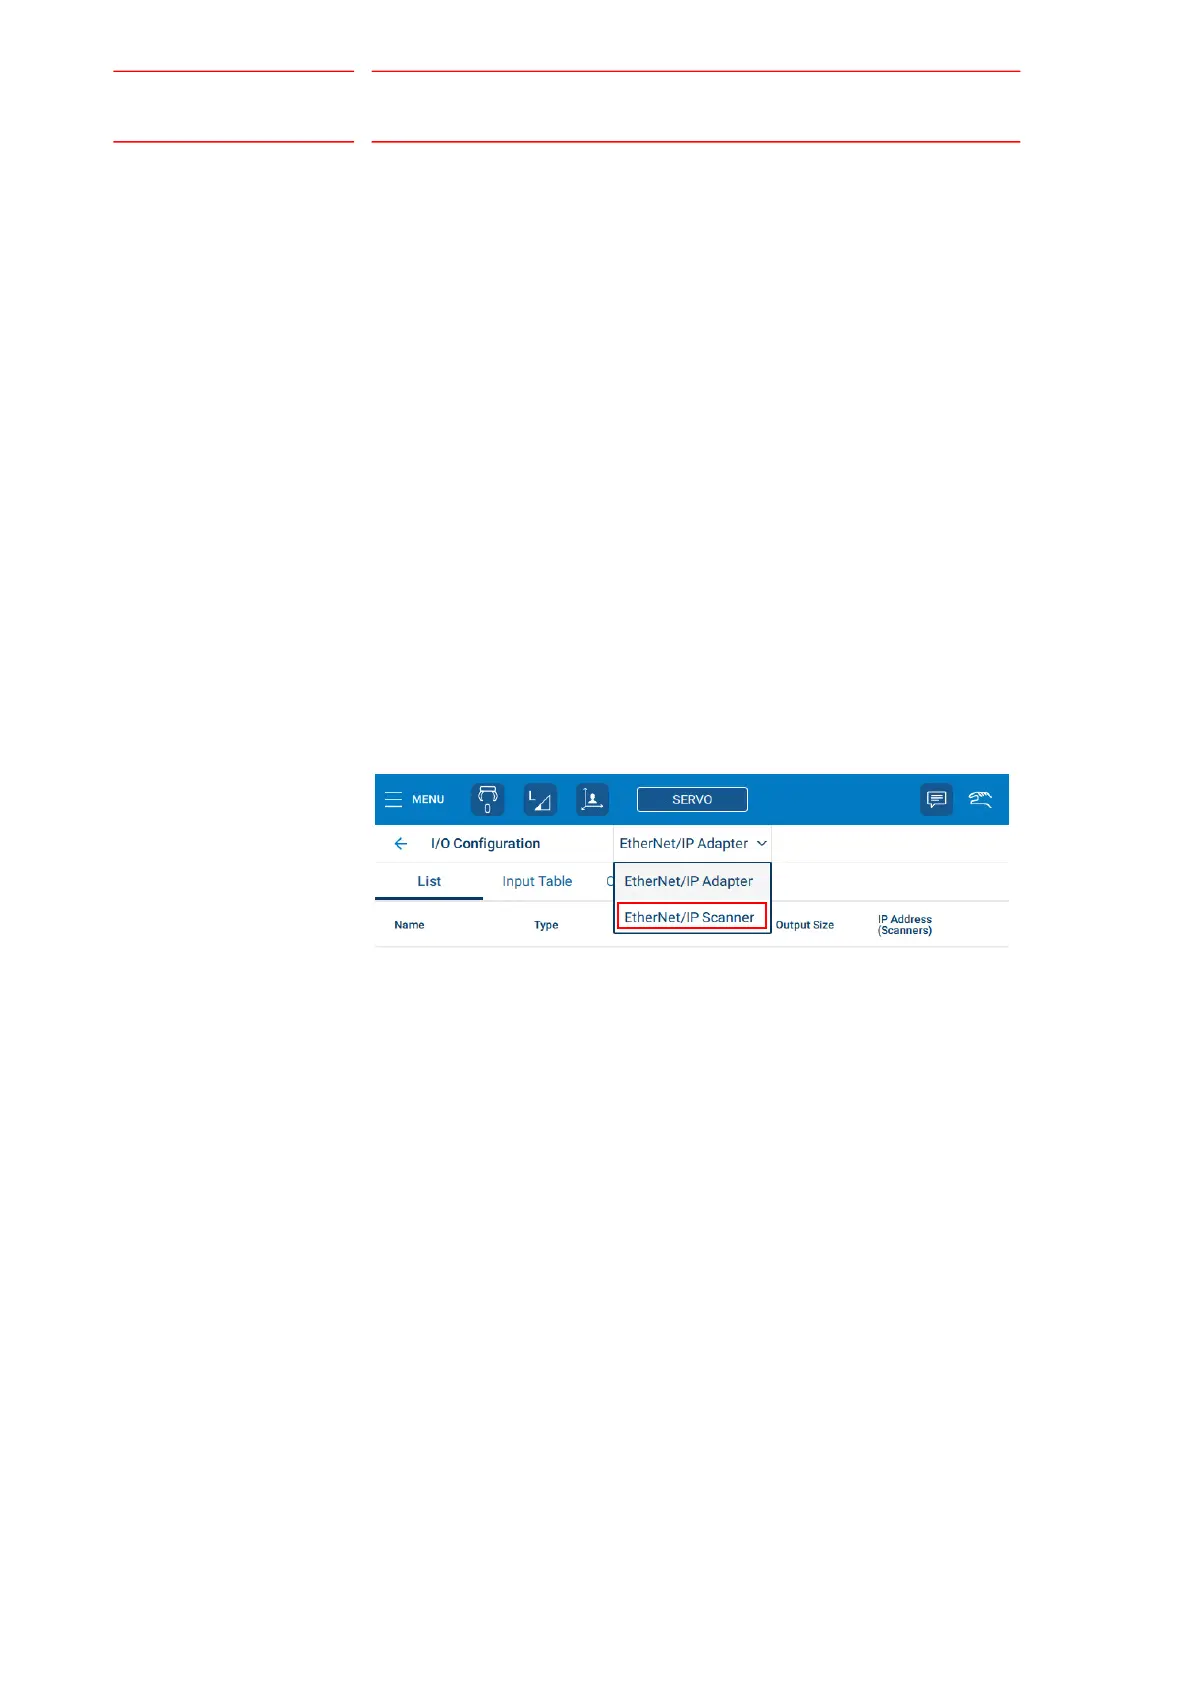
7.8.4.1 Creating a Scanner
To configure a new Scanner, press the {NEW ALLOCATION} button on
the top of the screen. From the dropdown menu that appears, select
“EtherNet/IP Scanner”.
Fig. 7-38: Selecting EtherNet/IP Scanner
This will create a new entry in the device list for an EtherNet/IP Scanner
with default name “NewScanner”. The detail panel will automatically start
with the {Save}/{Cancel} buttons. Pressing {Cancel} will delete the new
Scanner.
Note the initial “Size” and “Starting Group #” are 1 and 0 respectively
which is not a valid configuration. Valid data will need to be entered before
saving.