80 Rockwell Automation Publication 2198-UM004A-EN-P - October 2019
Chapter 4 Connect the Kinetix 5100 Drive System
Wiring Guidelines
Use these guidelines as a reference when wiring the connectors on your
Kinetix 5100 servo drives.
Follow these steps when wiring the connectors on your Kinetix 5100 drive
modules.
1. Prepare the wires for attachment to each connector plug by removing
insulation equal to the recommended strip length.
2. Route the cable/wires to your Kinetix 5100 drive.
3. Insert wires into connector plugs or the terminal block.
See connector pinout tables in Chapter 3
and Appendix A beginning on
page 435
for interconnect diagrams.
– Tighten the terminal screws on 2198-E2055-ERS, 2198-E2075-ERS,
and 2198-E2150-ERS drives to the specified torque value.
– Connectors on 2198-E1004-ERS, 2198-E1007-ERS,
2198-E1015-ERS, 2198-E1020-ERS, and 2198-E2030-ERS drives use
spring tension to hold wires in place.
– 2198-E1004-ERS, 2198-E1007-ERS, and 2198-E1015-ERS drives
include connector plugs and a wiring tool.
4. Gently pull on each wire to make sure that it does not come out of its
terminal; reinsert and/or tighten any loose wires.
5. Insert the connector plug into the drive connector.
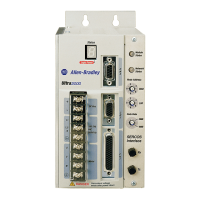
IMPORTANT For connector locations of the Kinetix 5100 drives, see Kinetix 5100
Connector Data on page 40.
When you remove insulation from wires or tighten screws to secure the
wires, see the tables beginning on page 78
for torque values.
IMPORTANT To improve system performance, run wires and cables in the wireways as
established in Establish Noise Zones
on page 33.
IMPORTANT Use caution not to nick, cut, or otherwise damage strands as you
remove the insulation.
1. Position the wiring tool to grip the orange tab.
2. Press lever firmly to disengage spring tension.
3. Insert (or remove) the wire.
4. Release lever to engage spring tension.
5. Reposition on the next orange tab and repeat.
Connector Plug
Lever
Upper Jaw Gripping
Orange Tab
Wiring Tool
Wire

 Loading...