• Loading Rolls in the Printer →P.588
• Loading Sheets in the Printer →P.616
Note
• Always
make sure the loaded paper matches the type of paper specified. Adjustment cannot be
completed correctly unless the setting value matches the loaded paper.
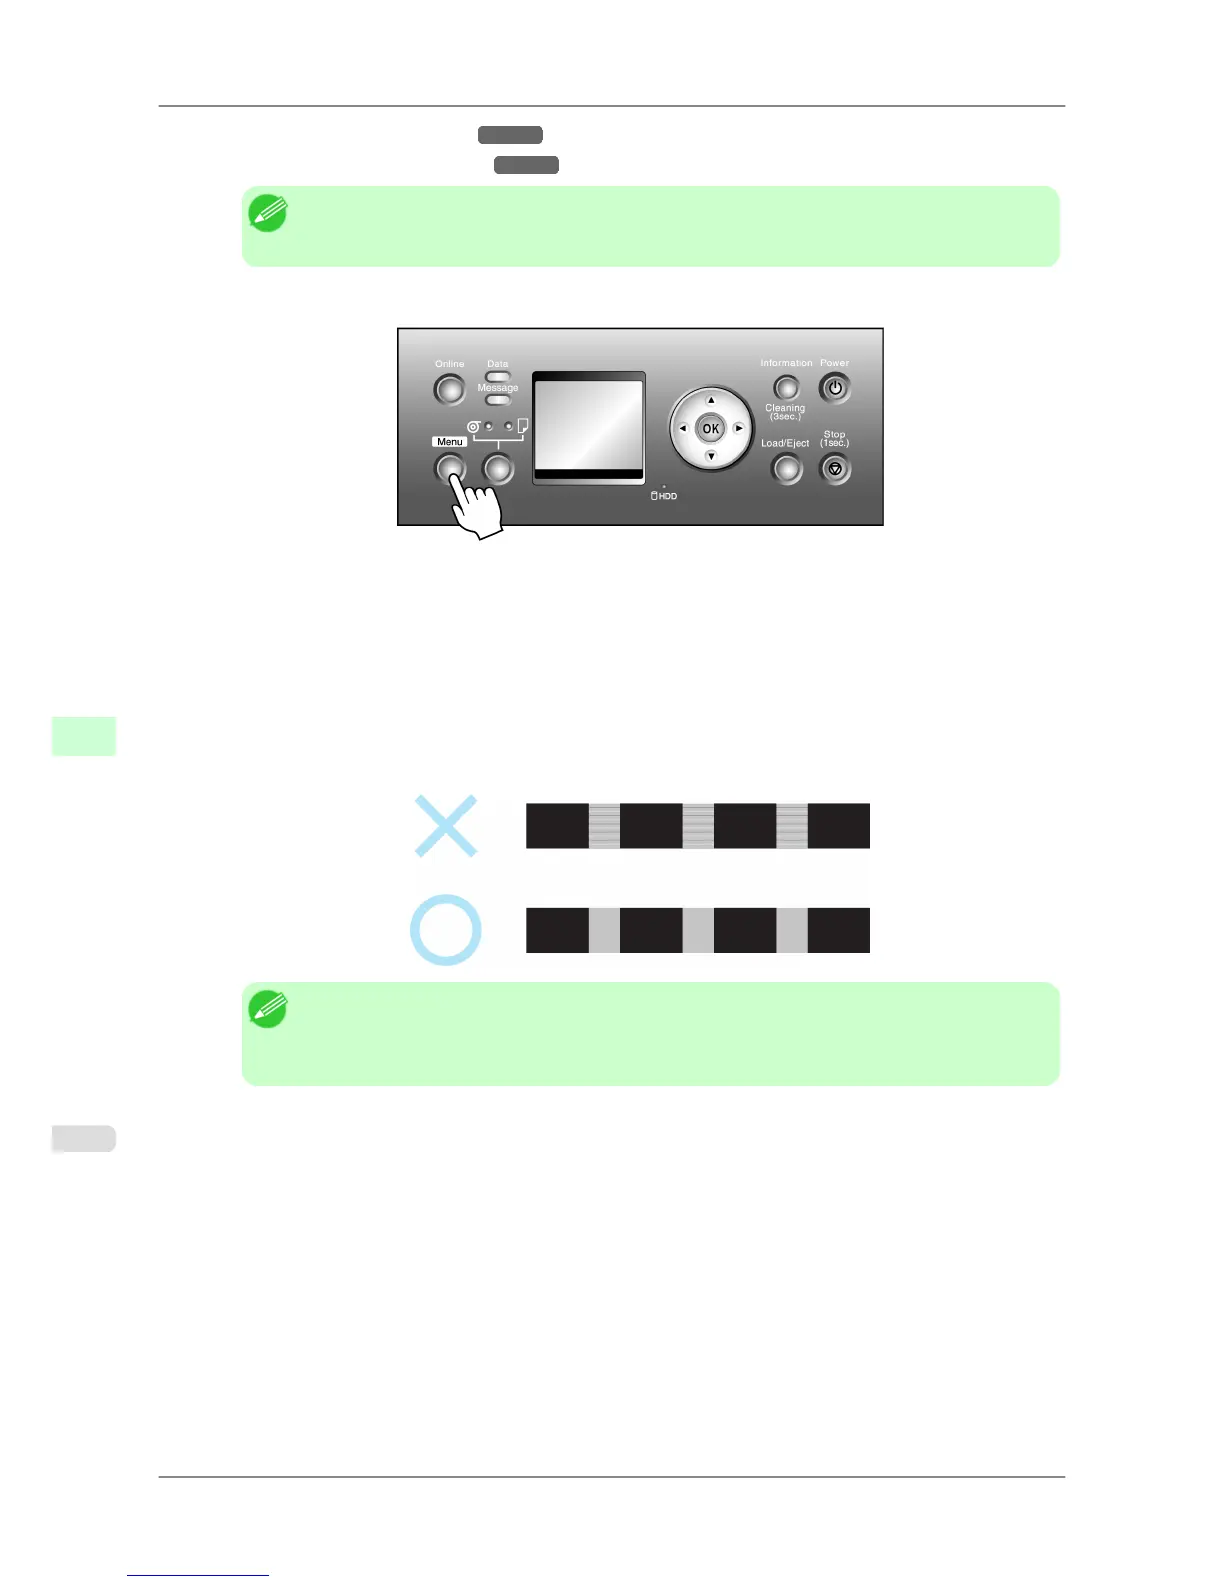
2. Press the Menu button to display MAIN MENU.
3. Press ▲ or ▼ to select Adjust Printer, and then press the ▶ button.
4. Press ▲ or ▼ to select Manual Band Adj, and then press the ▶ button.
5. Press ▲ or ▼ to select Yes, and then press the OK button.
Test pattern A is printed for band adjustment.
6. Examine test pattern A for band adjustment. Determine the pattern in which streaks are least noticeable.
Note
• If
streaks seem least noticeable in two patterns but you cannot decide which one is better, choose
an intermediate value. For example, choose 11 if you cannot decide whether pattern 10 or 12 is
better.
7. Press ▲ or ▼ to display the number selected in step 6, and then press the OK button.
Test pattern B is printed for band adjustment.
8. Examine test pattern B for band adjustment. Determine the pattern in which streaks are least noticeable.
9. Press ▲ or ▼ to display the number selected in step 8, and then press the OK button.
The adjustment value is now registered, and adjustment is complete.
Adjustments for Better Print Quality
>
Adjusting the feed amount
>
Manual Band Adjustment (Manual Band Adj) iPF825
8
638