Note
• By using RemoteUI, you can also specify the object name used by AppleTalk, as well as the printer zone
name.
For details on RemoteUI, see "Using RemoteUI." →P.717
Configuring the destination (Mac OS X)
Important
• AppleTalk is supported in Mac OS X 10.2.8–10.4.
Note
• The
following procedures are based on Mac OS X 10.4. The method of configuring the destination varies
depending on the version of Mac OS X.
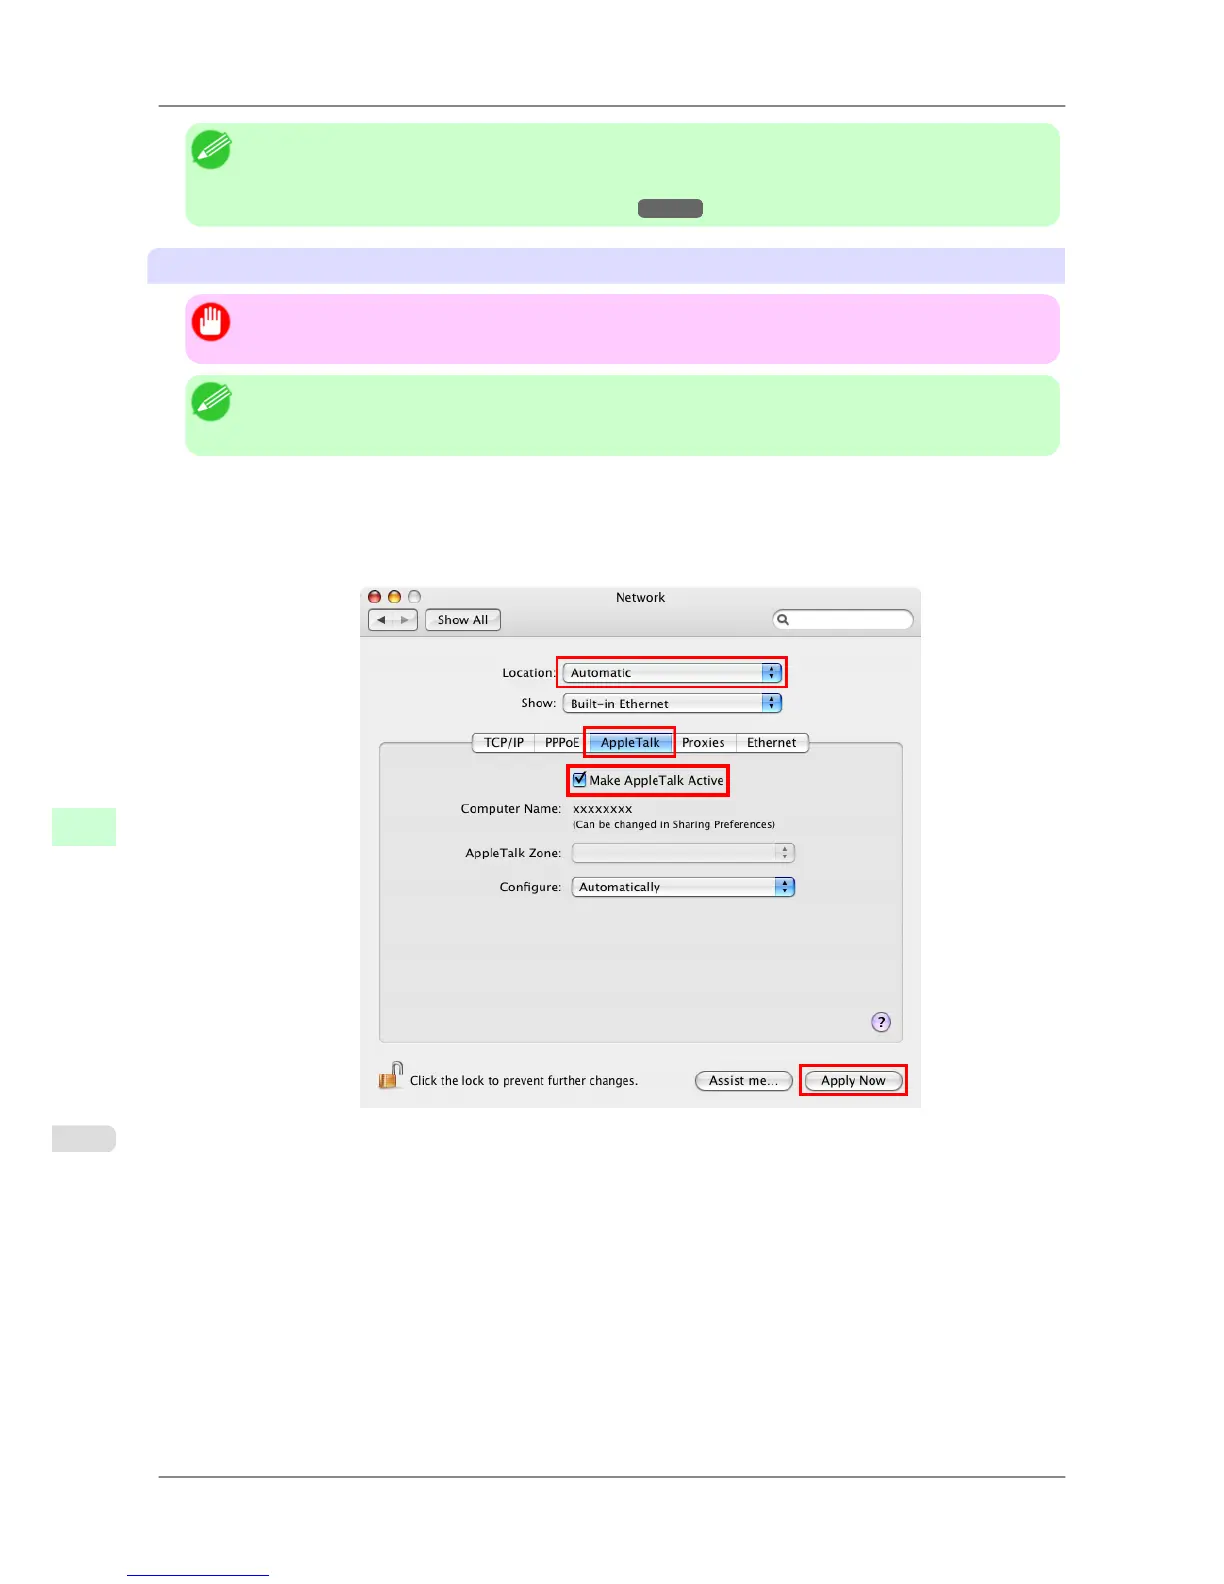
1. In System Preferences, click Network to display the Network window.
2. In Show,
choose Built-in Ethernet. Next, click AppleTalk, select Make AppleTalk Active, and click Apply
now.
3. Close the Network window and save the settings.
4. Choose Utilities (or Applications ) in the Go menu of Finder.
5. Click Printer Setup Utility (or Print Center ) in the Utilities folder.
Network Setting
>
Network Setting (Mac OS X)
>
Configuring the Destination for AppleTalk Networks iPF825
10
734