3-236 Phaser 5500 Printer Service Manual
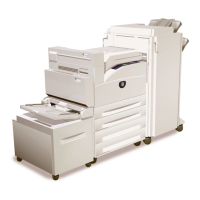
Slide In Tray 6 Feeder - Tray 6 Undocked
The Tray 6 Docking Switch indicates that Tray 6 is separated from the printer.
5
Check for +24 V to the switch.
Is there +24 V across P/J121-B1 (+) <=>
ground?
Replace the
Switch
Replace the
Engine Logic
Board.
Tray 6 Undocked (Docking Interlock Switch) Troubleshooting Reference
Applicable Parts References
■ Tray 6 PW B
■ Tray 6 Ma in
Harness
■ Tray 6 Docking
Switch
■ Engine Logic
Board
■ Print Engine P/J Engine Logic Board (page 10-13)
■ PL8.1 Print Engine Electrical (page 9-40)
■ Phaser 5500 Printer Options Service Manual
■ 2000-Sheet Feeder P/J Locator (page 5-20)
■ 2000-Sheet Feeder Interface Wiring (page 5-23)
■ PL22.7 Tray 6 Drive and Transportation (page 4-30)
■ PL22.8 Tray 6 Electrical (page 4-32)
Tray 6 Undocked (Docking Interlock Switch) Troubleshooting Procedure
Step Actions and Questions Yes No
1
Check the Tray 6 installation.
Is Tray 6 installed correctly?
Go to Step 2. Correct and go to
Step 2.
2
Check the Docking Switch condition.
Is the Docking Switch damaged?
Replace the
Docking Switch
(
page 3-66).
Go to Step 3.
3
Test the Docking Switch.
1. Pull Tray 6 away from the printer.
2. Run the Service Diagnostics Tray 6
Interlock Switch test.
Does the sensor status change when
the switch plunger is repeatedly
pushed?
Go to Step 10. Go to Step 4.
4
Check Tray 6 Docking Switch Harness
connections.
Are FS003, FS004 and P/JF08
connected?
Go to Step 6. Connect and go
to Step 5.
5
Cycle printer power.
Does the error still occur?
Go to Step 6. Problem solved.
Front Door Open (Front Door Interlock) Troubleshooting Procedure (Continued)
Step Actions and Questions Yes No
 Loading...
