Dashboard and control panel
S-44
Radio; performance, air volume and mode of
air compressor);
3. Install the HI-FI host and fix the screws
4. Insert the wiring connector behind the HI-FI
panel, and align the panel snap with the slot on
the dashboard, knock clockwise the snaps into
the panel from the left upper corner;
5. Fit the A/C controller and fix the screws;
6. Fit the A/C controller panel and knock
clockwise the snaps into the panel from the left
upper corner;
7. Reset the ashtray.
Disassembly/assembly of driver/
occupant-sided outlets
1. Remove the dashboard (See—— Disassembly/
Assembly of Dashboard)
2. Push out the snap A from the back of
dashboard;
3. Install as per the reverse order with that of
removal;
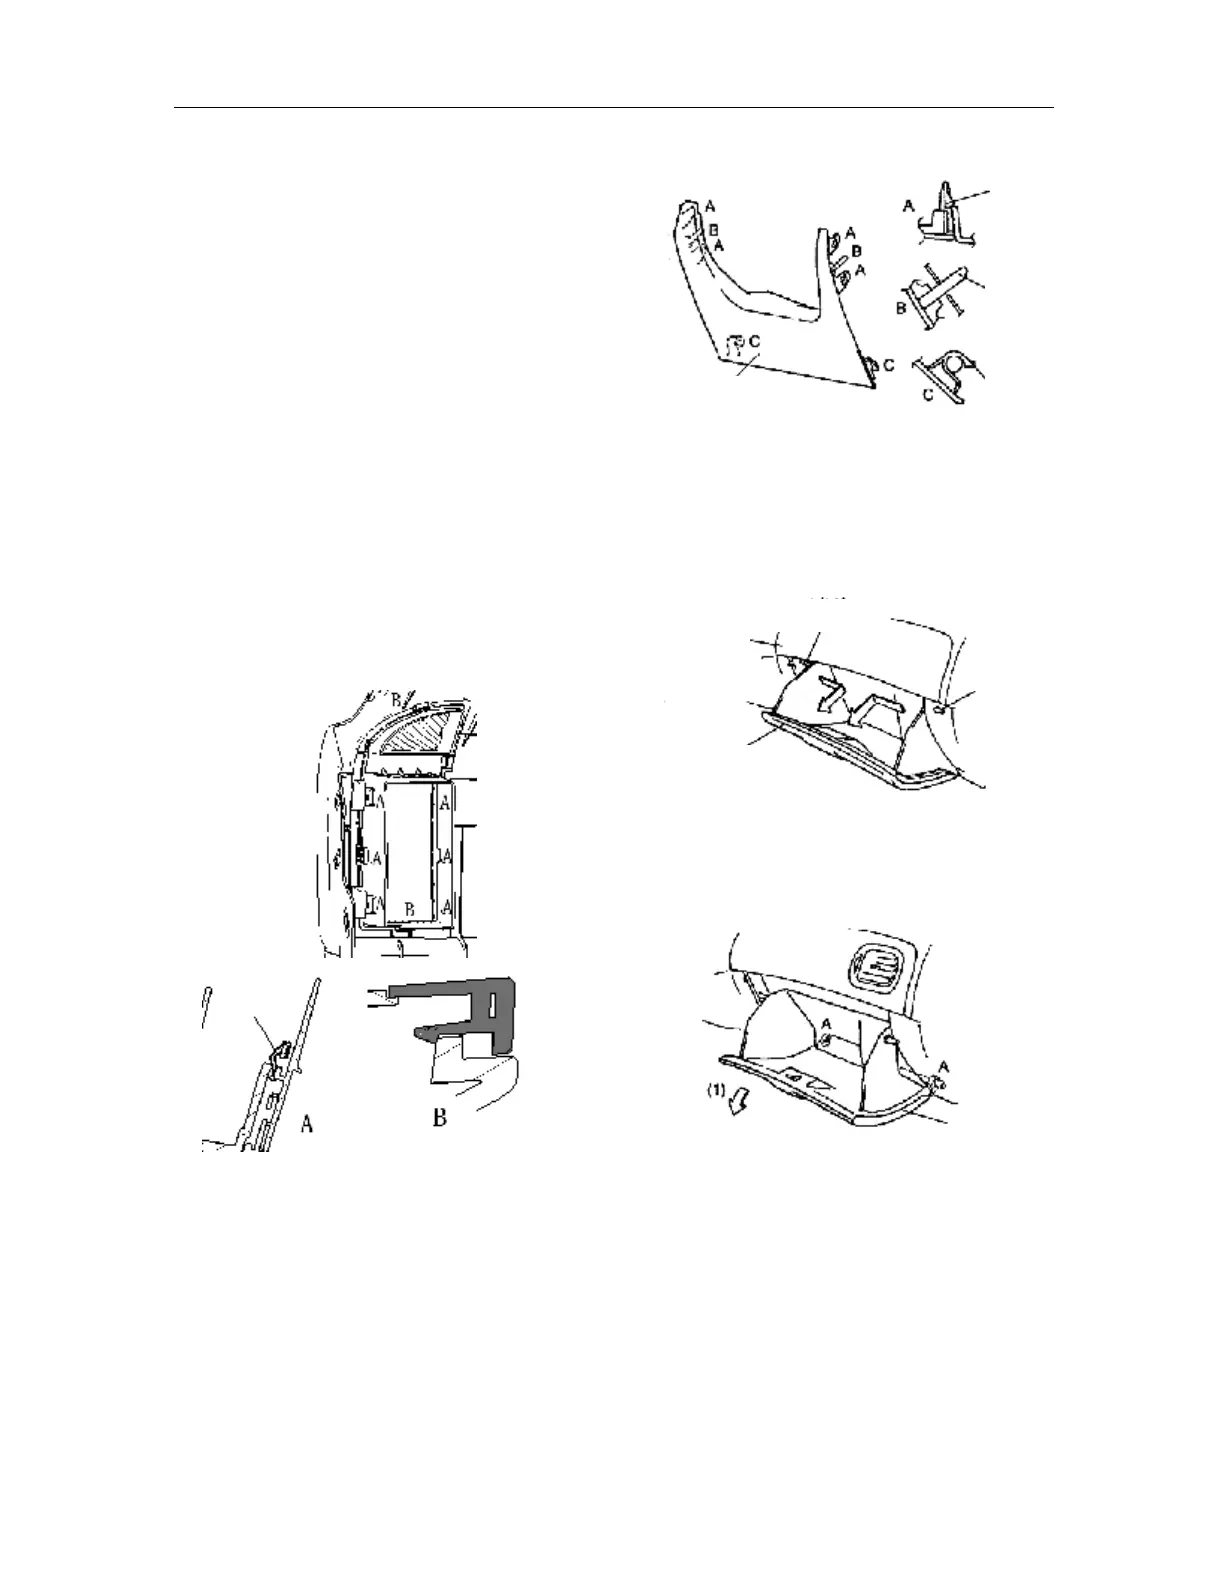
Disassembly/assembly of left lower panel at
the driver side
Push down the upper end of lower baffle and loosen
the snaps A and B on the dashboard;
1. Hold the lower baffle and loosen the hook C.
2. Install as per the reverse order with that of
removal.
Disassembly/assembly of sundries bin
1. Bend inward the fixer and remove it;
2. While pushing the sundries bin, turn it
downward, and then remove the mounting pin
A (1);
3. Remove the sundries bin;
4. Install as per the reverse order with that of
removal;
Disassembly/assembly of auxiliary fascia
console
Attention:
l To remove the mounting snaps of middle panel,
a “L” screwdriver shall be used.
1. Remove the shift lever handle ball;
Snap
Snap
Pin
Hook
Lower baffle
Fixer
Fixer
Dashboard
Sundries bin
Sundries bin