Audio system
T-39
Assembly method:
1. Insert all connectors behind the audio host and
the A/C controller;
2. Before the audio and A/C controller assemblies
are fit into the dashboard, it is recommended to
check first whether all parts are operating
normally (audio, Radio, A/C compressor
operation, air volume and mode);
3. Install the audio host and tighten the screws;
4. Insert the adapter cable plug behind the audio
panel, and place the panel, aiming the panel
snap at the slot on the dashboard, tap clockwise
the snap on the panel from the left upper angel;
5. Install the A/C controller and tighten the
screws;
6. Install the panel of A/C controller, and tap
clockwise the snap on the panel from the left
upper angel.
Removal/installation of 4D loudspeaker
1. Remove the negative cable of battery;
2. Remove 4D inner trim panel;
3. Remove the screws;
4. Disconnect the connectors of 4D loudspeaker
and remove them.
5. The installation procedure is in reverse order
with that of the removal.
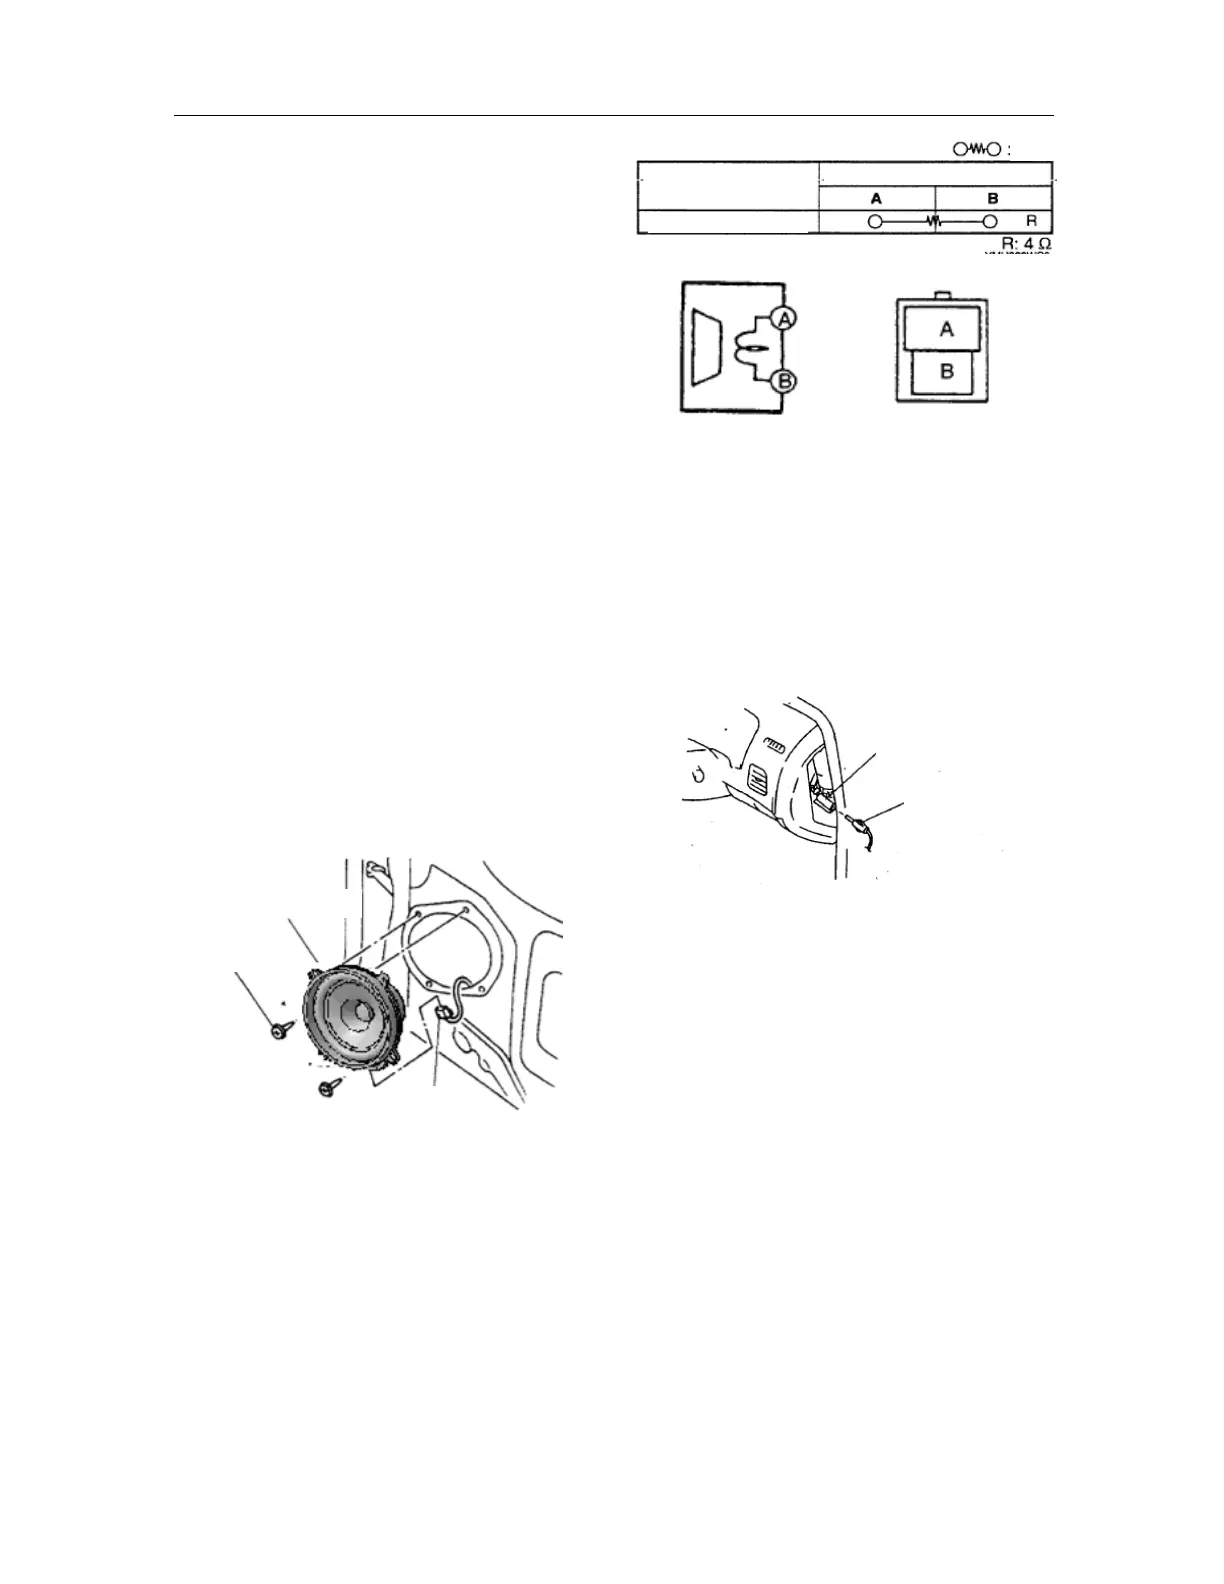
Check of 4D loudspeaker
1. Remove 4D loudspeaker;
2. Check, with an ohmmeter, the resistance
between the terminals of loudspeaker. Replace
the front door loudspeaker if it fails to meet the
technique requirements.
Removal/installation of antenna
1. Disconnect the negative cable connection of
battery;
2. Remove the front side trim panel at the driver
side;
3. Disconnect the antenna socket on roof;
Removal/installation of the signal line of
front antenna
1. Remove the negative cable of battery;
2. Remove the audio unit;
3. Remove the front side trim panel at the
occupant side;
4. Disconnect the connection between antenna on
roof and the signal line of front antenna;
5. Remove as per the following order. The
installation procedure is in reverse order with
that of removal.
4D loudspeaker
Screws
Joint
Element side connector
(viewed from the terminal
Testing conditions
Resistance
erminal
Under any conditions
Antenna feed
Roof antenna plug