Switch and relay
T-72
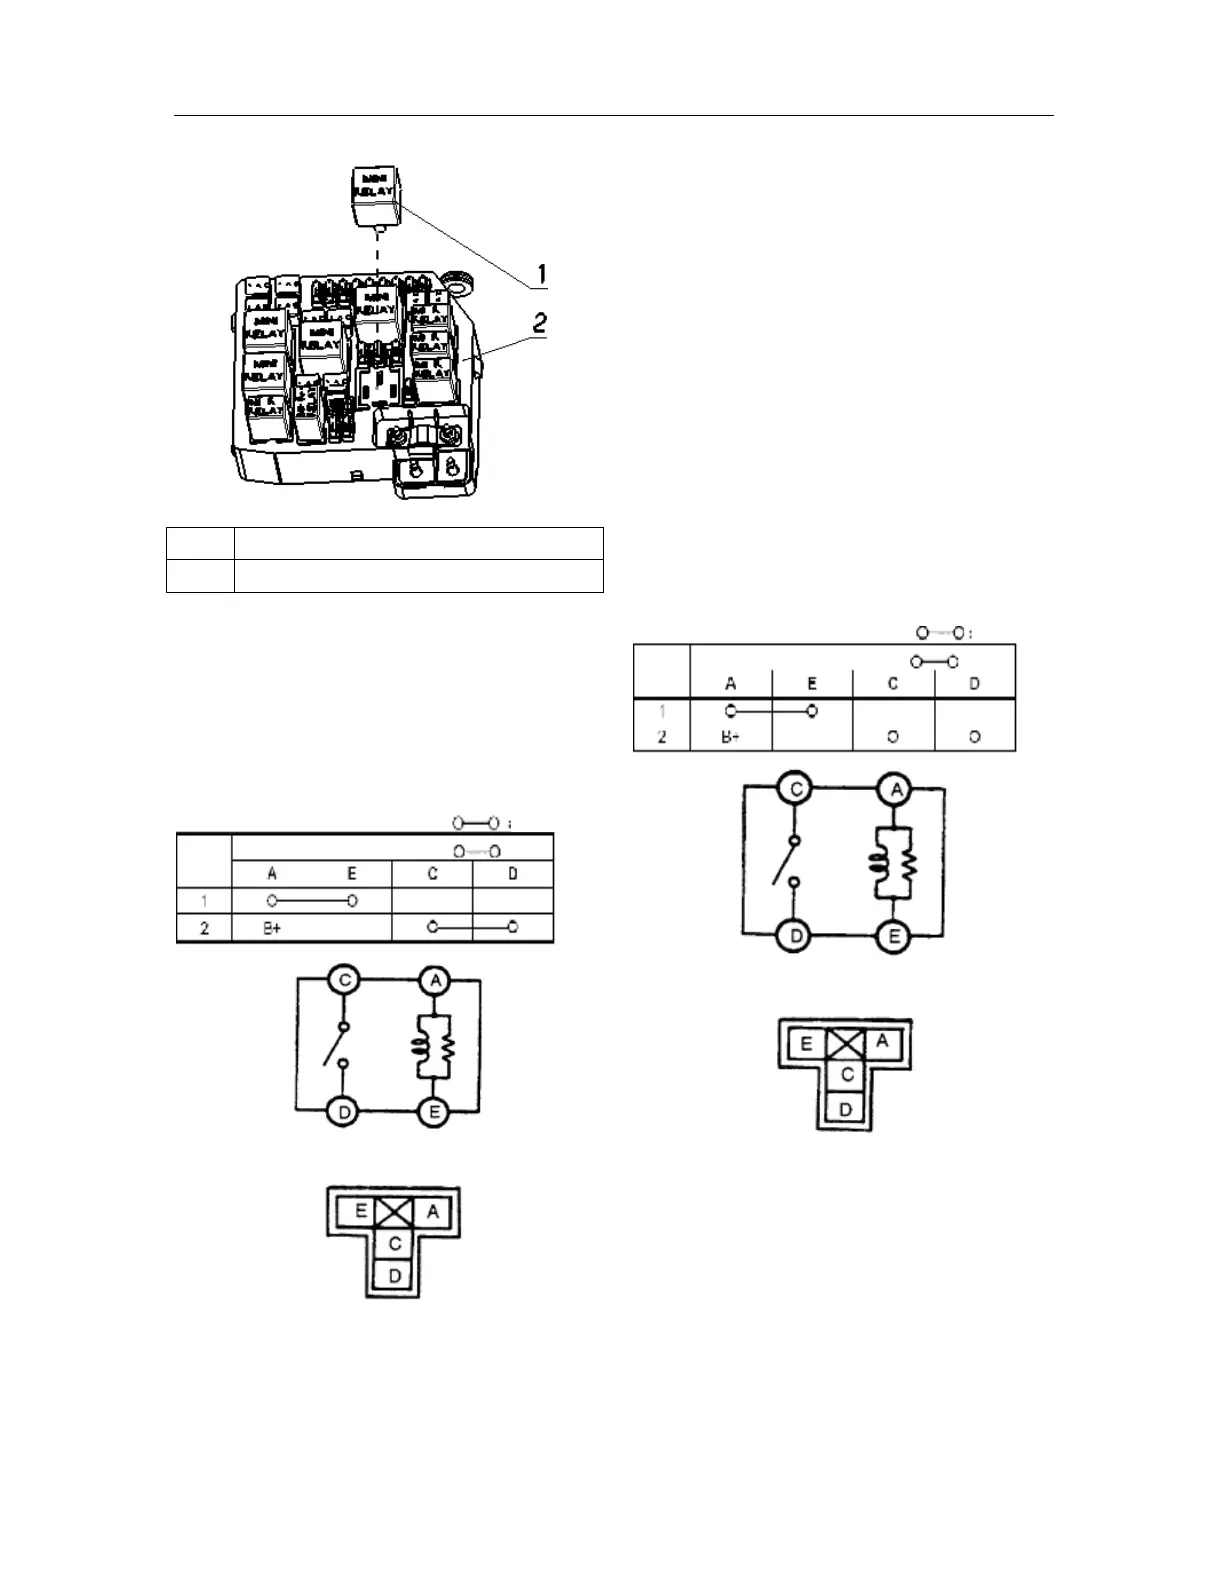
1 Headlamp relay
2 Main fuse box
Check of headlamp relay
1. Remove the headlamp relay;
2. Check the continuity between all terminals of
headlamp relays with an ohmmeter. If it fails to
meet the technique requirements, replace the
headlamp relay.
Relay circuit diagram
Element side connector
(Viewed from the terminal side)
Removal/installation of front fog lamp
relay
1. Disconnect the negative cable of battery;
2. Remove the bracket;
3. Remove the plug of front fog lamp relay;
4. Pry out the lock part at the side of relay with a
flathead screwdriver to remove the relay.
5. The installation procedure is in reverse order
with that of removal.
Check of front fog lamps relay
1. Remove the relay of front fog lamp;
2. Check the continuity between all terminals of
front fog lamps relay with an ohmmeter. If it
fails to meet the technique requirements,
replace the relay of front fog lamp.
Relay circuit diagram
Element side connector (viewed from the terminal
side)
Removal/installation of rear fog lamp relay
Note: The lock part of relay is vulnerable. Do not
remove the relay from the bracket except for
replacement. Prior to the removal, be sure to check
the relay.
1. Disconnect battery negative cable;
2. Remove the bracket;
Continuity
Terminal
Steps
Grounding
Continuity
Terminal
Steps
Grounding