Clutch Pedal
H1-2
Clutch pedal Total travel:
131mm (5.50in) (for reference)
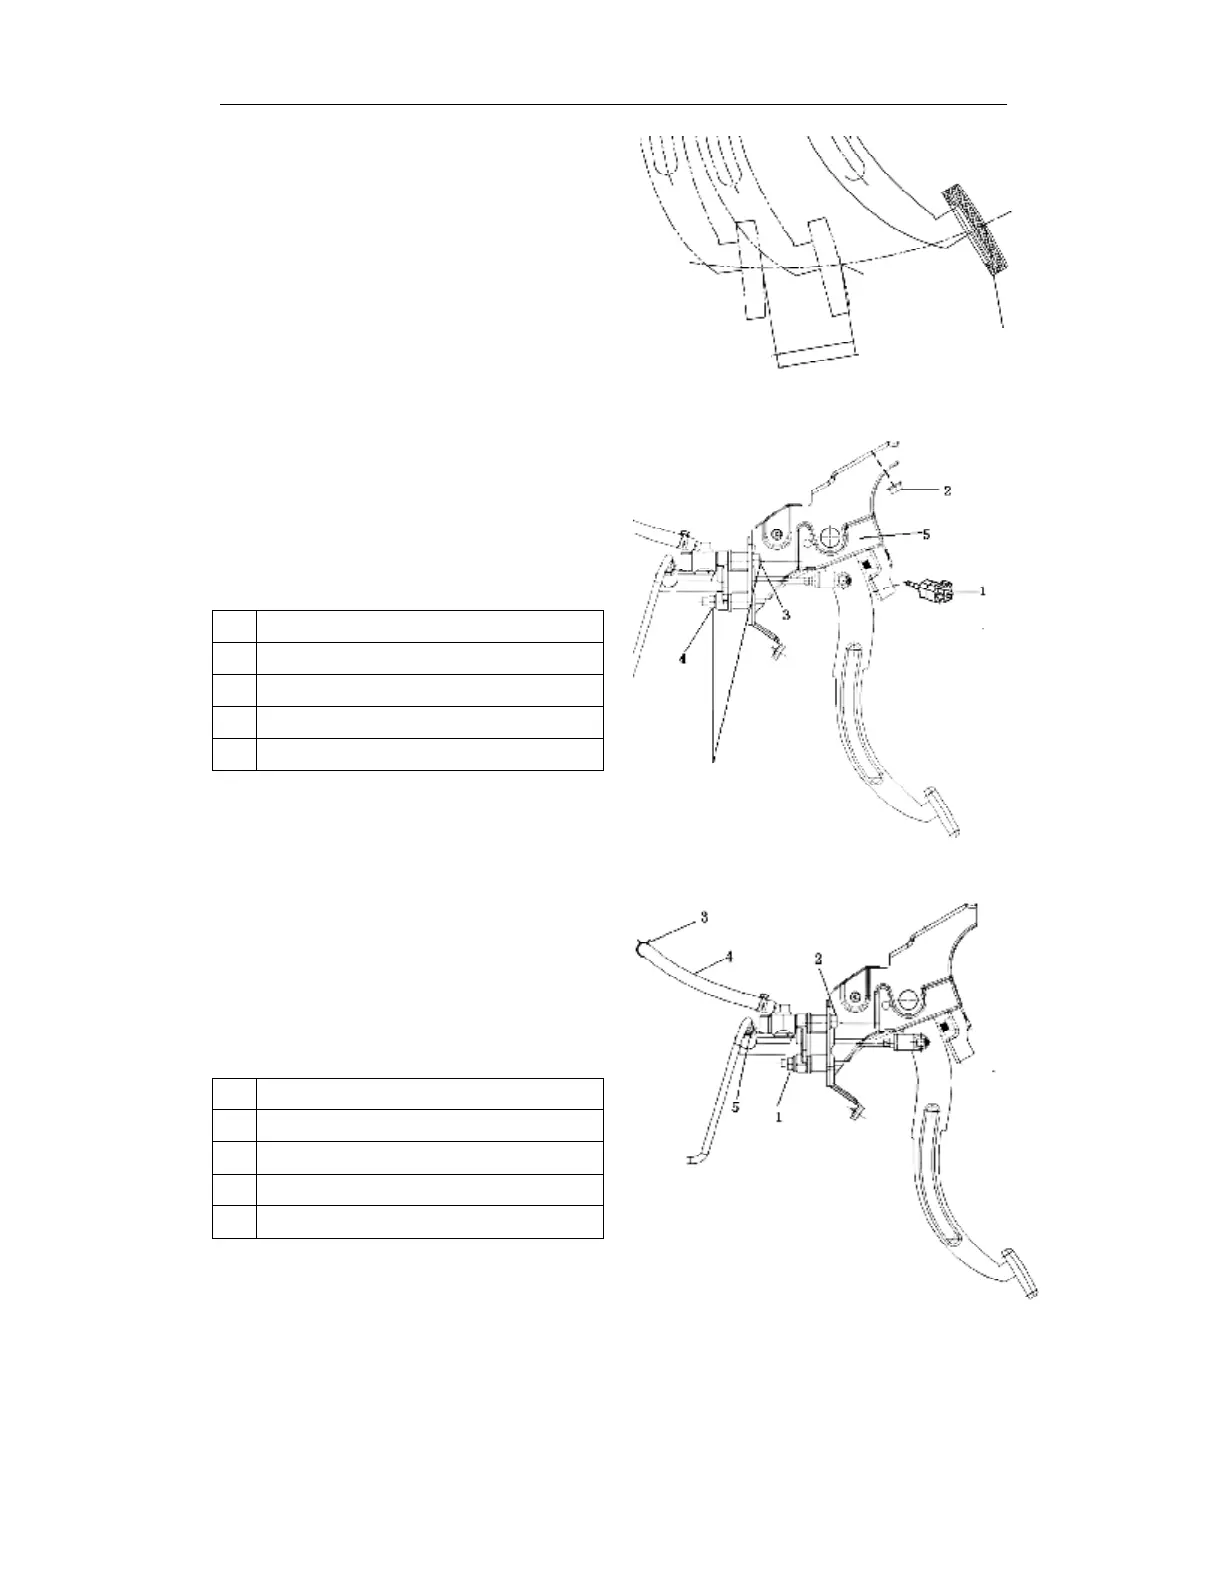
Clutch Pedal Removal/Installation
1. Remove in order 1-2-3-4-5 as shown in
the diagram.
2. Install in reverse order 5-4-3-2-1 as of
removal.
3. When installed, adjust the clutch pedal
(see Clutch Pedal – Clutch Pedal
Inspection/Adjustment)
4. Plug up the oil pipe at the time of removal
to prevent oil leakage
Attention: Do not drip brake fluid on ABS
module.
1 Clutch switch
2 Self-Locking Nut
3 Self-Locking Nut
4 Self-Locking Nut
5 Clutch Pedal
Clutch Master Cylinder
Clutch Master Cylinder Removal/
Installation
1. Remove in order 1-2-3-4-5 as shown in
the diagram.
2. When oil pipe is removed, plug it
immediately to prevent oil leakage.
3. Install in reverse order 5-4-3-2-1 as of
removal.
1 Split Washer
2 Axis Pin
3 Self-Locking Nut
4 Self-Locking Nut
5 Fluid Reserve Pipe
Clutch Separation Point
Clutch Pedal Separation Travel
Clutch Pedal Total Travel
Tightening Torque:18N·m~28 N·m
Nominal Value 22 N·m