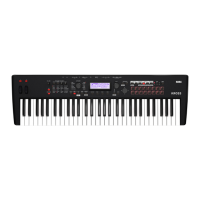
Sequencer mode
108
Playback will begin.
5. At the point where you wish to begin recording, press the
SEQUENCER (REC) button.
Recording will begin. Play the keyboard and use the controllers
such as the modulation wheel to record your performance.
6. When you finish recording, press the SEQUENCER
(REC) button.
Recording will end (playback will continue).
Note: Instead of pressing the SEQUENCER (REC) button in
steps 5 and 6, you can use a foot switch connected to the
ASSIGNABLE SWITCH jack.
Set the G–INPUT/CTRL> FOOT page Foot Switch Assign to
Song Punch In/Out.
7. Press the SEQUENCER (START/STOP) button.
Playback will stop.
Auto Punch In
Select this method when you wish to automatically re-record
selected portions of a previously-recorded track.
Recording will occur only over the specified area, rewriting it with
the newly recorded data.
First you must specify the area that will be re-recorded. Then
recording will automatically start and end within the specified
area. With this method, the musical data previously on the track is
overwritten by the newly recorded data.
1. Use Track Select to choose the track that you want to
record.
2. Set the Recording Setup to Auto Punch In.
3. In “M (Auto Punch In Start Measure), “M (Auto Punch In
End Measure)” specify the area that you wish to record.
For example, if you specify M005–M008, recording will occur
only from measure 5 to measure 8.
4. Select the MAIN page, and use Location to specify a loca-
tion several measures before the point where you wish to
begin recording.
5. Press the SEQUENCER (REC) button, and then press
the SEQUENCER (START/STOP) button.
Playback will begin.
When you reach the starting location you specified in step 3,
recording will begin. Play the keyboard and use the controllers
such as the modulation wheel to record your performance. When
you reach the ending location you specified in step 3, recording
will end. (Playback will continue.)
6. Press the SEQUENCER (START/STOP) button.
Playback will stop, and you will return to the location you
specified in step 4.
Auto Punch In Start Measure [M001…M999]
Auto Punch In End Measure [M001…M999]
When Recording Setup is set to Auto Punch In, specify the
measures where recording will start and end.
LOOP (Loop All Tracks) [Off, On]
Select this method when you wish to repeatedly record a specified
area of a track, and continue adding data. This is suitable for
creating drum patterns, etc.
1. Use Track Select to select the track that you want to record.
2. Check LOOP.
3. In “M (Loop Start Measure), “M (Loop End Measure)”
specify the area that you wish to record.
For example, if you specify M004–M008, recording will occur
repeatedly (as a loop) from measure 4 to measure 8.
4. In “Location,” specify a location several measures earlier
than the point where you wish to begin recording.
5. Press the SEQUENCER (REC) button, and then press
the SEQUENCER (START/STOP) button.
Playback will begin. When you reach the starting location you
specified in step 3, recording will begin. Play the keyboard and use
the controllers such as the modulation wheel to record your
performance.
When you reach the ending location which you specified in step 3,
you will return to the starting location, and continue recording.
6. The musical data that is loop-recorded will be added to the
previously-recorded data.
You can also erase specific data while you continue loop
recording. This is useful if, for example, you need to delete a
mistake without interrupting the flow of the recording.
If you press the SEQ button during loop recording, all musical data
will be removed from the currently selected track as long as you
continue pressing the button.
If the Remove Data check box is selected in the REC page, you
can delete just the data of a specific note number by holding down
its key (note number) during loop recording.
In the same way, bend data will be deleted while you hold the pitch
bend wheel in a position other than the center.
When you are once again ready to record musical data, uncheck
the Remove Data check box.
7. Press the SEQUENCER (START/STOP) button.
Playback will end, and you will return to the recording start
location that you specified in step 4.
If Loop All Tracks is selected, normal playback will be looped as
well.
Loop Start Measure [M001…M999]
Loop End Measure [M001…M999]
Specifies the range of measures where recording will repeat when
Recording Setup is set to Loop All Tracks.
Remove Data [Off, On]
Use this to delete unwanted MIDI data that you recorded while
using Loop All Tracks. This is available when Recording Setup is
set to Loop All Tracks.
On (checked): You can delete unwanted MIDI data while
recording with Loop All Tracks. During recording, press the key
(note number) that corresponds to the MIDI note data you wish to
delete. All occurrences of that note number will be deleted for the
time that you continue holding down the key.
Controller data can also be erased in a similar way. For example
while you move and hold the pitch bend wheel away from
yourself, bend data will be erased. This applies to Pitch Bend,
M.Wheel:#01, JS:CC#02, and Damper (CC#64).
Also, you can press and hold down the SEQ button to delete all
MIDI data for as long as the key is held.
Multi REC [Off, On]
On (checked): Multi-track recording setup is enabled. Select this
if you want to record two or more tracks simultaneously.

 Loading...