Sequencer mode
110
sequencer. You can also stop recording by pressing the
SEQUENCER (START/STOP) button on the KROSS.
After this, you can play back the newly recorded sequence:
11. In the G–MIDI> BASIC page, set MIDI Clock to Internal.
Set Tempo Mode to Auto in the SEQ> MAIN page.
Press the SEQUENCER (START/STOP) button to play
back.
Note: If the correct sounds are not selected when you start playing
back, you may be able to solve the problem by using the function
Event Edit (S–TRACK EDIT) to re-specify the Program Change
data.
Play/Rec/Mute [Play, Rec, Mute]
Use this to mute a MIDI track, or to select the recording tracks for
multi-track recording.
During playback, or for single-track recording (normal recording),
you can only select Play or Mute for tracks—with the exception of
the recording track. For multi-track recording, tracks can be set to
Play, Rec, or Mute.
Each time you press the Play/Rec/Mute button, it will toggle
between those functions.
P (Play): The track will play.
R (Rec): For single track recording, the selected track will be set
to REC when you press the SEQUENCER (REC) button. REC
cannot be manually selected.
For multi-track recording (the Preferences page Multi REC is on),
select REC for the tracks that you wish to record.
M (Mute): The track will be muted (silent).
If MIDI tracks whose Status is BTH, EXT, or EX2 are muted
by Mute or by the Solo function, note on/off messages will
not be transmitted on the MIDI channel selected for those
tracks.
Time Sig (Time Signature)
[**/**, 1/4…16/4, 1/8...16/8, 1/16...16/16]
This is the time signature at the current location of the song. The
time signature can be changed at each measure.
**/**: This will be displayed when you press the SEQUENCER
(REC) button. Specify this when you wish to use the time
signature that is already recorded for that measure, and wish to
record without changing the time signature.
Set Track Select to a Track from 01–16, press the SEQUENCER
(REC) button, and specify the time signature here.
When you press the SEQUENCER (START/STOP) button
to begin recording, the time signature that you specify will be
recorded on the tempo track and on previously recorded tracks.
Be aware that if you press the SEQUENCER (START/
STOP) button during the pre-count to stop recording, the time
signature will not be recorded.
Normally, you will specify the time signature when you record the
first track, and select **/** when recording subsequent tracks.
Changing the time signature in the middle of a song
If you know the location where you wish to change time
signatures, use the Insert Measure function to specify and insert
the time signature wherever desired, and then record your musical
data.
If you want to change the time signature of a song that already
contains performance data, use the Event Edit function to edit the
time signature of a bar event.
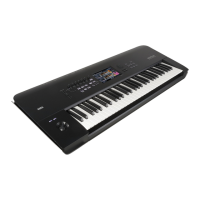
If the number of beats in a measure increases when you modify the
time signature, rests will be inserted in the portion that was added.
Conversely if the number of beats decreases, that portion will not
be played. However if you return to the original time signature, the
data that had been hidden will once again be played. (The data
itself will not be erased.)
Tempo Mode [Auto, Manual, REC]
(Tempo) [040.00...300.00, EXT]
This specifies the tempo of the song. (see page 103)
METRONEME
Setup
Here you can adjust metronome settings. Press the ENTER button
to access the METRONOME SETUP dialog box.
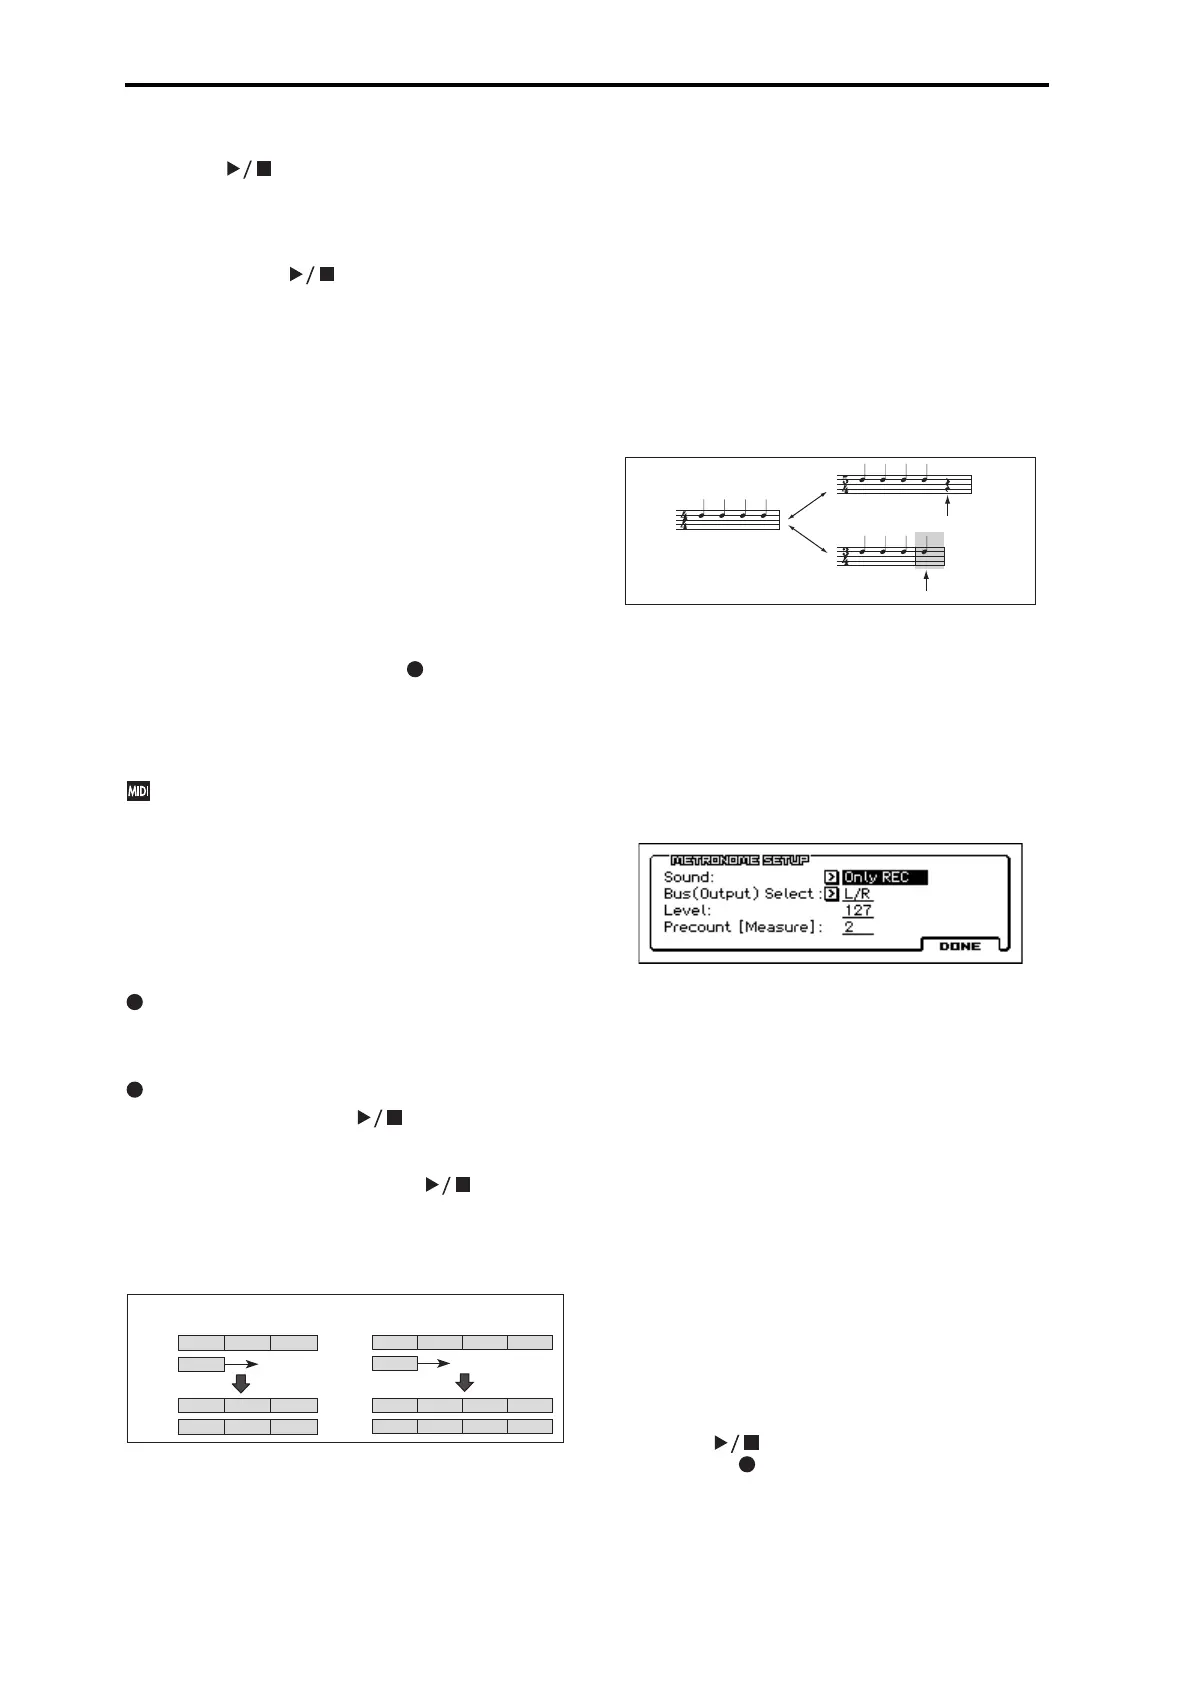
Sound [Only REC, REC & Play, Off]
Only REC: The metronome will sound only during recording.
REC & Play: The metronome will sound during recording and
playback.
Off: The metronome will not sound during playback or recording.
However, the pre-count metronome will sound before recording
begins.
Bus (Output) Select [L/R, L, R]
Selects the output destination of the metronome sound.
L/R: Output from AUDIO OUTPUT L/Mono and R.
L: Output from AUDIO OUTPUT L/Mono.
R: Output from AUDIO OUTPUT R.
Level [000…127]
Sets the volume of the metronome.
Precount [Measure] [0…2]
Specifies the pre-count that will occur before recording begins.
With a setting of 0, recording will begin the instant you press the
SEQUENCER (START/STOP) button (after first pressing
the SEQUENCER (REC) button).
1 (4/4) 2 (3/4)
Track 1
3 (4/4)
1 (4/4) 2 (3/4)
Track 1
3 (4/4)
1 (4/4) 2 (3/4)
Track 2
3 (4/4)
1 (4/4)
Track 2
Recording
1 (4/4) 2 (3/4)
Track 1
3 (4/4)
1 (4/4) 2 (7/8)
Track 1
3 (7/8)
1 (4/4) 2 (7/8)
Track 2
3 (7/8)
3 (4/4)
4 (7/8)
Recording
1 (4/4)
Track 2
4 (7/8)
when Meter = **/** when Meter =7/8
Recording from measure 2 of track 2
Rest is inserted
Not played

 Loading...