098-00028-000 Revision F – May, 2012 TimeProvider 5000 User’s Guide 519
Appendix F PTP Probe Option
Operating the Probe
Operating the Probe
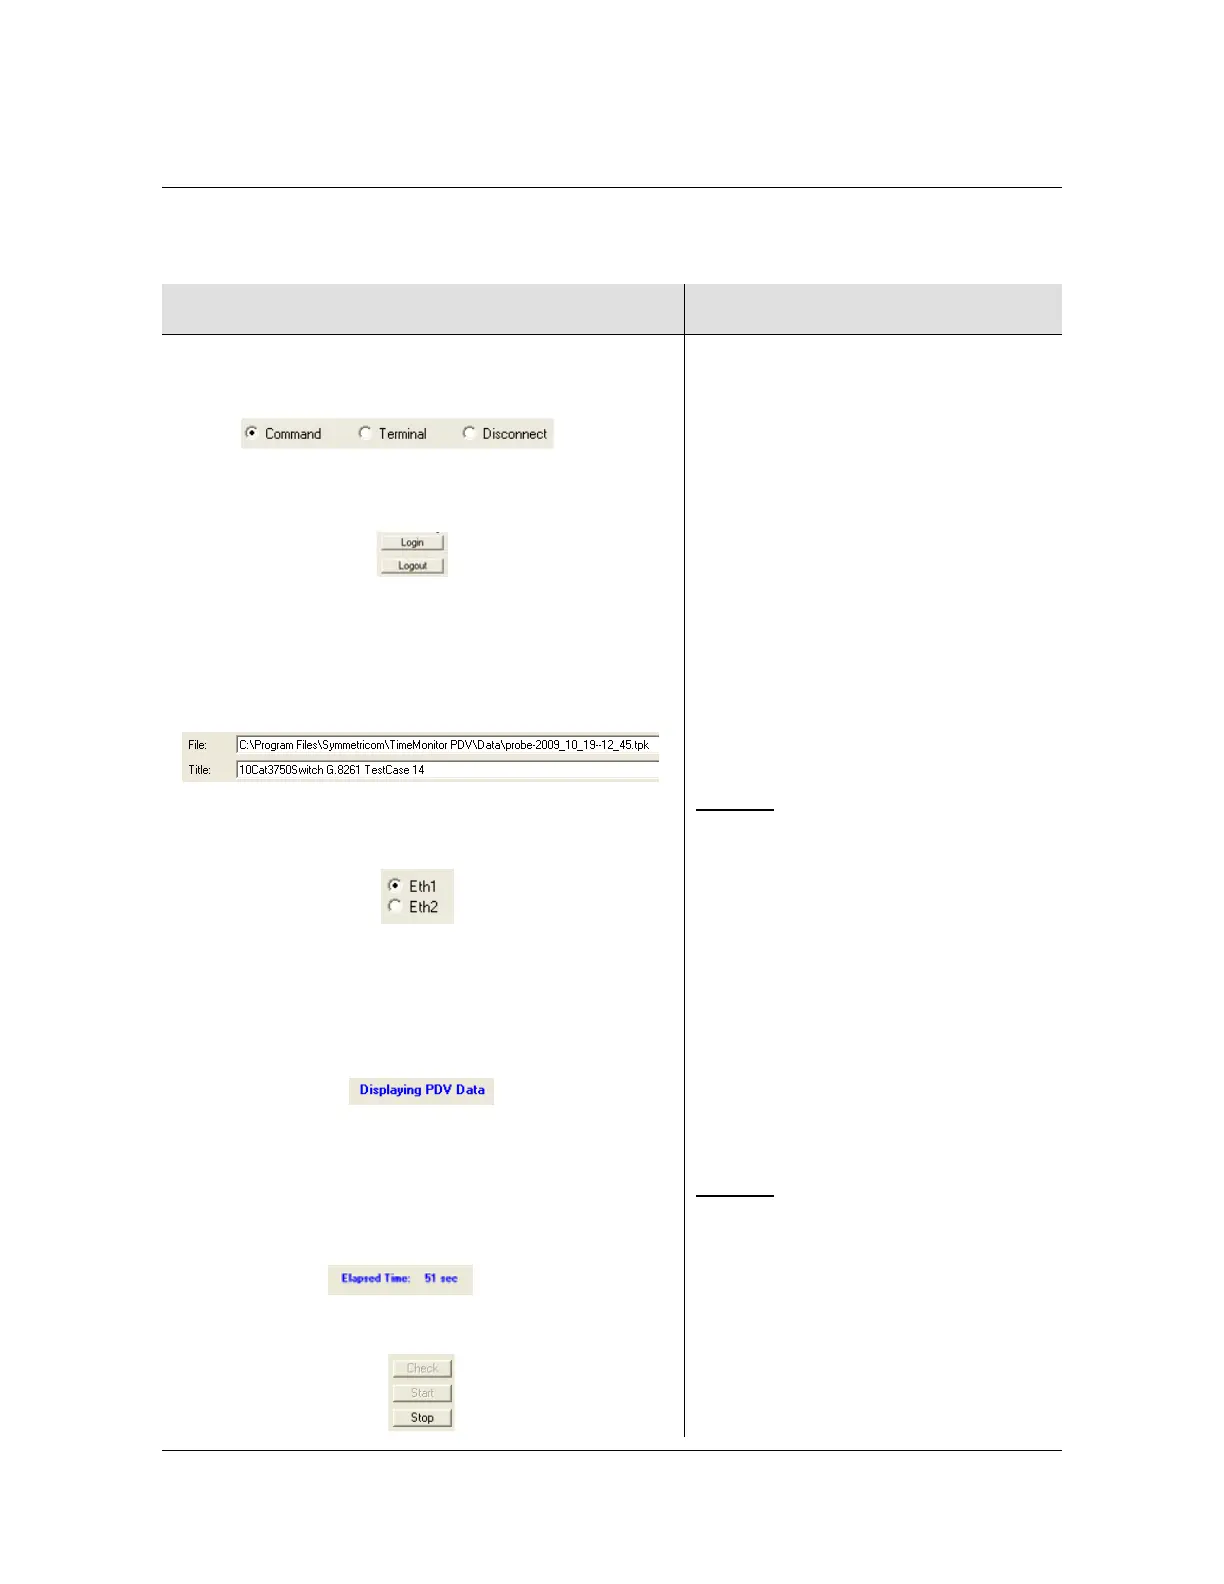
Table F-11. Measurement Procedures
TimeMonitor PDV CLI Command
1. Click on the Command radio button to put
TimeMonitor PDV into the proper mode for making
Probe changes.
2. Click the Login button. The Probe will prompt for
Username and Password.
3.
Enter the desired file name and destination
directory. The software will reuse a file name
for new files and add on date and time to the
file name if the file already exists. Also enter
the desired title for file.
4. Select the radio button for the desired probe
port.
5. Click on the Check button to preview PTP data
before beginning measurement (optional).
The top of the main screen will display the
message:
If the setup is configured correctly info like that
shown Figure F-8 in will appear in display.
6. Click on the Start button to start the
measurement process. The top of main screen
will display the elapsed time of measurement
7. Click on the Stop button to stop measurement.
Symmetricom recommends that users
ping from the probe to the
grandmaster’s PTP IP address to verify
the network connection before
attempting to gather data. Improper
network setup and configuration is the
most common error encountered with
the TP 5000 Probe.
Use the CLI command ping [imc |
ioc1-1 | ioc1-2] [<vlan-id>]
<IP address>
to specify the IP address to ping and the
Probe port from which to send the ping.
See
Chapter 3, CLI Commands and
SNMP
for additional info.
Example
:
To ping the grandmaster at IP address
192.168.5.120, no VLAN from port
IOC1-1 of the TP 5000 Probe:
Type ping ioc1-1
192.168.5.120 and press Enter.
____________________________
To begin the measurement:
show ptp-probe data ioc-[y]
where y is the port number.
Example
:
1. Login at the Admin or Config-user
level.
2. Type show ptp-probe data
ioc-1 and press Enter to start
the measurement process.
3. To stop the measurement process,
press the Enter key again.
 Loading...