84 TimeProvider 5000 User’s Guide 098-00028-000 Revision F – May, 2012
Chapter 2 Installing
Setting Shelf ID on Expansion Shelves
Proper cable, grounding techniques, and lightning arrestors should be used. Mount
the antenna outside, preferably on the roof with a clear view of the sky. Do not
mount the antenna near a wall or other obstruction blocking part of the sky. Mount
the antenna well above roads or parking lots.
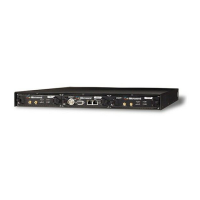
Setting Shelf ID on Expansion Shelves
Set the shelf ID on the TP E10 or TP E30 expansion shelf using a small flat-blade
screwdriver to turn the mechanical rotary switch on the front panel. See Figure 2-26.
Each expansion shelf must be provided a unique user-defined shelf ID. There can
be up to 10 shelf IDs (0 to 9) in the system.
Figure 2-26. Shelf ID Selector
Making Ground and Power Connections
The TimeProvider 5000 has two –48 VDC power connectors for redundant
operation, which are located on the right and left sides of the front panel (see
Figure 2-27). A separate frame ground terminal is on the left side of the front panel.
The TP E10 and TP E30 expansion shelves each have two –48 VDC power
connectors for redundant operation, which are located on the right and left sides of
the front panel (see Figure 2-28 and Figure 2-29). A separate frame ground terminal
is provided on the right side of the front panel.
Warning: To avoid serious personal injury or death, exercise caution
when working near high voltage lines. In particular:
Use extreme caution when installing the antenna near, under, or
around high voltage lines.
Follow local building electrical codes for grounding the chassis.
Note: If 2 systems are assigned the same shelf ID, then management
capability will be lost and an alarm will be generated on the TP 5000
shelf.
Warning: To avoid accidental power-up of the chassis, remove the A
and B fuses on the branch over-current protection unit before
beginning installation of the TP 5000, TP E10, and/or TP E30. These
units are not equipped with a power on/off switch.
 Loading...