Pro Tools Reference Guide304
To record to one or more MIDI or Instrument
tracks:
1 With Pro Tools HD, make sure that Delay
Compensation is disabled in the Options menu.
2 Configure a MIDI or Instrument track for re-
cording (see “Configuring MIDI or Instrument
Tracks for Recording” on page 301).
3 Record enable the track you want to record by
clicking its Record Enable button.
4 Ensure that Pro Tools is in Normal (Nonde-
structive) Record mode. If necessary, deselect
the following in the Options menu: Destructive
Record, Loop Record, QuickPunch, TrackPunch
(Pro Tools HD only), and DestructivePunch
(Pro Tools HD only).
5 Check your MIDI Merge settings.
6 Check the pre-roll and Countoff settings.
7 To have recording start from the beginning of
the session, click Return to Zero in the Trans-
port.
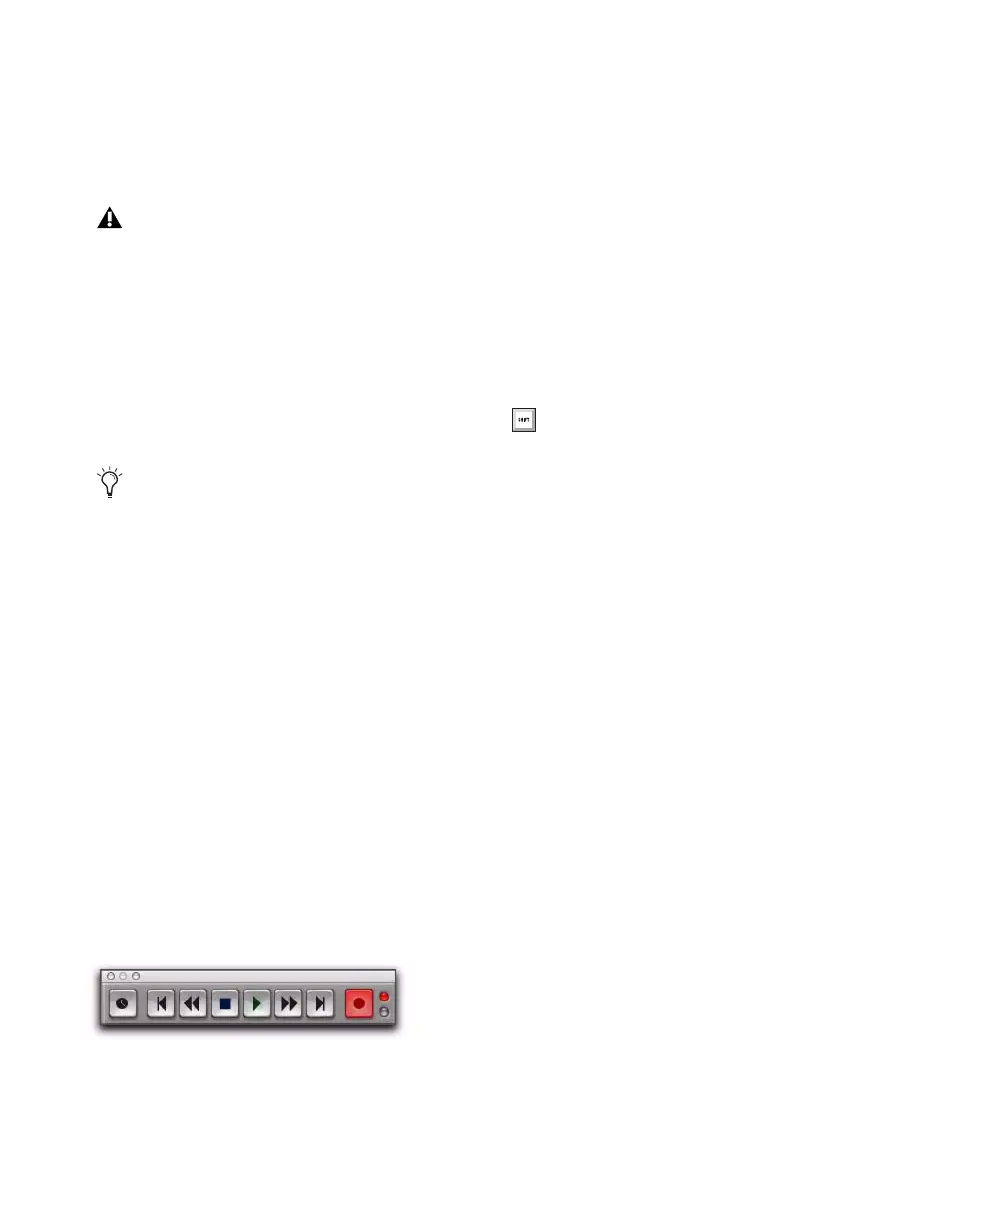
8 Click Record in the Transport to arm Pro Tools
for recording (Record Ready mode). The Track
Record Enabled indicator lights red.
9 Click Play to start recording. If using Count-
off, Pro Tools counts off the specified number of
measures and then begins recording. If using
Wait for Note, recording begins as soon as you
start playing (when a MIDI event is received).
10 Play your MIDI controller.
11 When you are finished playing, click Stop in
the Transport to stop recording.
For each record-enabled track, a new MIDI re-
gion is created and appears both in the playlist
and in the Region List.
MIDI Regions Created on Barlines
When recording MIDI, or when manually enter-
ing MIDI notes, the beginning and ending of
MIDI regions are created on bar boundaries.
This greatly facilitates arranging MIDI regions in
a musically meaningful way, in whole bar
lengths.
The beginning of a recorded MIDI region always
starts on the barline immediately before the first
MIDI note (note on) of the region. Likewise, the
MIDI region ends on the barline immediately
following the last note (note off) of the region.
Recording Over Exisiting MIDI Regions
Unlike audio regions, existing MIDI regions are
never overwritten even though MIDI data
within regions can be overwritten. When MIDI
Merge mode is disabled and recording MIDI on
a track with existing regions, newly recorded
MIDI data overwrites existing MIDI data within
existing regions, but the existing region bound-
aries remain. New MIDI regions are only created
Digidesign recommends recording without
Delay Compensation in most cases. For
more information, see “Delay Compensa-
tion” on page 656.
To record enable additional MIDI and In-
strument tracks, Shift-click their Record En-
able buttons.
Record button in Record Ready mode
Press F12 to start recording immediately.
You can also Press Control+Spacebar (Win-
dows) or Command+Spacebar (Mac) to
start recording. For more information, see
“Record Shortcuts” on page 280.