Chapter 8: Sessions 83
Chapter 8: Sessions
This chapter covers the basics of starting a
project in Pro Tools, including how to create
and save a Pro Tools session.
Creating a New Session
The first step in beginning a Pro Tools project is
creating a new session.
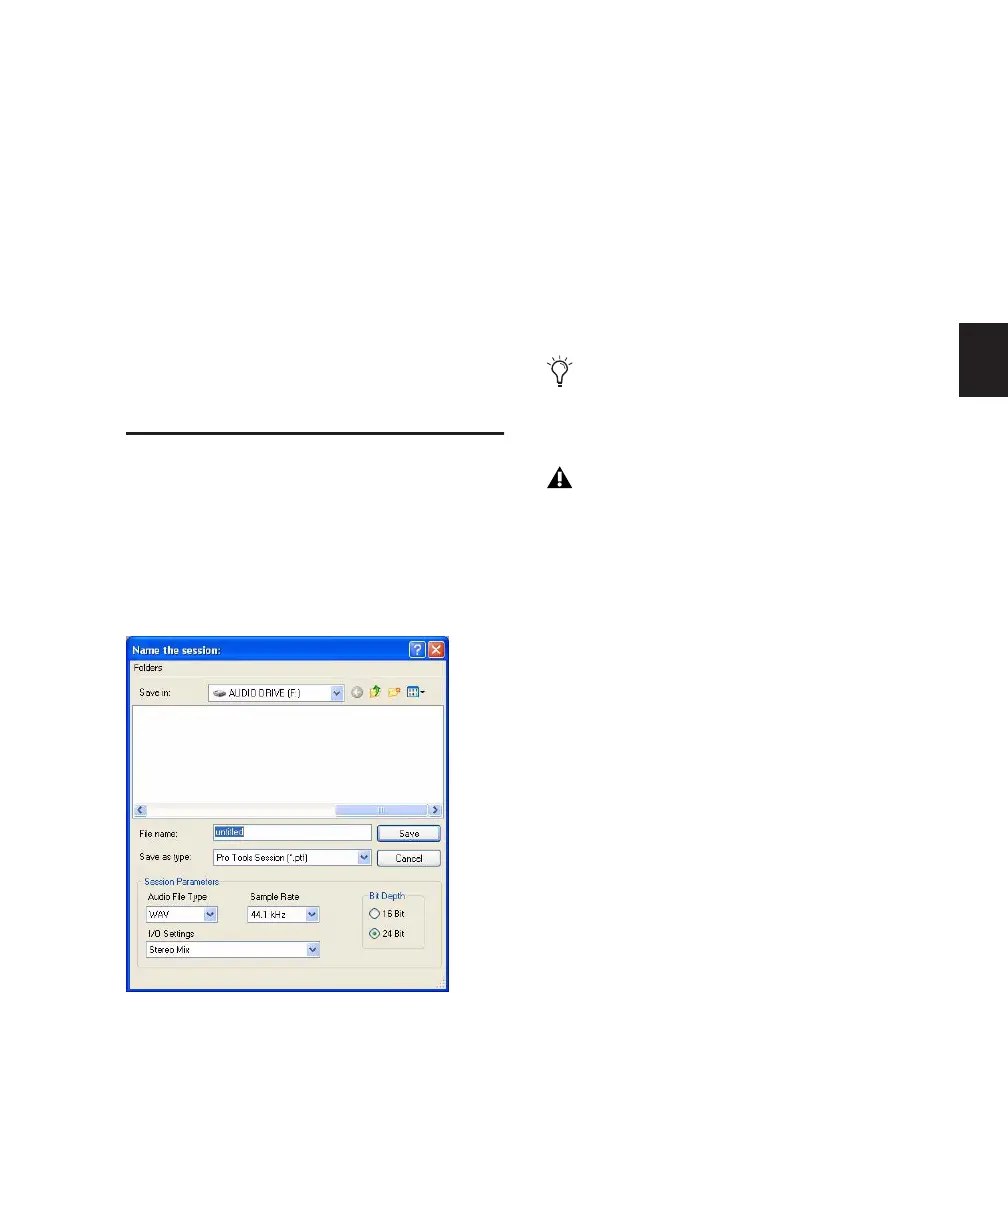
To create a new session:
1 Choose File > New Session.
2 Select the drive where you want to save the
session. The session should be saved on a dedi-
cated audio drive.
3 Select the audio file format for the session.
4 Select the bit depth (16 bit or 24 bit) and the
sample rate.
5 Select the I/O Settings to use for the session.
Several pre-configured I/O Settings are included
with your system, or you can select a custom I/O
Setting. For more information, see Chapter 6,
“I/O Setup.”
6 Name the Session.
7 Click Save.
Selecting Bit Depth and Sample Rate
When selecting a bit depth or sample rate for
your session, consider fidelity, any compatibil-
ity issues with others systems, and storage space.
Bit depth and sample rate also have an effect on
the amount of mixing power available in a ses-
sion. Fewer mixer channels are available with
24-bit sessions and with sessions at higher sam-
ple rates. (For more information, see your Get-
ting Started Guide.)
New Session dialog
For optimum compatibility between Win-
dows and Mac, set the file type to BWF
(.WAV).
Sound Designer II (SD II) files are not sup-
ported on Windows systems or at sample
rates above 48 kHz.