Pro Tools Reference Guide154
Working with Groups
Creating Groups
You can select the tracks you want to add to a
group before creating it, or add and remove
tracks from a group after it has been created.
Creating Groups in Pro Tools HD
To create a group in Pro Tools HD:
1 Select the tracks you want to include in the
group. (If you do not select tracks at this time,
you can add tracks later.)
2 Do one of the following:
• Choose Track > Group.
– or –
• Choose New Group from the Group List
pop-up menu.
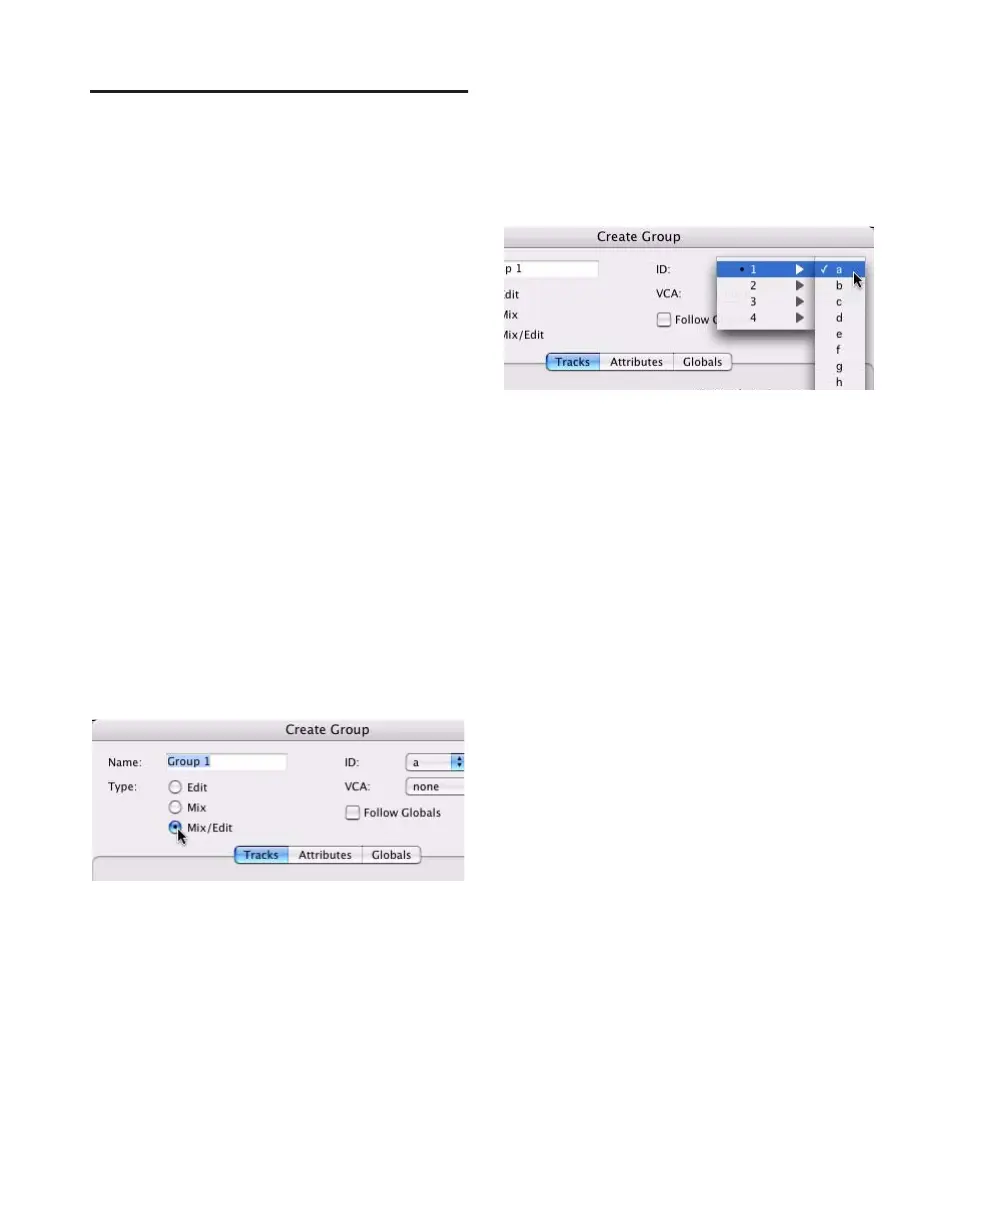
3 Enter a name for the group.
4 Select the type of group to create: Edit Group,
Mix Group, or Mix/Edit Group.
5 Choose a Group ID from the ID pop-up menu.
Four banks of 26 are available: a–z, 2a–z, 3a–z,
4a–z. (If you do not choose a Group ID,
Pro Tools automatically assigns the next avail-
able ID to a new group.)
6 Click Tracks in the Group dialog, and do any
of the following:
• To add the tracks that are currently selected
in the session to the group, click the Add
button at the bottom of the Group dialog.
• To add tracks to the group, select the track
names in the Available track list, and click
Add or press A on the computer keyboard.
• To remove tracks from the group, select the
track names in the Currently In Group list,
and click Remove or press R on the com-
puter keyboard.
• Double-click track names in either list to
move them to the opposite column.
• To replace all tracks in the group with the
tracks that are currently selected in the ses-
sion, click the Replace button at the bot-
tom of the Group dialog.
Selecting a Group Type
Choosing a Group ID