Pro Tools Reference Guide382
◆ For a fade-in or fade-out, position the cursor
near an audio region’s start or end point, near
the top. Once the Fade cursor appears, drag into
the region to set the fade length. The fade is cre-
ated automatically with the Default Fade Set-
tings (in the Editing Preferences page).
◆ For a crossfade, position the cursor between
two adjacent audio regions, near the bottom.
Once the Crossfade cursor appears drag left or
right to set the crossfade length. The crossfade is
created automatically with the Default Fade Set-
tings (in the Editing Preferences page).
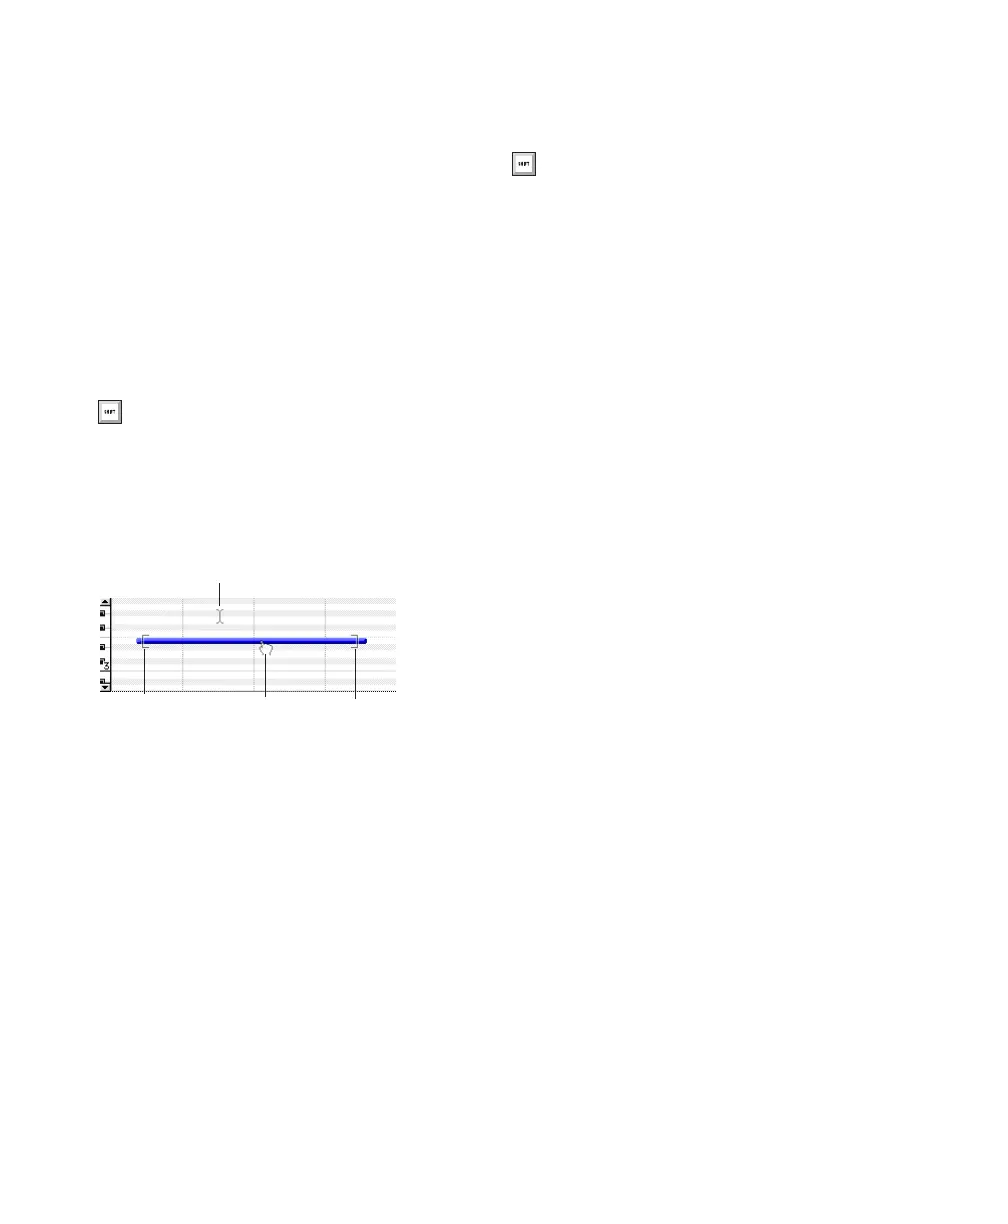
The Smart Tool in Notes View
The following capabilities are available with the
Smart Tool when working with MIDI and In-
strument tracks in Notes View:
◆ For the Selector tool, position the cursor so it
does not cover any notes.
◆ To get the Selector tool while positioning the
cursor over notes, press Control (Windows) or
Command (Mac).
◆ For the Grabber tools, position the cursor over
the note, near its middle.
◆ To get the Marquee so you can select a group
of notes, position the cursor so it does not cover
any notes and press Control (Windows) or Com-
mand (Mac).
◆ For the Trim tools, position the cursor near
the note’s start or end point.
The Smart Tool in Automation and
Controller Views
The following capabilities are available with the
Smart Tool when working in both automation
and controller views:
◆ For the Selector tool, position the cursor any-
where in the bottom 75% of the playlist for the
Selector tool. Drag with the Selector tool to se-
lect breakpoints.
◆ For Trim tools, position the cursor in the top
25% of the playlist for the Trim tool. Drag with
the Trim tool to trim breakpoints. Press Control
(Windows) or Command (Mac) while trimming
for fine control.
◆ For Grabber tools, Control (Windows) or
Command (Mac) for the Grabber tool, then
click in on the automation line to create break-
points
To edit existing breakpoints, move the cursor
near a breakpoint for the Grabber tool.
For fine control with the Grabber tool, press
Control (Windows) or Command (Mac)—or
continue to hold the key if you are creating a
new breakpoint.
To vertically constrain Grabber tool movement,
press Shift.
To vertically constrain Grabber tool movement
with fine control, press Control+Shift (Win-
dows) or Command+Shift (Mac).
To temporarily switch the Smart Tool to the
Scrubber, place the cursor over the region so
that the Selector tool is enabled, then press
Start (Windows) or Control (Mac).
Smart Tool in Notes View
Selector tool
Grabber tool
Trim note start
Trim note end
To temporarily switch the Smart Tool to the
Eraser, place the cursor over the region so
that the Selector tool is enabled, then press
Alt+Start (Windows) or Option+Control
(Mac).
 Loading...