Chapter 28: Basic Mixing 627
Auxiliary Input Tracks
Auxiliary Inputs provide the same signal routing
options as audio tracks, except that their input
must come from an internal bus or hardware in-
put. Inserts on Auxiliary Inputs are pre-fader.
Auxiliary Inputs are used as inputs for audio
from external MIDI instrument and other
sources, as well as to submix internal bus and
output paths. They can be fully automated.
When using Auxiliary Inputs as inputs for exter-
nal sources, adjust the source output levels to
achieve proper recording levels.
Common Uses for Auxiliary Inputs
By bussing tracks to the Auxiliary Input, you
can:
• Apply real-time plug-ins or an external pro-
cessor to a submix, using the Auxiliary Input
as an effects return (such as reverb or bus line
compression)
• Input audio from external MIDI instruments
and other audio sources into the mix, to mon-
itor or route to audio tracks for recording to
disk (such as from the audio outputs of a MIDI
synthesizer)
• Consolidate volume control of any submix
under a single fader
• Play back audio from an instrument plug-in,
even though Instrument tracks are the recom-
mended way to integrate instrument plug-ins
(such as Digidesign’s Xpand!).
To route an Auxiliary Input:
1 Click the Input Path selector of the Auxiliary
Input and choose an input or bus path.
2 Click the Output Path selector of the Auxiliary
Input and choose an output or bus path.
3 Adjust the Auxiliary Input fader to set the re-
turn volume (it defaults to –∞ dB).
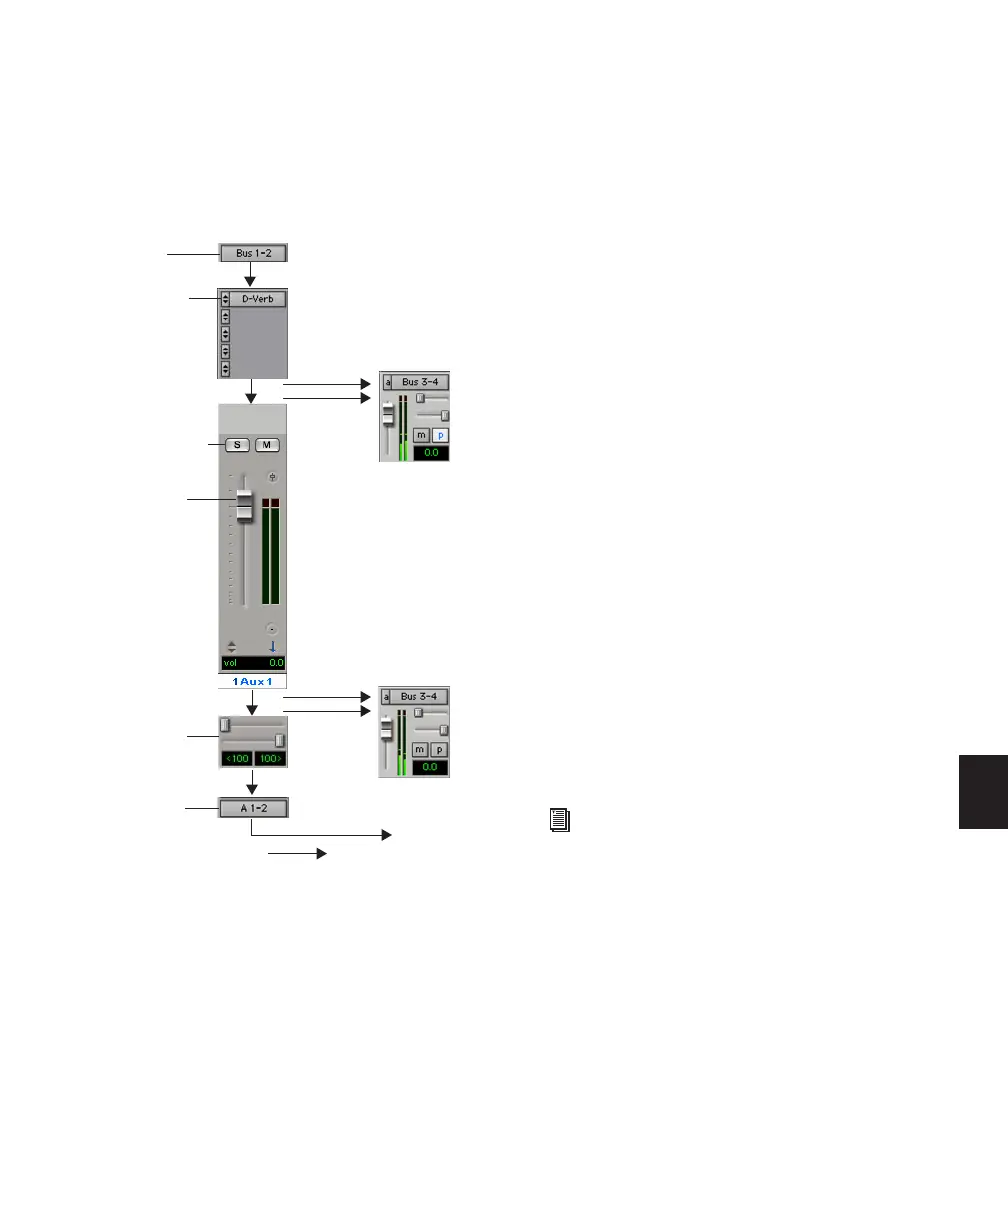
Audio signal flow, Aux Input tracks
Inserts
Sends,
Volume
(plug-ins or
Main Output
pre-fader
Solo/Mute
Panner
Additional Outputs
Sends,
post-fader
Output
+
Source: bus or
Input
inserts)
hardware
hardware input path
Submix examples begin in “Signal Routing
for Monitoring and Submixing” on
page 650.