Designjet Z Series — Service Manual 6-91
Removal and Installation - Encoder Strip
Encoder Strip
Removal
1. Remove the Right Cover (refer to page 6-
27).
2. Remove the Left Cover (refer to page 6-30).
3. Remove the Encoder Strip (with spring and
attachment nut) (refer to page 6-84).
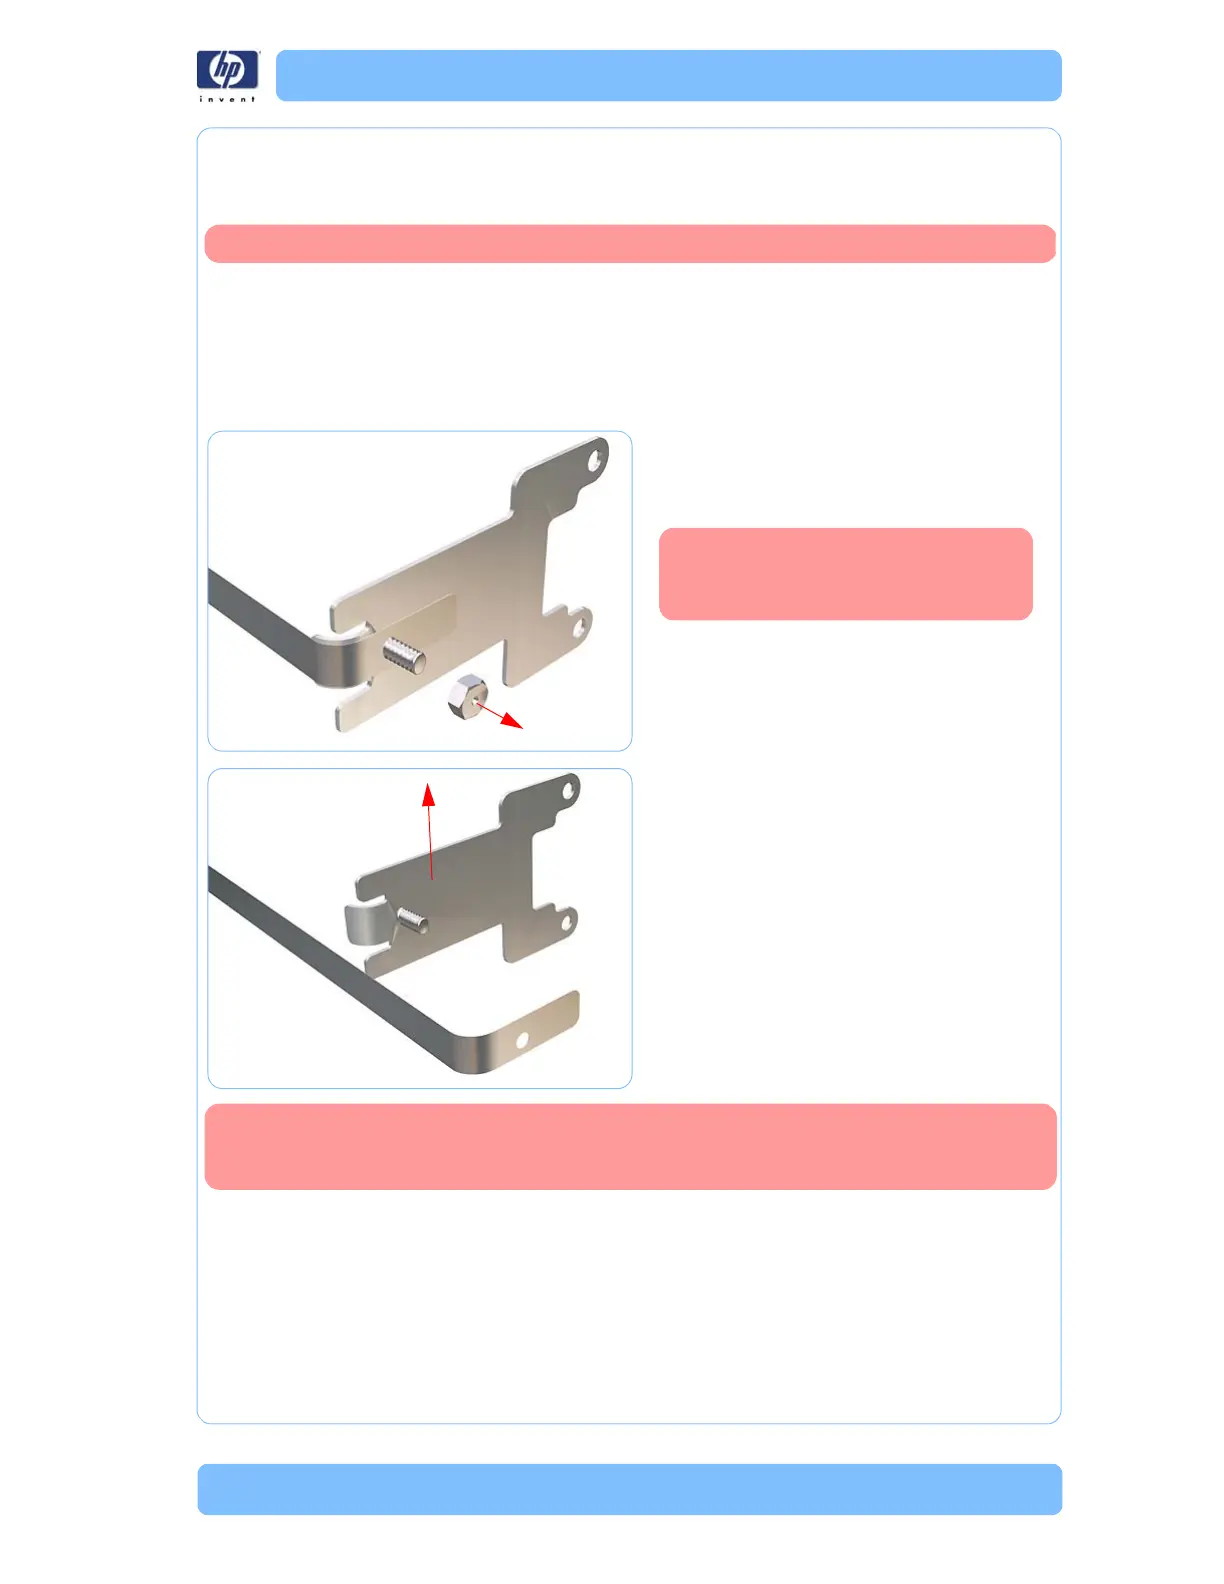
4. Use the spanner provided in the tool kit to
remove the 13 mm locking nut that secures
the Encoder Strip to the Encoder Strip
Spring.
5. Remove the Encoder Strip Spring.
Switch off the printer and remove the power cable.
There are two sizes of nuts. If you
are working with a newer printer,
the nuts will be smaller.
When you finish installing or replacing this component, you must perform the
necessary Service Calibrations. To find which calibrations you must perform,
Refer to page 6-8,
Service Calibration Guide to Removal and Installation
.
 Loading...