6-192 Designjet Z Series — Service Manual
Removal and Installation
Pinchwheel Assembly
Removal
1. Remove the Window (refer to page 6-13).
2. Remove the Spindle (refer to page 6-75).
3. Remove the Left Roll Guide (refer to page
6-82).
4. Remove the Right Roll Guide (refer to page
6-83).
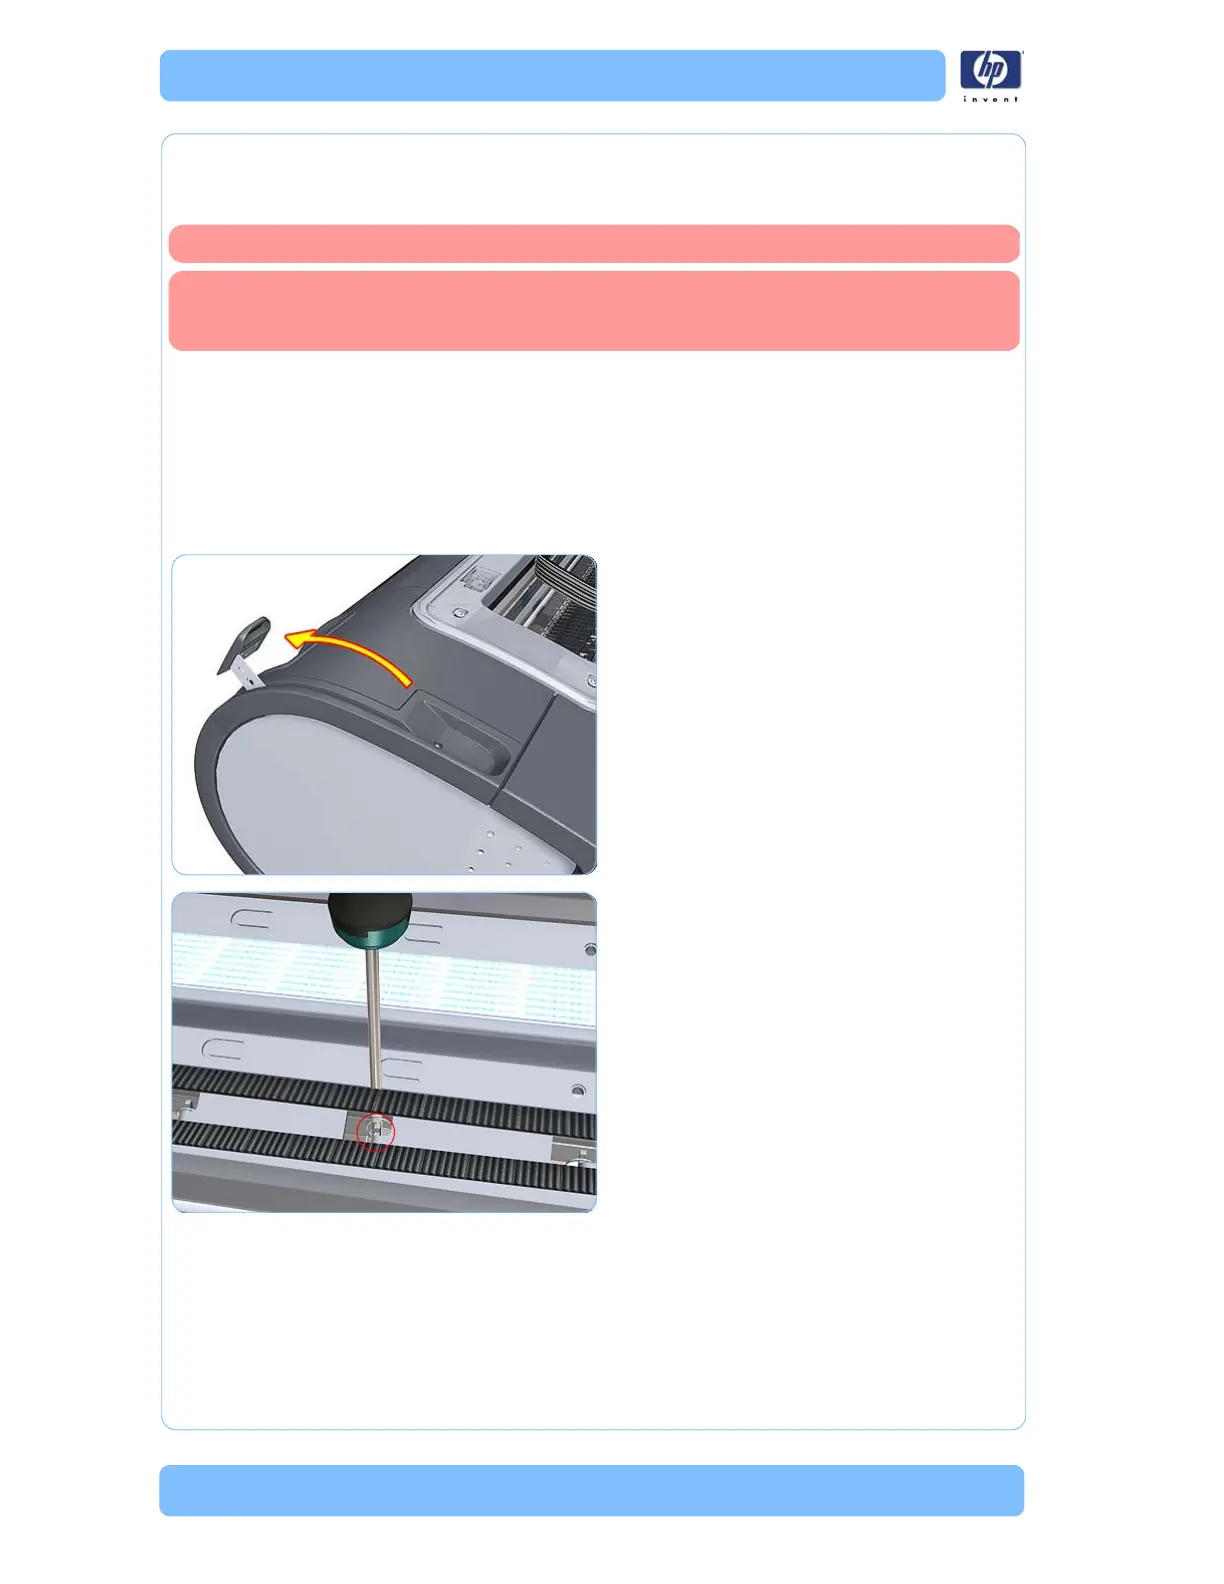
5. Raise the Media Lever.
6. Use the Pinchwheel Insertion Tool to
remove the spring from the attachment on
the printer.
Switch off the printer and remove the power cable.
Never remove and replace all the Pinchwheel Assemblies at the same time. In
order to align a Pinchwheel Assembly, you need a minimum one Pinchwheel
Assembly correctly aligned by the manufacturer.
 Loading...