Designjet Z Series — Service Manual 6-205
Removal and Installation - Left Starwheel Lifter
Left Starwheel Lifter
Removal
1. If you are working on a Z3200 series
printer, set the starwheels rail to the HIGH
position using the procedure outlined in the
note above.
2. Remove the Front Cover (refer to page 6-
17 ) .
3. Remove the Left Cover (refer to page 6-30).
4. Remove the Electronics Module (Main PCA
and PSU) (refer to page 6-163).
5. Remove the Left Spittoon (refer to page 6-
175 ) .
6. Remove the Starwheel Assembly (refer to
page 6-166).
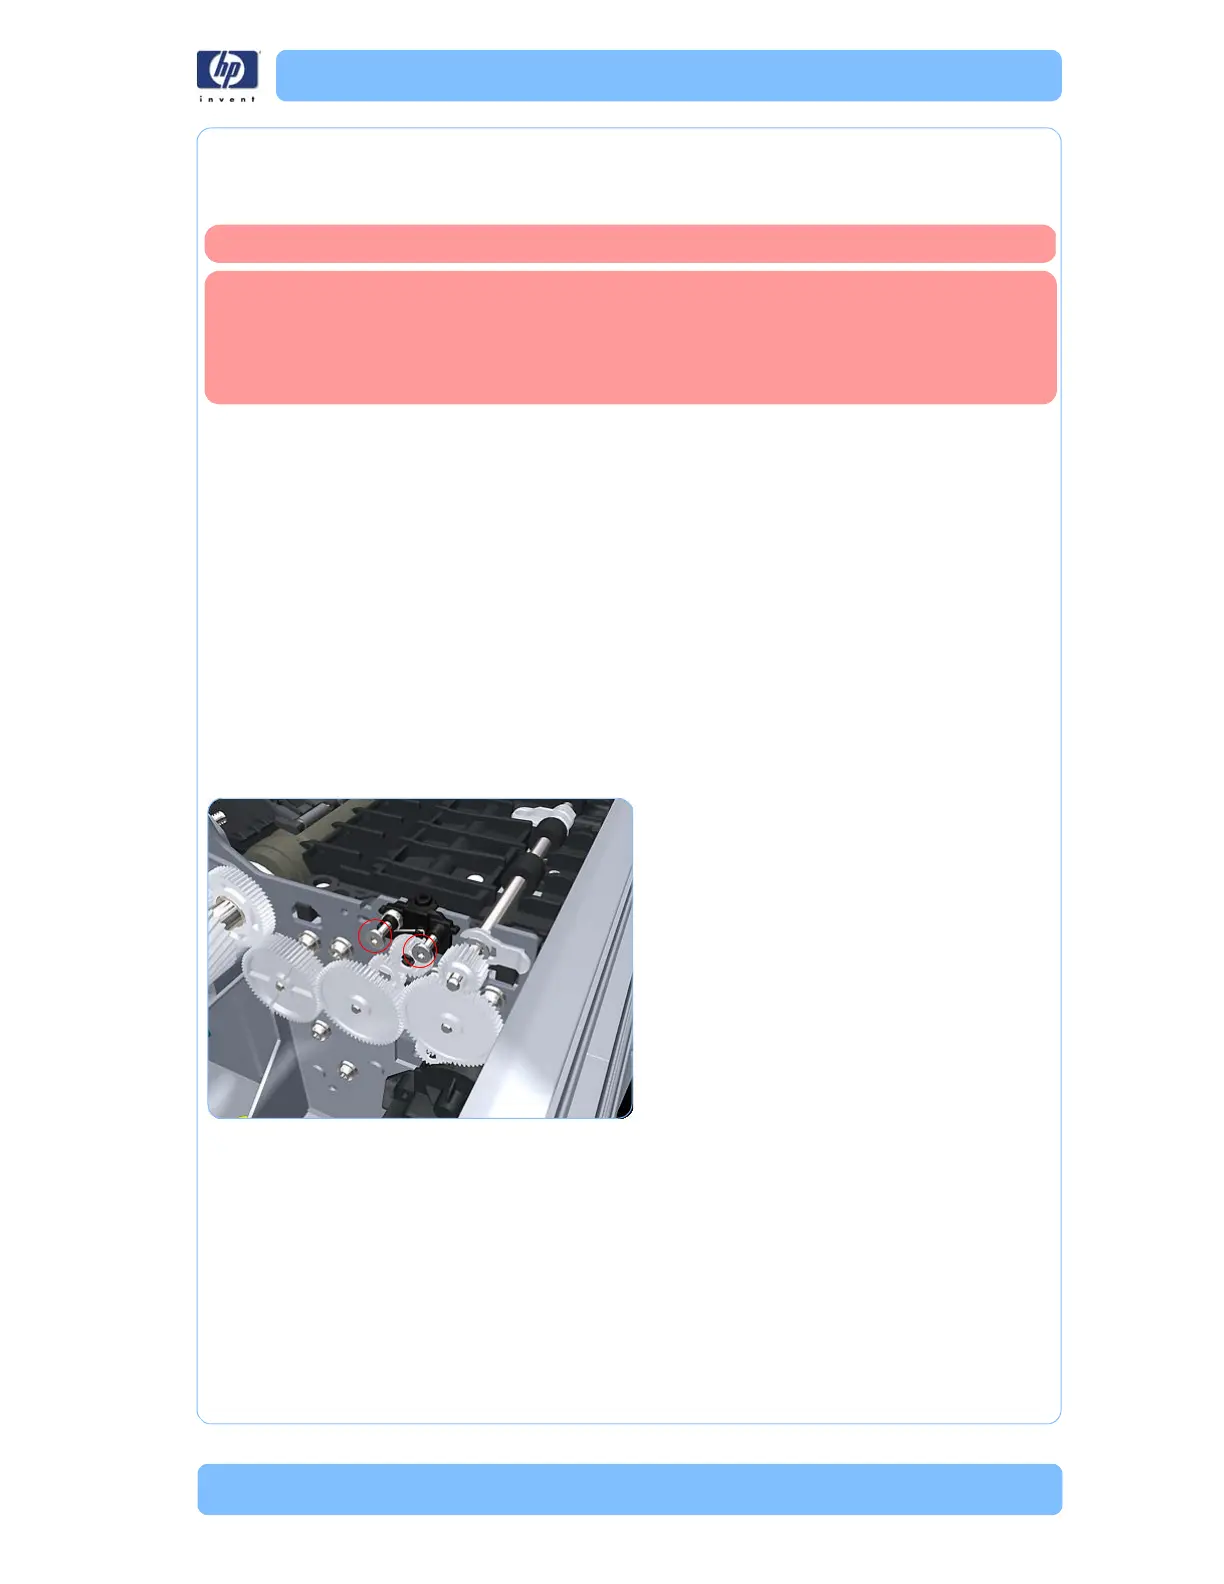
7. Remove two T-8 screws that secure the Left
Starwheel Lifter to the printer.
Switch off the printer and remove the power cable.
For Z3200 series: To be able to remove this assembly, the starwheels rail
must be at the HIGH position. To reach this position, restart the printer.
During the initialization (near the beginning), the printer will raise the
starwheels rail to the HIGH position. Turn off the printer when the starwheels
rail is at the highest point using the rear button.
 Loading...