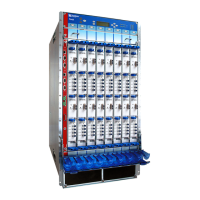
This procedure to remove components from the chassis is for initial installation only, and
assumes that you have not connected power cables or cords to the router. The procedure
describes how to remove components from the chassis, first from the rear and then from
the front:
•
Removing the T640 Power Supplies on page 181
•
Removing the T640 SIBs on page 182
•
Removing the T640 Control Boards on page 183
•
Removing the T640 SCGs on page 184
•
Removing the T640 Standard or Quiet Rear Fan Tray on page 185
•
Removing the T640 Cable Management System on page 186
•
Removing the T640 Standard or Quiet Front Fan Trays on page 187
•
Removing the T640 FPCs on page 188
Removing the T640 Power Supplies
The power supplies are located at the rear of the chassis below the SIBs. Each two-input
160-A DC power supply weighs approximately 23 lb (10.5 kg). Each three-input 240-A
DC power supply weighs approximately 25 lb (11.3 kg). Each four-input 240-A DC power
supply weighs approximately 26.6 lb (12.0 kg). Each six-input DC power supply weighs
26.6 lb (12.0 kg). Each AC power supply weighs 31.0 lb (14.06 kg).
To remove the power supplies, starting with the upper power supply:
1. Attach an electrostatic discharge (ESD) grounding strap to your bare wrist, and connect
the strap to an approved site ESD grounding point. See the instructions for your site.
2. Switch the circuit breakers on the DC power supply faceplates to the off position (O)
or the power switches on the AC power supply faceplates to the standby position.
We recommend this even though the power supplies are not connected to power
sources.
3. Loosen the captive screws on the lower corners of the power supply faceplate
completely.
4. Twist the ejector handles on the upper corners of the faceplate counterclockwise to
unseat the power supply.
5. Grasp the handle on the power supply faceplate and pull firmly to start removing the
power supply. Slide it halfway out of the chassis (see Figure 69 on page 182).
CAUTION: Be prepared to support the full weight of the power supply as
you remove it from the router.
181Copyright © 2017, Juniper Networks, Inc.
Chapter 19: Installing the T640 Router Without a Mechanical Lift

 Loading...