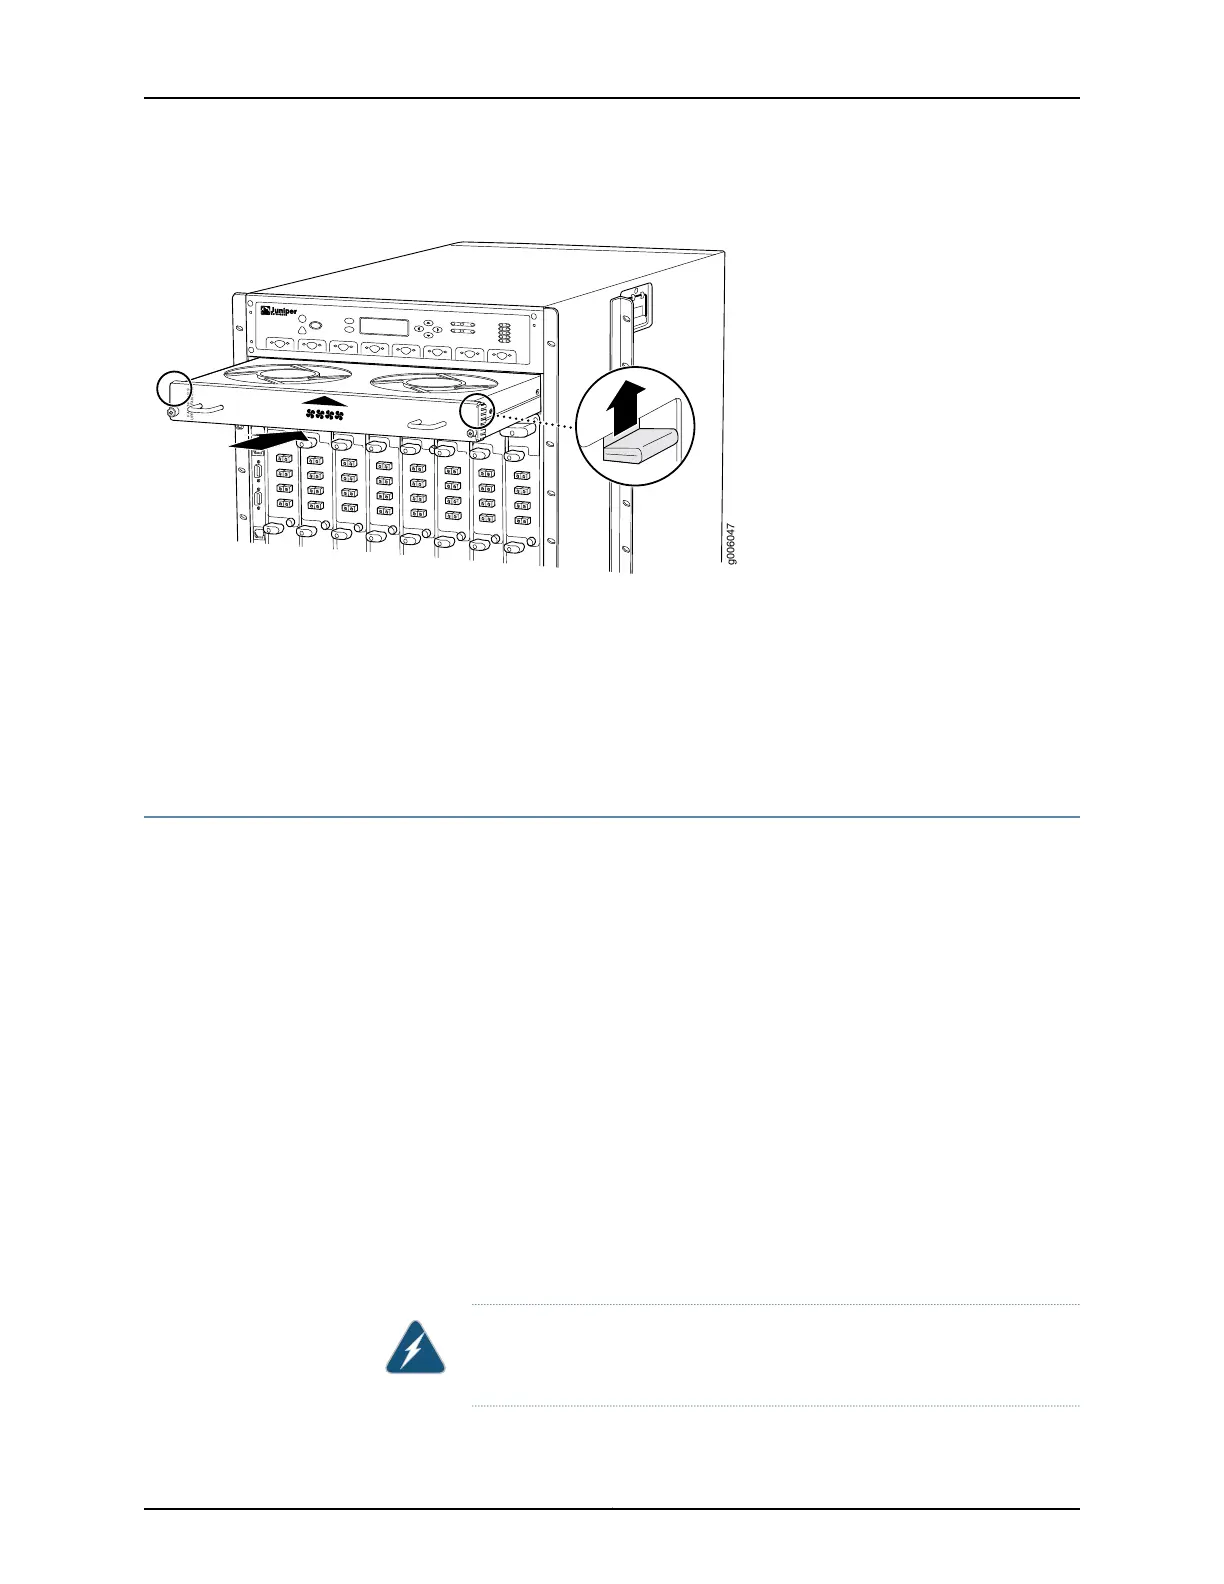
Figure 144: Installing the Quiet Upper Front Fan Tray
g006047
FA N T-F T OP -S
UPPER FA NTR AY
Related
Documentation
T640 Cooling System Description on page 31•
• Maintaining the T640 Fan Trays on page 445
• Troubleshooting the T640 Cooling System on page 469
• T640 Preventing Electrostatic Discharge Damage on page 506
Replacing the T640 Quiet Rear Fan Tray
The rear fan tray is mounted vertically on the right side of the rear of the chassis. The
quiet rear fan tray contains eight fans, and is not interchangeable with the front fan trays.
The quiet rear fan tray must be used in conjunction with the quiet front fan trays. The
quiet rear fan tray weighs about 10 lb (4.5 kg).
1.
Removing the T640 Quiet Rear Fan Tray on page 304
2.
Installing the T640 Quiet Rear Fan Tray on page 305
Removing the T640 Quiet Rear Fan Tray
To remove the quiet rear fan tray (see Figure 145 on page 305):
1. Attach an electrostatic discharge (ESD) grounding strap to your bare wrist, and connect
the strap to an approved site ESD grounding point.
2. Loosen the captive screws on the top and bottom of the fan tray faceplate.
3. Grasp the handles, and pull the fan tray halfway out of the chassis.
WARNING: To avoid injury, keep tools and your fingers away from the fans
asyou slide the fan tray out of the chassis. The fansmight still be spinning.
Copyright © 2017, Juniper Networks, Inc.304
T640 Core Router Hardware Guide

 Loading...


