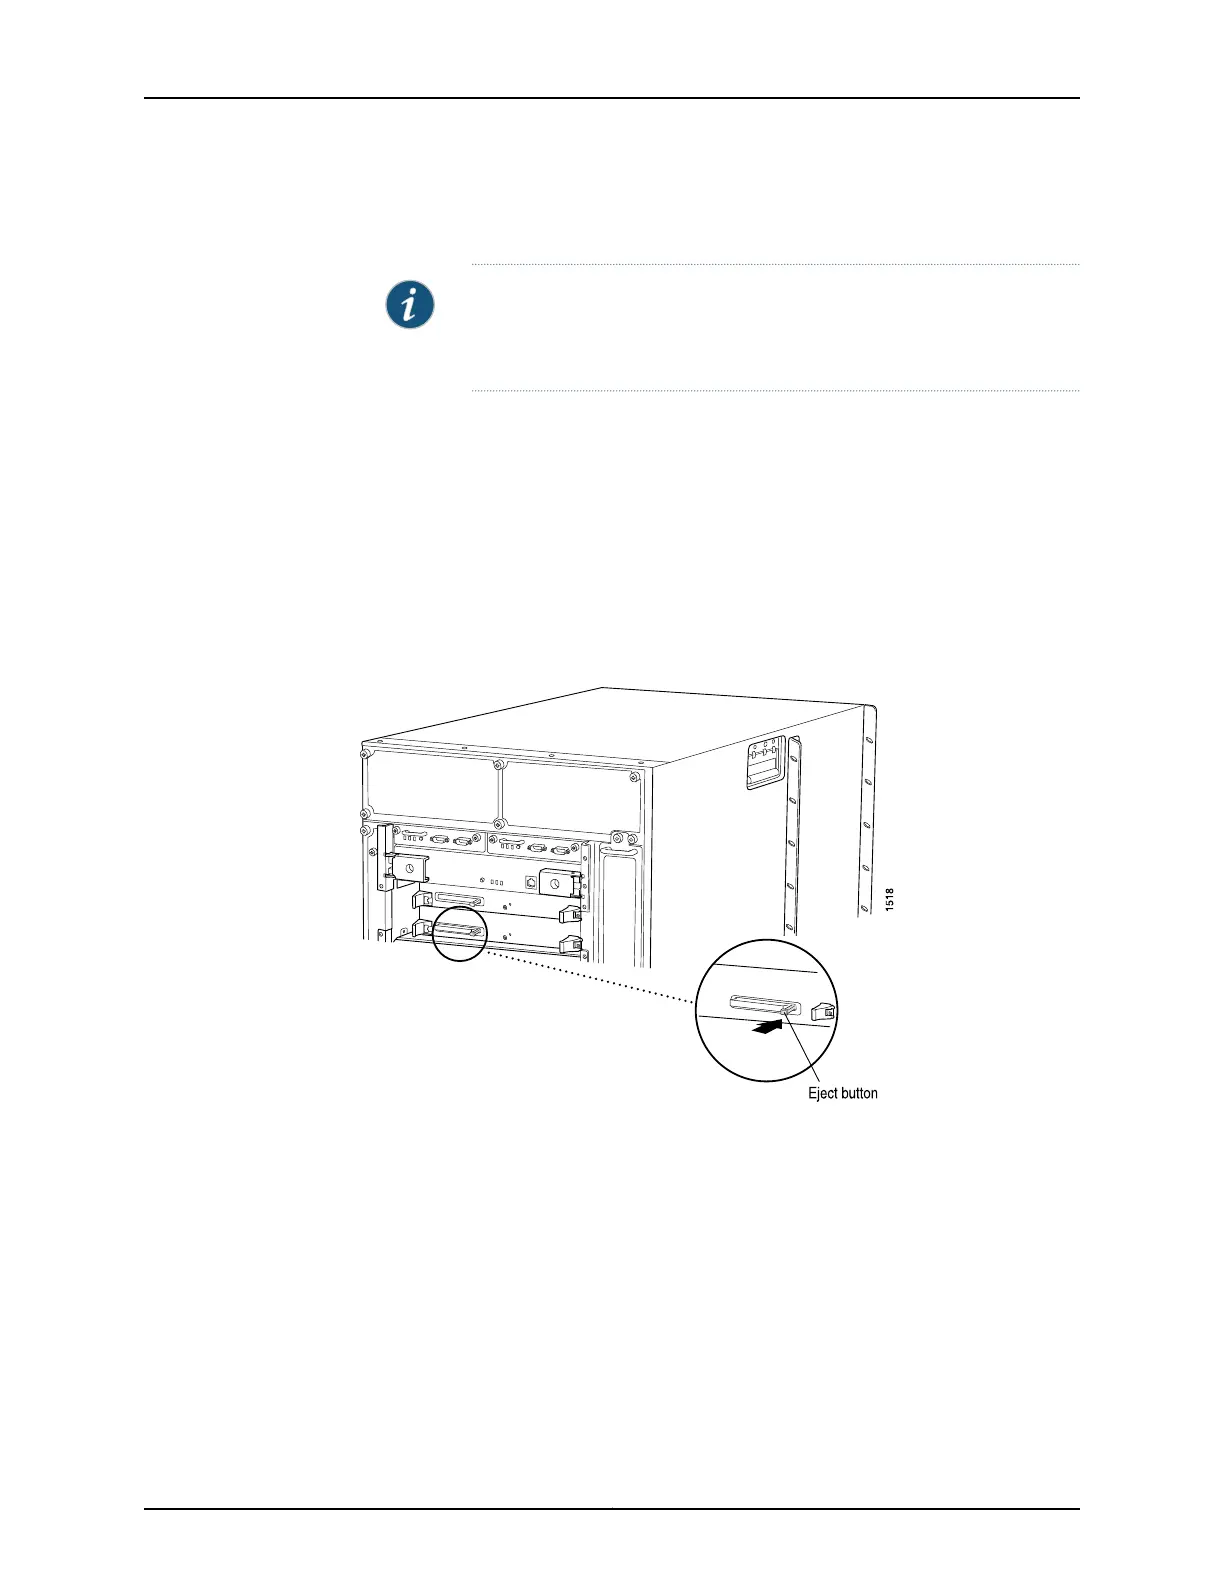
4. On the Routing Engine faceplate, press the eject button on the right side of the PC
Card slot once to release the button. Press again to release the PC Card.
NOTE: The Routing Engine in your router might have two PC Card slots.
In this case, use either slot. Do not install more than one PC Card in the
Routing Engine.
5. The PC Card pops partially out of the slot. Grasp the card and pull it completely out
of the slot.
6. Place the PC Card on the antistatic mat.
7. If you are not replacing the PC Card now, reinstall the Routing Engine cover and tighten
the screws on the corners of the cover to secure it to the chassis.
Figure 160: Removing a PC Card
Installing a T640 PC Card
To install a PC Card (see Figure 161 on page 327):
1. Attach an electrostatic discharge (ESD) grounding strap to your bare wrist, and connect
the strap to one of the ESD points on the chassis.
2. If the Routing Engine cover is in place, remove the cover by loosening the captive
screws on the corners of its faceplate.
3. Insert the PC Card into the PC Card slot on the Routing Engine, with the Juniper
Networks logo facing downward.
Copyright © 2017, Juniper Networks, Inc.326
T640 Core Router Hardware Guide

 Loading...


