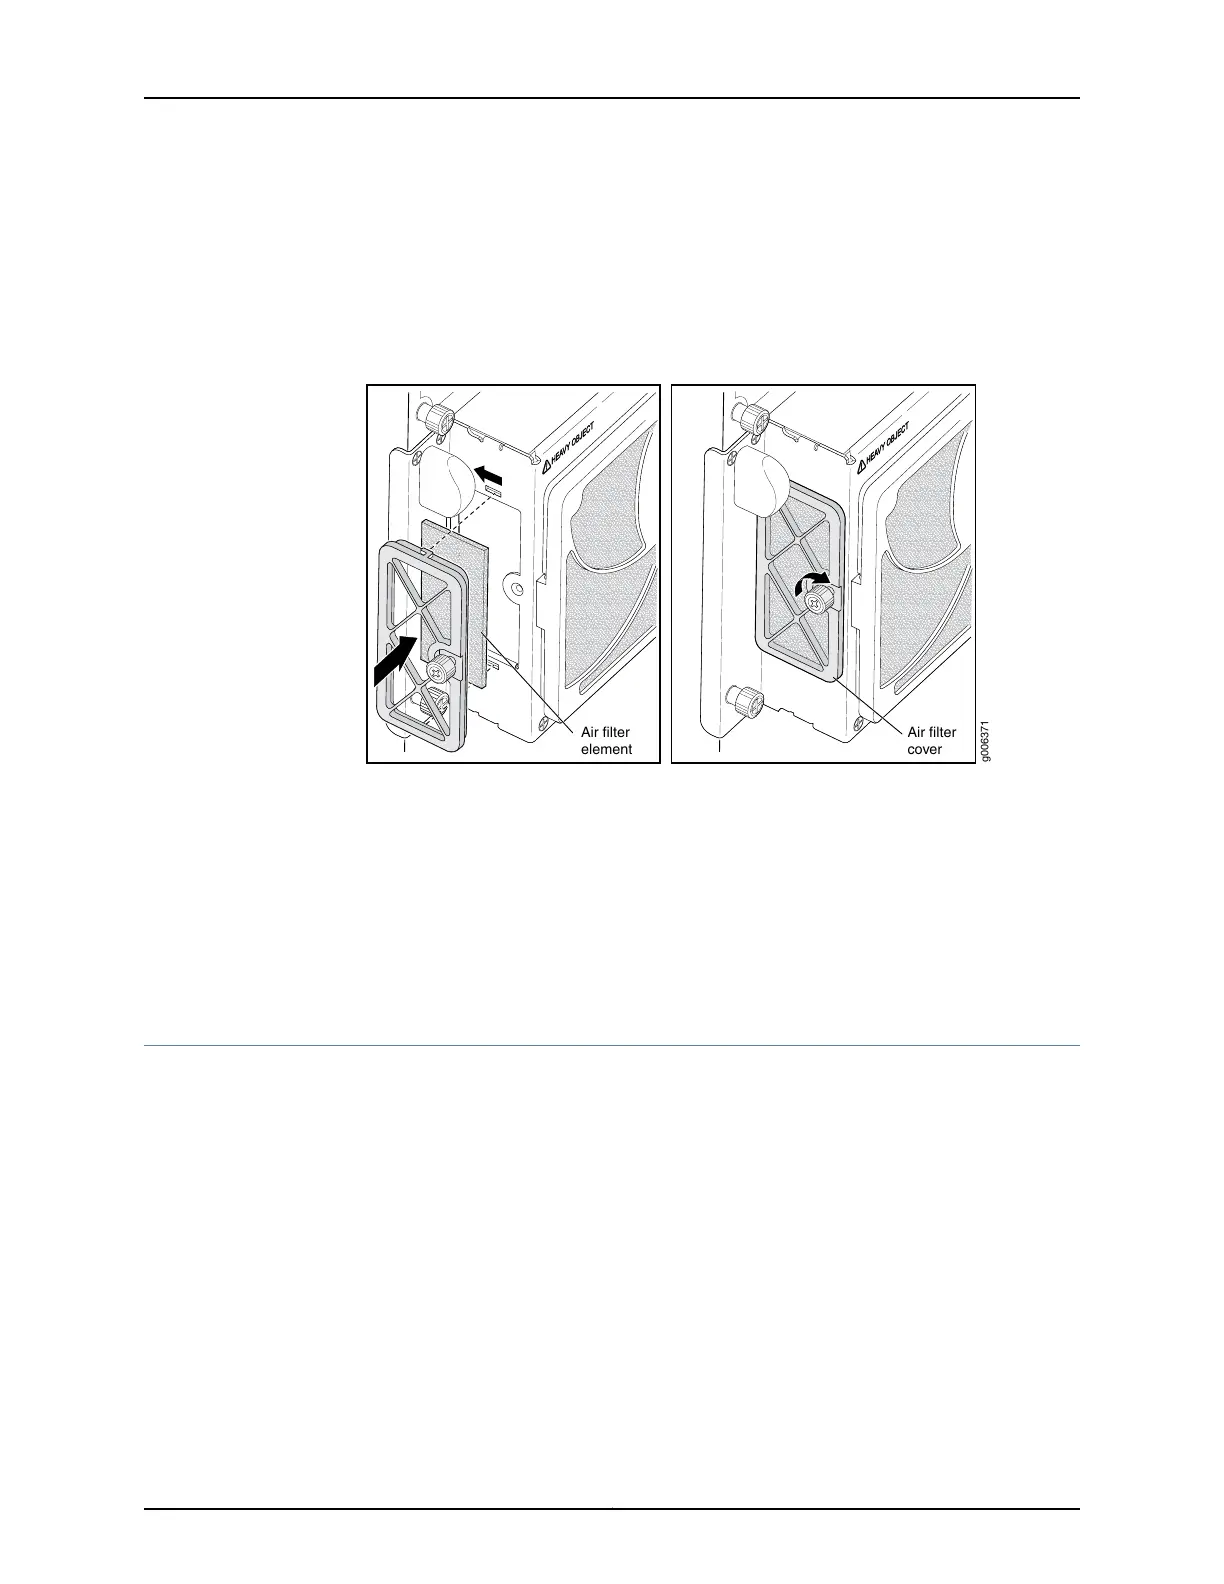
4. Slide the side air filter cover back into the power supply faceplate. The two lances
insert into the sheet metal.
5. Tighten the captive screw.
Figure 204: Installing the Power Supply Side Air Filter
g006371
Air filter
element
Air filter
cover
Related
Documentation
T640 Six-Input DC Power Supply Description on page 104•
• T640 Six-Input DC Power Supply LEDs on page 105
• Maintaining the T640 Power Supplies on page 456
• T640 Preventing Electrostatic Discharge Damage on page 506
• General Safety Guidelines for Juniper Networks Devices on page 503
Replacing a Front Air Filter Element on a T640 AC or DC Power Supply
You can use this procedure for a two-input 160-A DC power supply, three-input 240-A
DC power supply, four-input 240-A DC power supply, three-phase delta AC power supply,
or three-phase wye AC power supply.
1.
Removing a Front Air Filter Element on a T640 AC or DC Power Supply on page 391
2.
Installing a Front Air Filter Element on a T640 AC or DC Power Supply on page 392
Removing a Front Air Filter Element on a T640 AC or DC Power Supply
To remove a power supply front air filter element (see Figure 205 on page 392):
1. Attach an electrostatic discharge (ESD) grounding strap to your bare wrist, and connect
the strap to one of the ESD points on the chassis.
391Copyright © 2017, Juniper Networks, Inc.
Chapter 29: Replacing Power System Components

 Loading...


