6. Install the Routing Engine.
7. You can view the the SDRAM configuration and verify the DIMM was installed correctly
by issuing the show chassis routing-engine command.
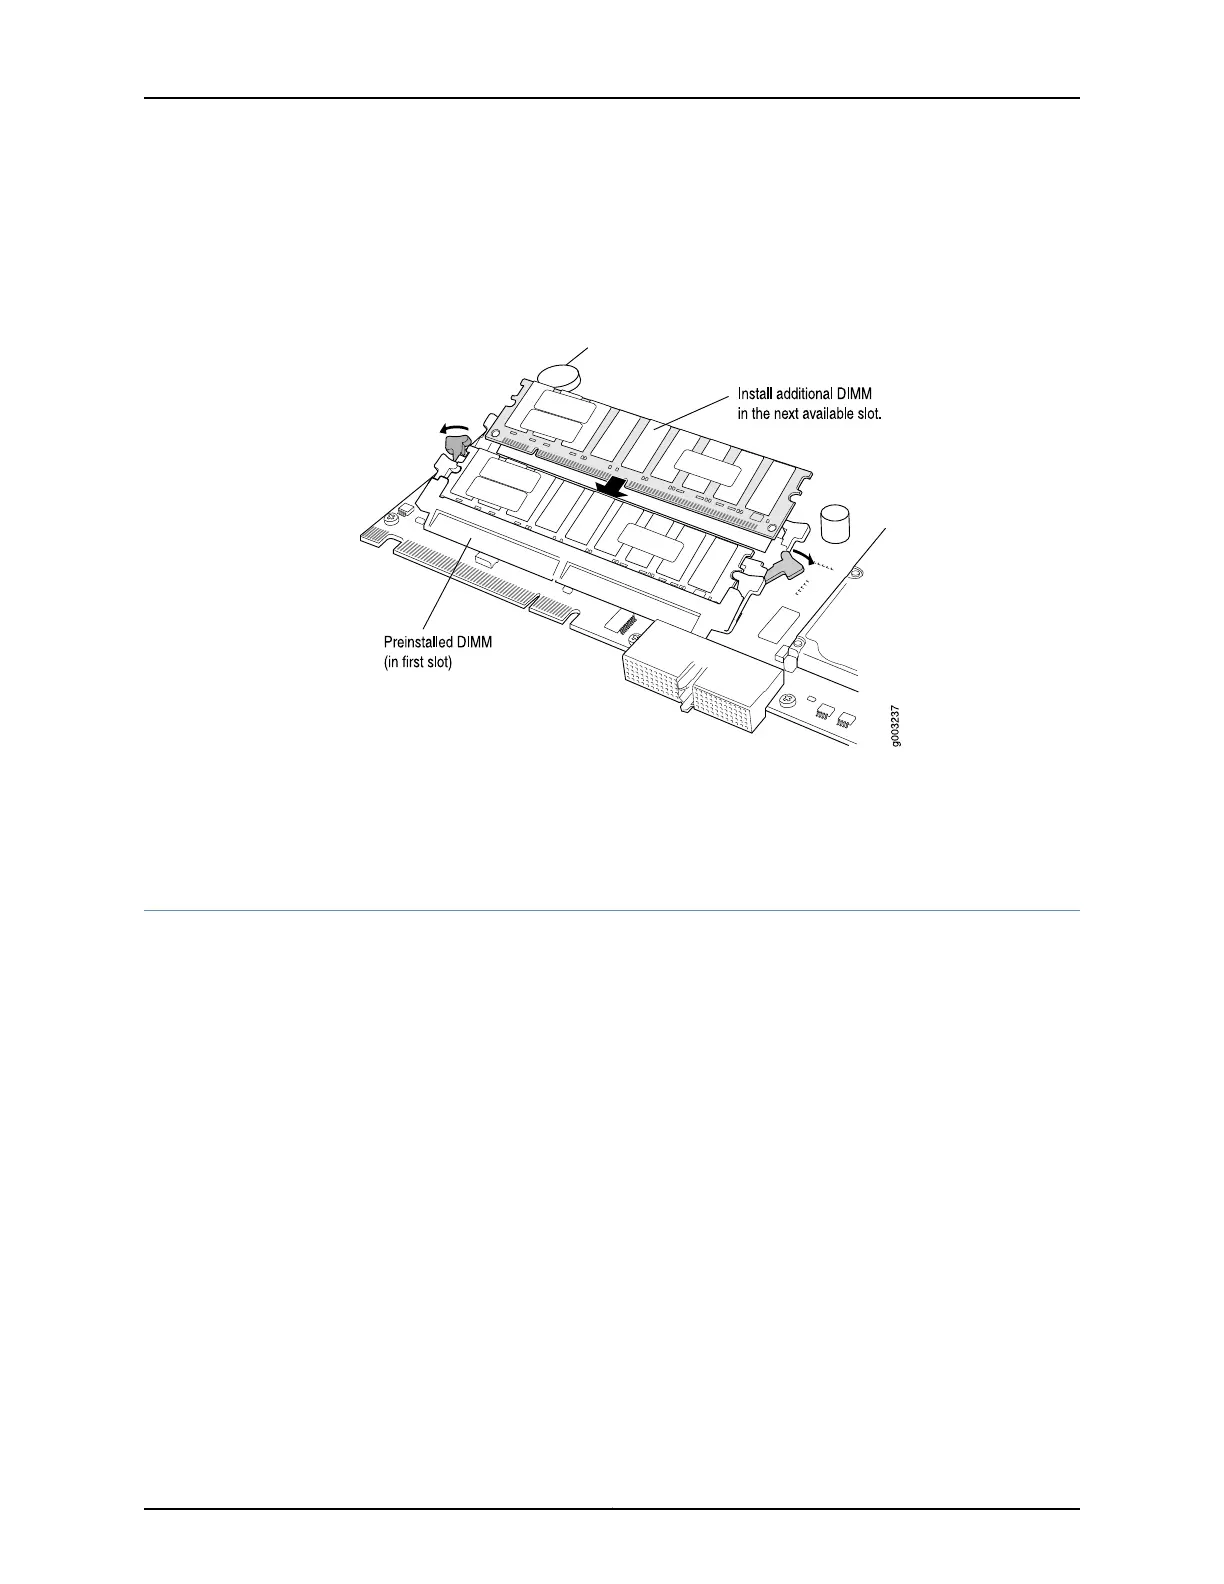
Figure 159: Installing the DIMM Module
Related
Documentation
T640 Routing Engine Description on page 36•
• Replacing a T640 Routing Engine on page 317
Replacing a PC Card in a T640 Routing Engine
To replace a PC Card, perform the following procedures:
1.
Removing a T640 PC Card on page 325
2.
Installing a T640 PC Card on page 326
Removing a T640 PC Card
The PC Card is located in the slot labeled PC CARD on the Routing Engine. To remove
the PC Card (see Figure 160 on page 326):
1. Place an electrostatic bag or antistatic mat on a flat, stable surface.
2. Attach an electrostatic discharge (ESD) grounding strap to your bare wrist, and connect
the strap to one of the ESD points on the chassis.
3. Remove the Routing Engine cover by loosening the captive screws on the corners of
its faceplate.
325Copyright © 2017, Juniper Networks, Inc.
Chapter 27: Replacing Host Subsystem Components

 Loading...


