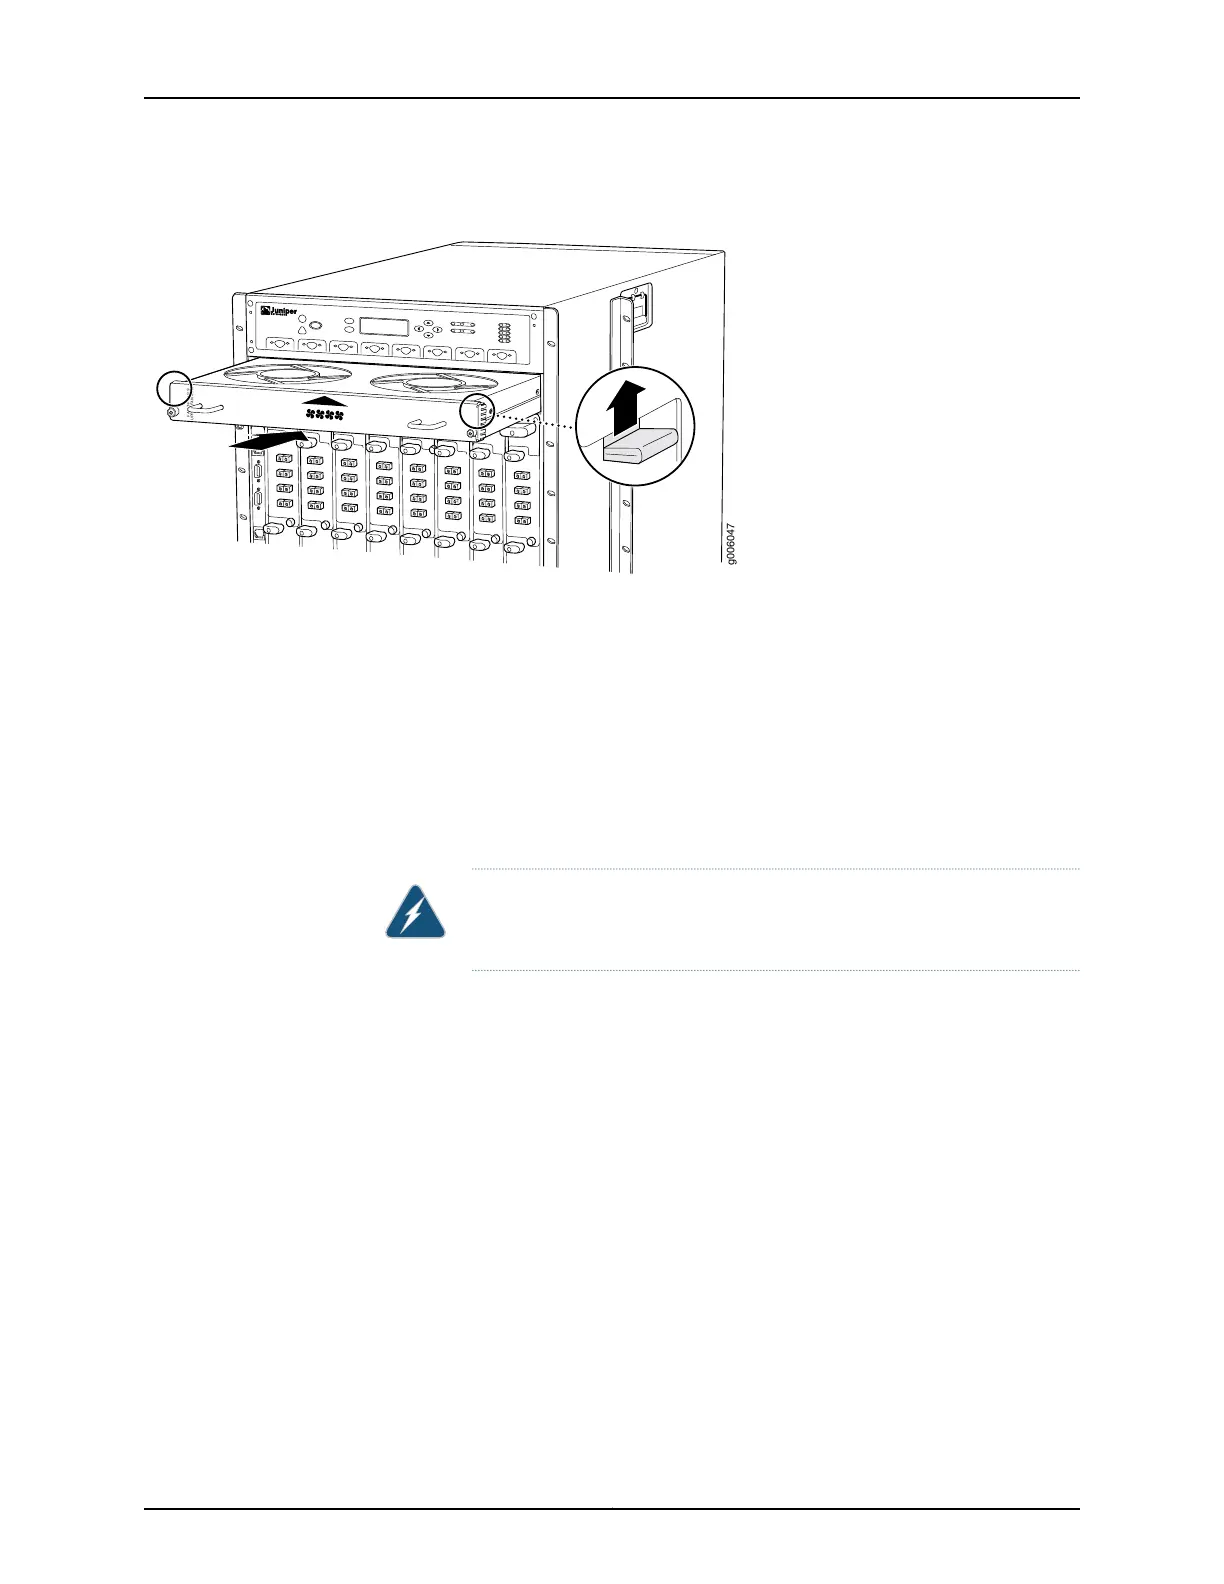
Figure 138: Installing the Quiet Upper Front Fan Tray
g006047
FA N T-F T OP -S
UPPER FA NTR AY
Upgrading the Standard Rear Fan Tray to a Quiet Rear Fan Tray
To upgrade the rear fan tray (see Figure 139 on page 298) and Figure 140 on page 299:
1. Attach an electrostatic discharge (ESD) grounding strap to your wrist, and connect
the strap to one of the ESD points on the chassis.
2. Loosen the captive screws on the top and bottom of the standard fan tray faceplate.
3. Grasp the handles, and pull the standard rear fan tray halfway out of the chassis.
WARNING: To avoid injury, keep tools and your fingers away from the fans
asyou slide the fan tray out of the chassis. The fansmight still be spinning.
4. Wait for the fans to stop spinning.
5. After the fans stop spinning, place one hand under the fan tray to support it, and pull
the standard fan tray completely out of the chassis.
6. Locate the quiet rear fan tray labeled REAR FANTRAY FAN-R-S.
7. Grasp the quiet rear fan tray by its handles and insert it straight into the chassis.
8. Tighten the captive screws on the quiet rear fan tray faceplate to secure it in the
chassis, using a Phillips (+) screwdriver, number 2.
297Copyright © 2017, Juniper Networks, Inc.
Chapter 26: Replacing Cooling System Components