2
G
G
H
H
Procedure
Be sure to turn the MFP main power switch off
and disconnect the MFP power plug from the
wall outlet before starting to install the mailbox.
Before installing the finisher, carry out the
following procedure.
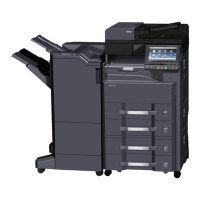
1. Fit the two plate feet V (H) and secure them
using two M4 x 10TP screws (G) for each.
Install the finisher referring to the installation
guide for finisher.
Procédure
Veiller à bien mettre l’interrupteur principal du
MFP sur la position d’arrêt et à débrancher la
fiche d’alimentation du MFP de la prise murale
avant d’entreprendre l’installation de la boîte à
lettres.
Avant d’installer le retoucheur, effectuer la
procédure suivante.
1. Insérer les deux pieds de plaques V (H) et
les fixer à l'aide de deux vis M4 x 10TP (G)
pour chaque pièce.
Installer le retoucheur en se reportant au
guide d’installation du retoucheur.
Procedimiento
Asegúrese de apagar el MFP con el interruptor
principal y de desconectar la clavija de
alimentación del MFP de la toma de corriente
de la pared antes de empezar a instalar el
buzón de correo.
Antes de instalar el finalizador, realice el
siguiente procedimiento.
1. Coloque las dos patas de placa V (H) y
asegúrelas por medio de dos tornillos M4 x
10TP (G) para cada una.
Instale el finalizador consultando la guía de
instalación para el finalizador.
Verfahren
Schalten Sie vor der Installation der Mailbox
unbedingt den Hauptschalter des MFP aus, und
ziehen Sie den Netzstecker aus der
Netzsteckdose.
Bevor Sie den Finisher installieren, führen Sie
das folgende Verfahren aus.
1. Bringen Sie die beiden Plattenfüße V (H) an,
und befestigen Sie sie jeweils mit zwei M4 x
10TP Schrauben (G).
Installieren Sie den Finisher gemäß der
Installationsanleitung des Finishers.
Procedura
Non mancare di spegnere l’MFP utilizzando
l’interruttore principale di alimentazione e
scollegare la spina del cavo di alimentazione
dell’MFP dalla presa della rete elettrica, prima di
cominciare a installare la casella postale.
Prima di installare il finitore, eseguire le seguenti
procedure.
1. Inserire i due piedini della piastra V (H) e
fissare ciascuno di essi utilizzando due viti
M4 x 10TP (G).
Installare il finitore seguendo le istruzioni
della guida all’installazione del finitore.
[ 取付手順 ]
メールボックスを取り付ける際は、必ず MFP 本
体の主電源スイッチを OFF にし、電源プラグを
外して作業をおこなう。
フィニッシャの設置を行う前に、次の手順を行
う。
1. プレートフット V(H) を 2 箇所取り付け、ビ
スM4×10TP(G)各2本で固定する。
フィニッシャの設置手順書を参照して、フィ
ニッシャの設置を行う。

 Loading...


