E-GENIUS CALIBRATION PRESETS
PRODUCT REFERENCE GUIDE
339
• Sync Controller IP (the sync adapter cable must be used): 192.168.0.145
Open a browser and enter cameras IP address into the browser’s address field. When e-
Genius
opens, enter the case sensitive user name (setup) and password (DLAset).
E-GENIUS CALIBRATION PRESETS
Before physical calibration is begun, a few settings need to be confirmed or modified in
e-Genius. Your PC’s IP address needs to match the camera system’s IP Address range.
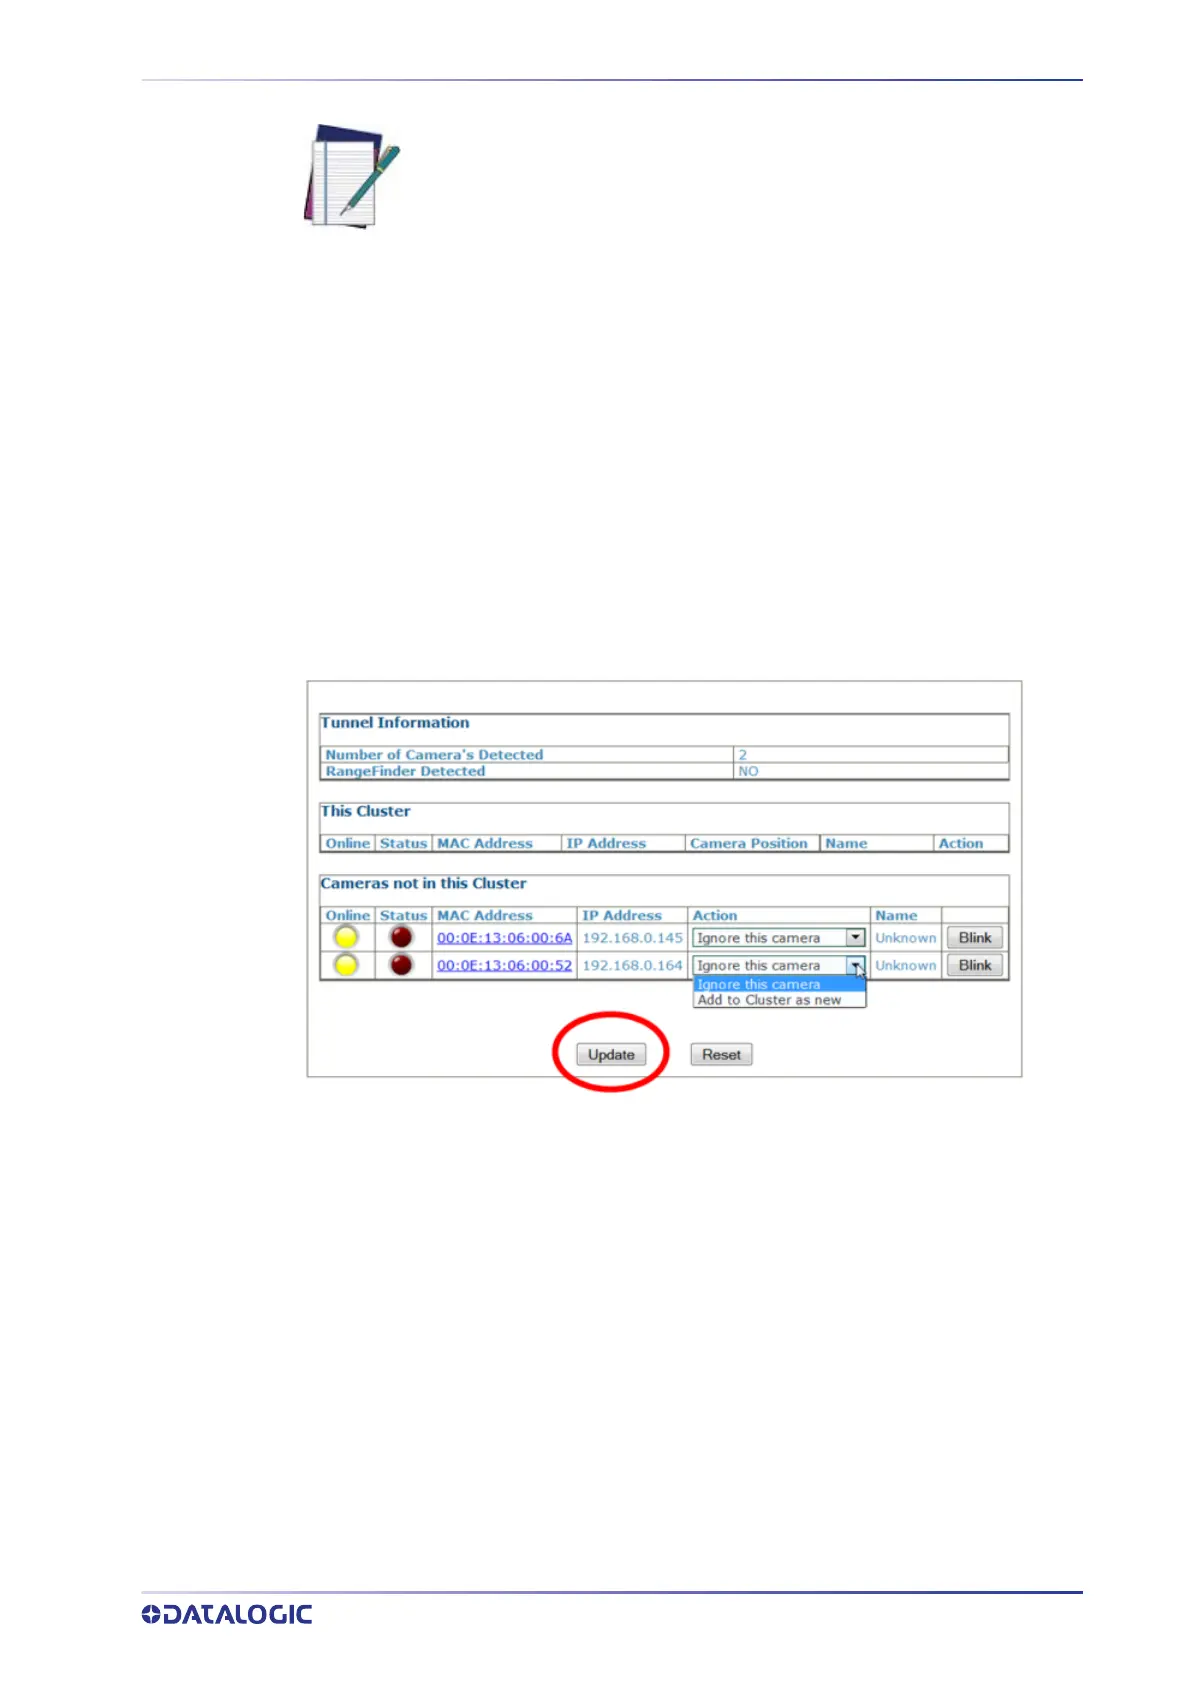
System Info: Bring Each Camera into the Network
When power is applied to the AV7000 scan tunnel for the first time each camera will
need
to be brought into the sync network using the
e-Genius.
1. From the menu tree, navigate to the
Modify Settings | System Info. The System
Info Page opens.
2. From the Action drop-down list, select the Add to Cluster as new.
3. Click Update to add the camera to the This Cluster table.
4. Once each AV7000 has been added under
This Cluster, its mounting positions will
need to be identified. Click
Blink in a camera’s row in the table. That camera’s illu-
mination will light.
5. Once the camera has been identified, select its mounting position from the
Cam-
era Position drop-down list.
NOTE: Your PC’s IP address needs to match the camera system’s IP
Address r
ange, see “Changing Your PC’s IP Address:” on page 90 for
information on connecting a laptop to the system. The Host and Image port
IP addresses may have been changed for your application. Contact your
system administrator for changes.