AUTOMATED MOUNTING CALIBRATION
236
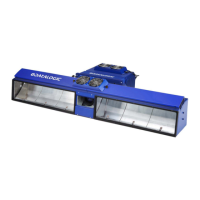
AV7000 LINEAR CAMERA
• Run each package 2-3 inches from the left/right edge of the transport. Running
directly on the left/right edge can result in slightly incorrect package width values.
It is suggested to run the box slightly in from the side of the conveyor. If the pack
-
age is too close to the edge of the conveyor it could cause an error.
• The width and height reported in the “Detailed Status Area” is within 25mm of the
actual pack
age dimensions. Below is an example:
Here is what you can check if the width is not within 25mm of the actual package
width.
• Run the package further from the conveyor edge.
• Check the position sensor for accuracy.
Command Bar Commands and What To Expect:
Top Camera being calibrated (with or without Side cameras):
Run a small height package on the right side of the transport
• Target white level will be updated
• Time from package induction to “ready for next package” is 15 seconds
Run a tall height package on the left side of the transport
• Far Working Distance, View Angle, Distance to Trigger Source, and Target
White Level will be updated
• Parameters will be saved
• Time from package induction to “ready for next package” is 30 seconds
Side Camera(s) being calibrated (no Top cameras):
Run a package on the right side of the transport
• Target white level will be updated
• Time from package induction to “ready for next package” is 15 seconds
Run a package on the left side of the transport
• Far Working Distance, View Angle, Distance to Trigger Source, and Target
White Level will be updated
• Parameters will be saved
• Time from package induction to “ready for next package” is 30 seconds
Handling Errors
If an error occurs, the previous package will need to be re-run. See Handling Errors.
• Pause by pressing the Pause/Play Button. Press the Pause/Play Button again
to resume calibration.
• The last calibration step and all data captured will be remembered if calibra-
tion is interrupted (browser connection is lost, or the user navigates to another
page). If this happens, navigate to the Dynamic Calibration page, enable one
camera (to make the “Start Dynamic Calibration” button clickable) and press
“Start Dynamic Calibration”. All of the values selected previously will be updated,
along with any calibration values.
• Calibration takes significantly longer if the incorrect “Mirror Mounting Angle”
is selected.
• A camera’s starting parameters are reloaded if calibration is stopped before
calibration is complete.
Follow the Command Bar instructions until each camera’s Calibration Status LED turns
green and calibration is completed.
Calibration Sequence Examples
NOTE: It may take several box runs before the calibration is complete. FOLLOW the
instructions.
JUST Top Camera Calibration:

 Loading...