214323 367 Revision A
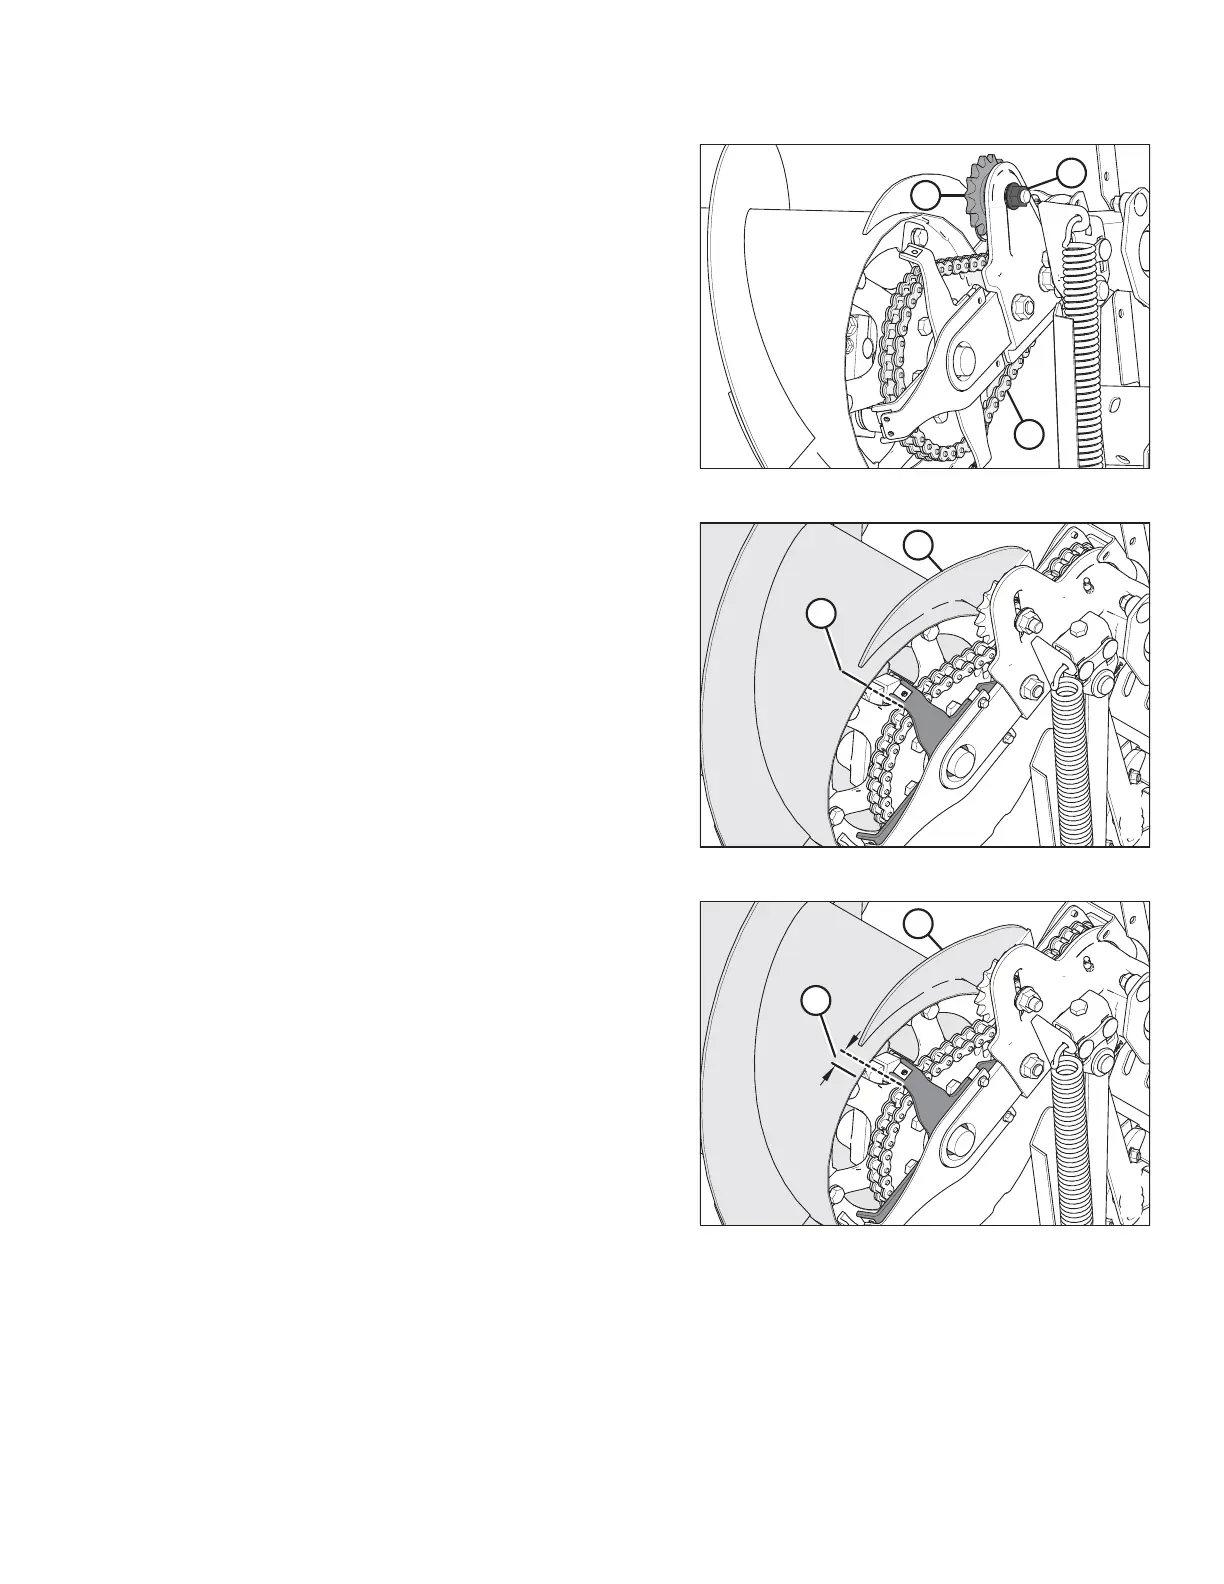
Figure 5.76: Auger Drive
7. Loosen nut (A) securing idler sprocket (B).
8. Rotate the auger in reverse to take up the slack in the
lower strand of chain (C).
9. Push down idler sprocket (B) to eliminate the remaining
slack in the lower strands (C).
10. Rotate the auger back and forth to check the slack, and
repeat Step 9, page 367 if necessary. A slight amount of
slack is acceptable.
NOTE:
Do NOT use excessive force on idler to tighten chain.
11. Tighten idler nut (A) and torque to 290 Nm (215 lbf∙ft).
Figure 5.77: Auger Drive
12. Rotate auger (A) by hand, in reverse, until it cannot turn
anymore.
13. Mark a line (B) on the drum that lines up with one of the
cover supports.
Figure 5.78: Auger Drive
14. Rotate auger (A) by hand, in forward direction, until it
cannot turn anymore.
15. Measure the distance between the two lines (B).
For a new chain:
• If the difference (B) is 1–4 mm (0.04–0.16 in.), no
more adjustment is required.
• If the difference (B) is greater than 4 mm (0.16 in.),
repeat Steps 7, page 367 to 11, page 367.
For a used chain:
• If the difference (B) is 3–8 mm (0.12–0.31 in.), no
more adjustment is required.
• If the difference (B) is greater than 8 mm (0.31 in.),
repeat Steps 7, page 367 to 11, page 367.
16. Check the distance between the two lines (B) again.
17. Coat chain with grease.
MAINTENANCE AND SERVICING