214323 386 Revision A
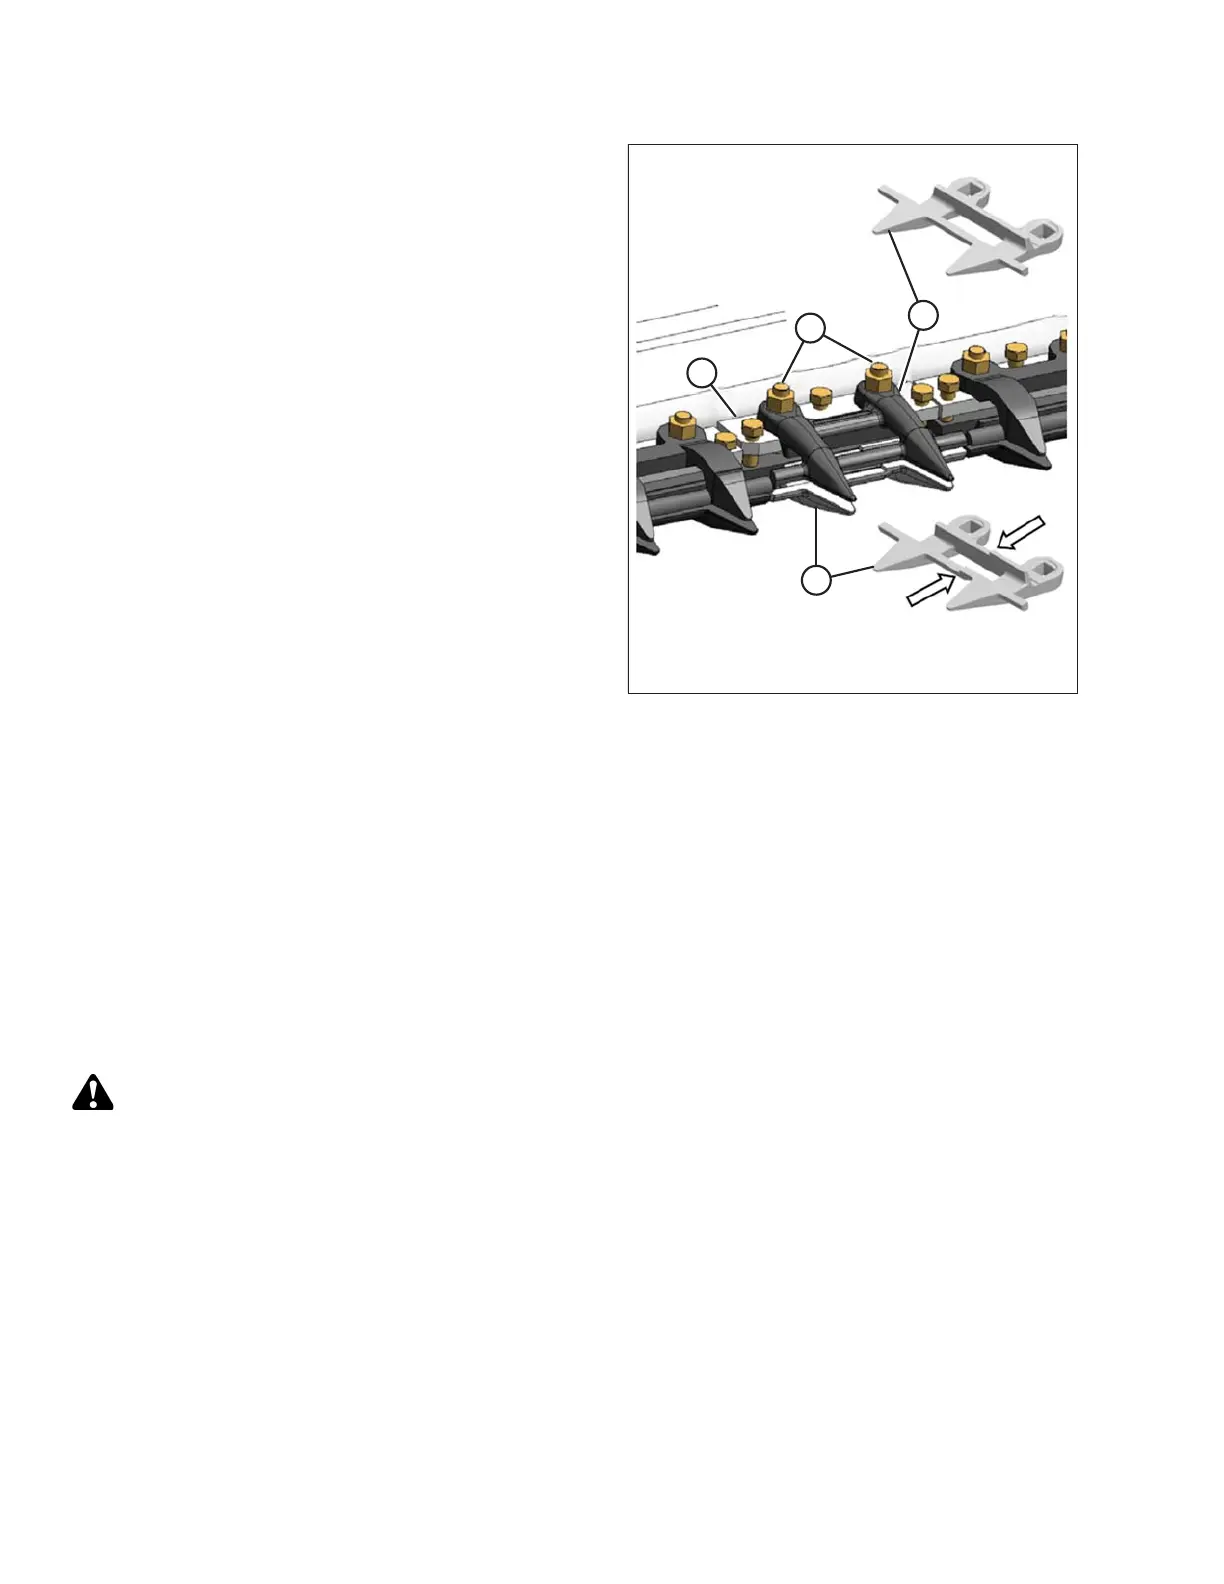
Figure 5.118: Center Guards
7. Shut down the combine, and remove the key from
the ignition.
8. Remove the two nuts (A) and bolts attaching the
guard (B), hold-down (C), and adjuster bar (D) to
the cutterbar.
9. Remove guard (B), plastic wearplate (if installed), hold-
down (C), and adjuster bar (D).
10. Position the plastic wearplate (if applicable),
replacement guard (B), adjuster bar (D), and hold-
down (C) onto the cutterbar. Install bolts, but do
NOT tighten.
IMPORTANT:
Ensure center guard (B) (right of the cutterbar split) has
offset cutting surfaces.
NOTE:
Hold-down (C) must accommodate the two overlapping
knives at the center guard location. Ensure the proper
replacement guard is installed at this location.
11. Check and adjust the clearance between the hold-down
and the knife. Refer to Checking and Adjusting Knife
Hold-Downs, page 386.
Checking and Adjusting Knife Hold-Downs
NOTE:
Align guards prior to checking and adjusting hold-downs. Refer to Adjusting Knife Guards, page 380.
Perform daily inspections to ensure knife hold-downs are preventing knife sections from lifting off guards while
permitting knife to slide without binding. Refer to:
• Checking Pointed Guard Hold-Downs, page 386
Checking Pointed Guard Hold-Downs
This procedure is applicable to headers with pointed guards.
Measure clearance between hold-downs and knife sections as follows:
WARNING
To avoid bodily injury or death from unexpected startup of machine, always stop engine and remove key
before adjusting machine.
MAINTENANCE AND SERVICING