Legend
1 Riser
2 Controller motherboard
2 After the riser is seated properly inside the Controller, tighten the two
captiv
e Phillips screws on both sides of the riser to secure the riser on the
Controller motherboard.
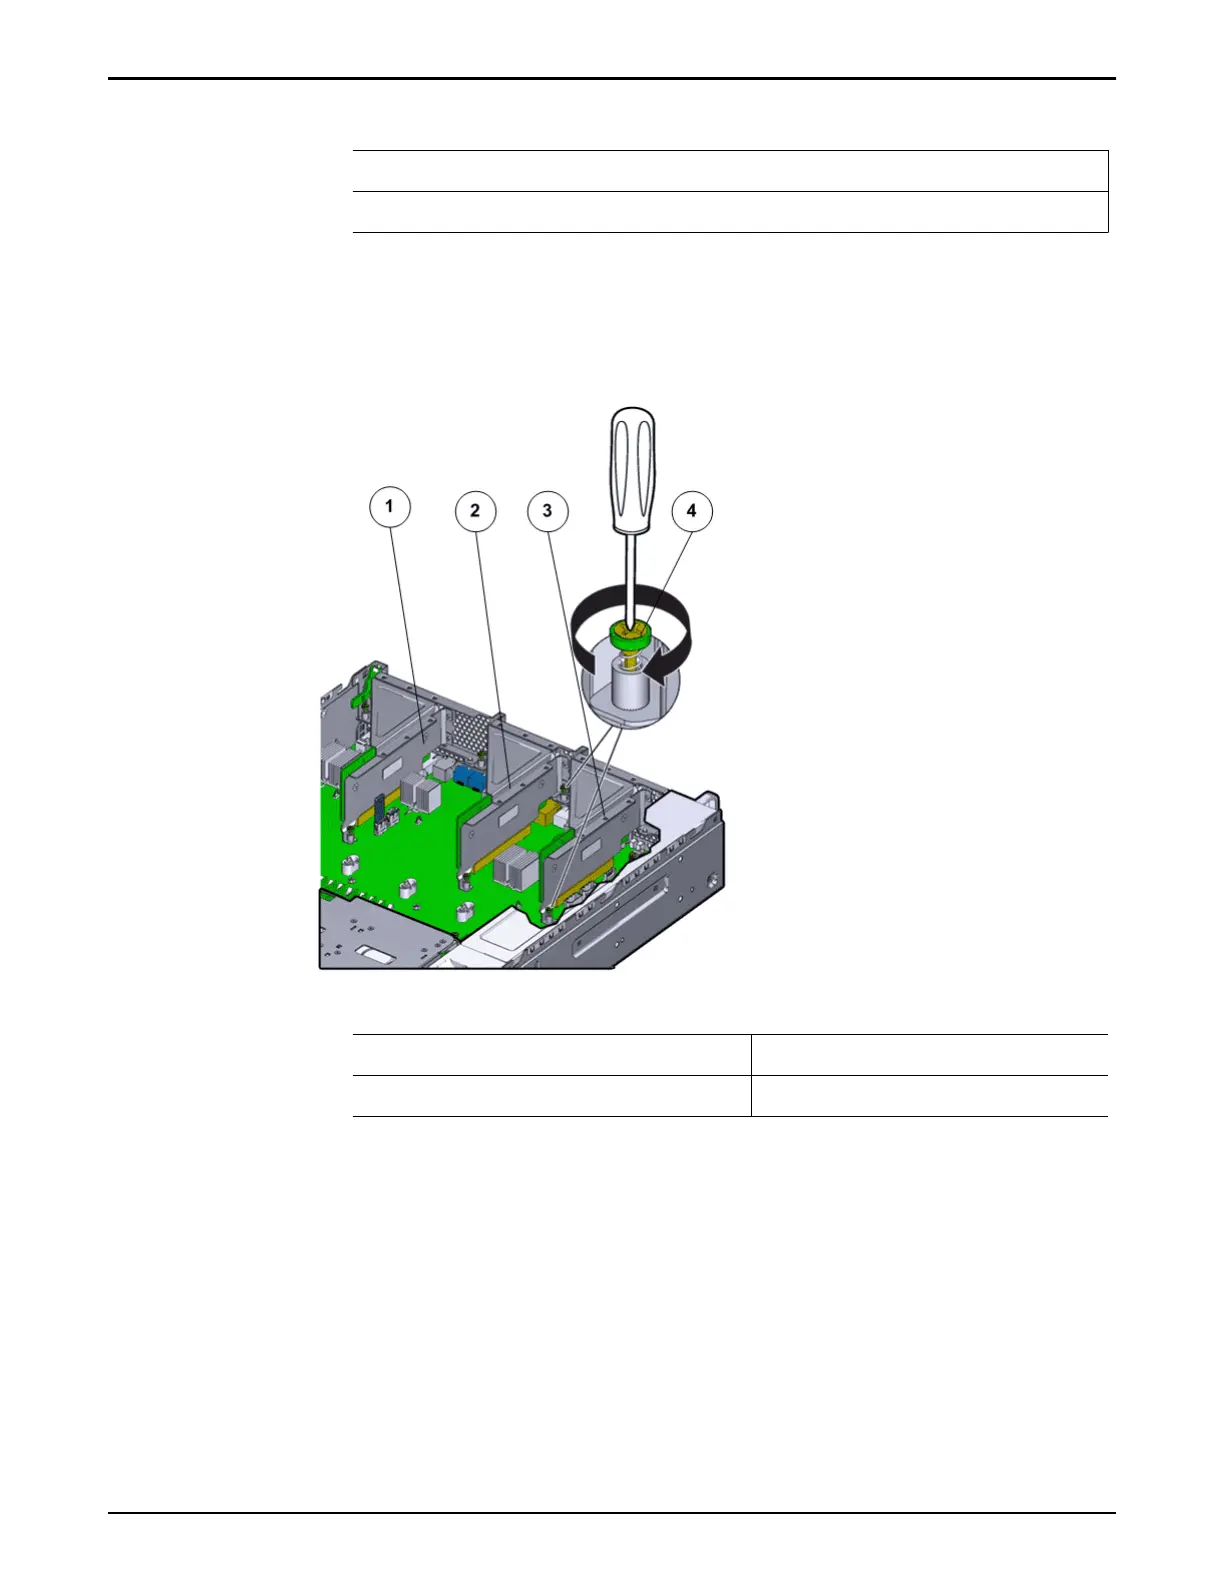
Figure 99: Captive screws to secure risers to the motherboard
Legend
1 Riser 3 with latch 3 Riser 1
2 Riser 2 4 Captive screws
To install riser 3, lock the latch to secure the riser to the Controller
motherboard.
Controller Replacement Procedures
133