Legend
1 Phillips Number 2 pan head screw with patch lock
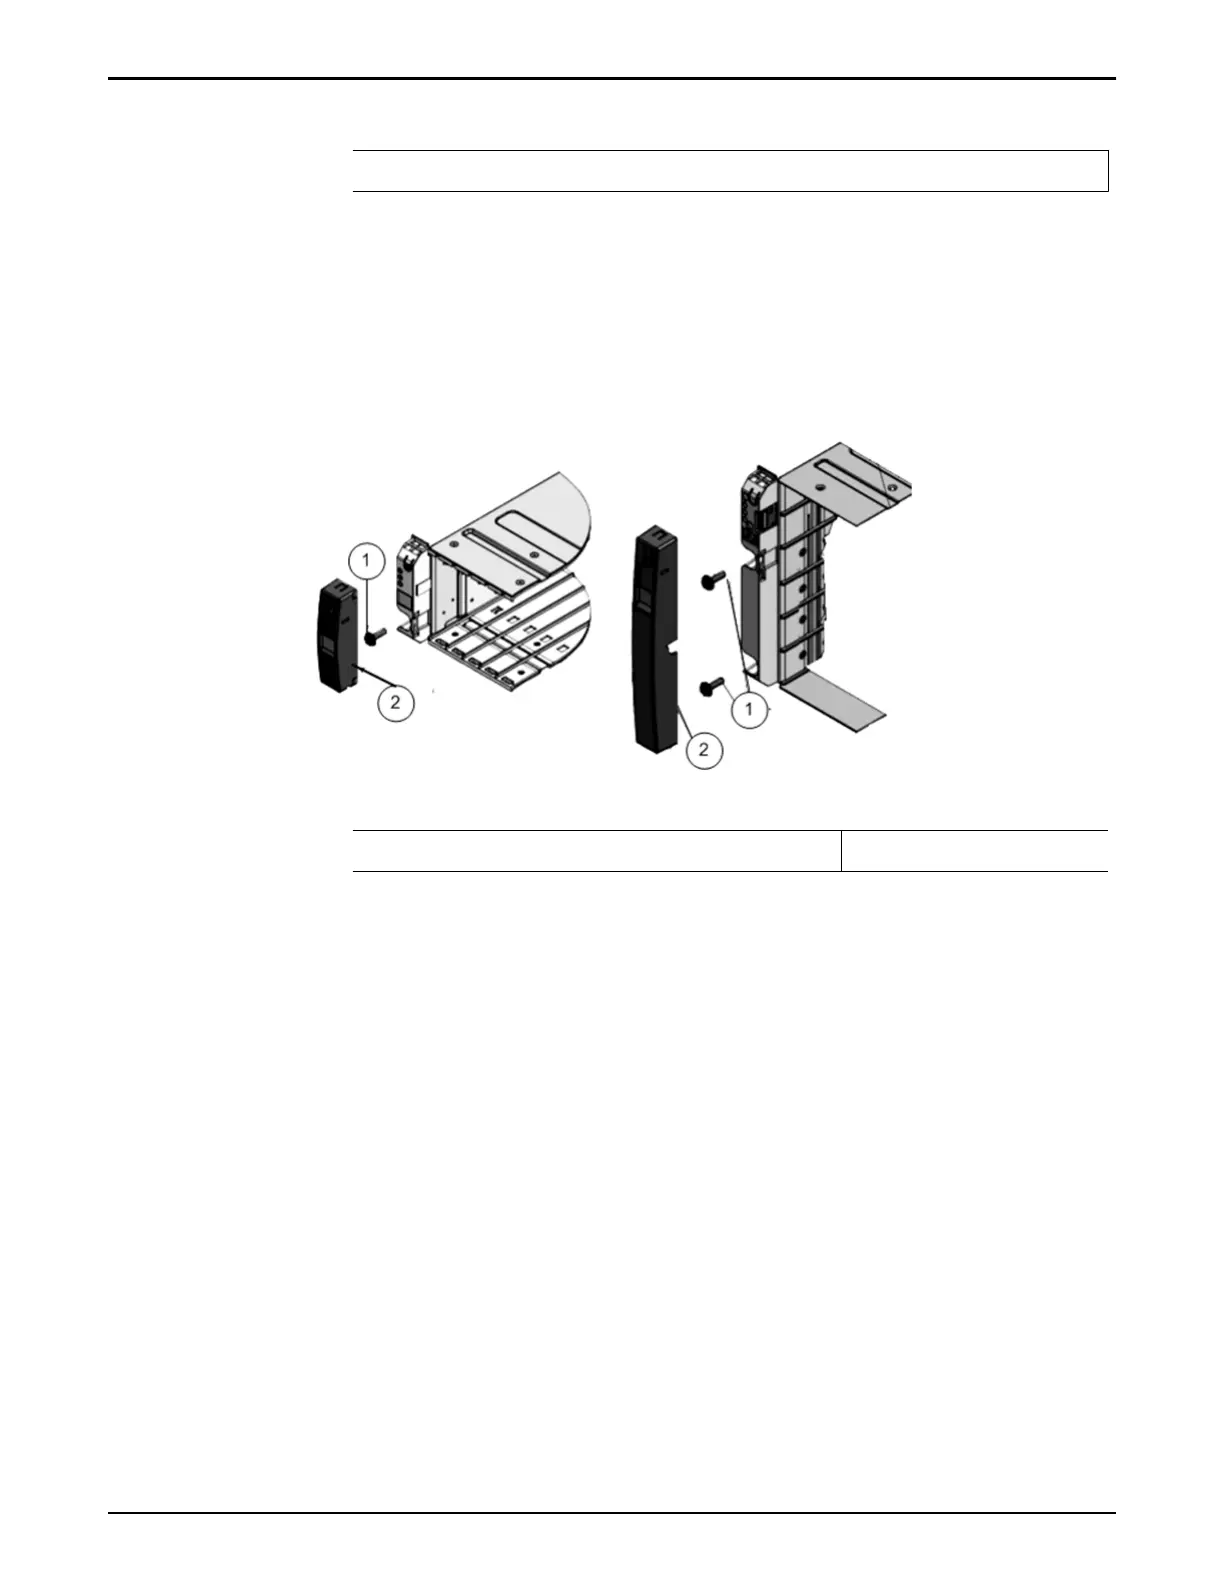
4 Remove the front-side caps on both sides of the Drive Enclosure and secure
a Phillips 13mm head hex ange screw
.
Note: The front-side cap on the right side of the Drive Enclosure contains
the RFID tag, which uniquely identies the Drive Enclosure. Take care not
to mix up the right front-side caps among Drive Enclosures.
Figure 49: Left front-side cap and Phillips 13mm head hex flange screw
Legend
1 Phillips 13mm head hex ange screw 2 Left front-side cap
After you have secured the Drive Enclosure to the rails, aach the front-
side caps to the Driv
e Enclosure.
5 Insert the I/O modules, the power cooling modules, and all of the drives
into their corresponding slots in the chassis.
Pilot Rails
Adding Pilots in the rack requires you to install rack rails in the rack and slide
rails on the chassis for each Pilot that you plan to add.
Pilot rail kits can be installed in the Sun trademark Rack 900, the Sun Rack 1000,
and third-party ANSI/EIA 310-D-1992 or IEC 60927 compliant racks with the
following types of holes:
•
Square (9.5 mm)
•
Round (M6 or 1/4-20 threaded only)
Caution: We recommend that you install each Pilot after you install the rail kit
before installing the next combination of rail kit and Pilot. Installing all of the rail
kits and then inserting the Pilots is not always possible because of potential space
Oracle FS1–2 Global Procedures
80