Tip: The Driv
e Enclosure sticker on the back of the chassis must be removed once
the Drive Enclosure is installed in the rack because the seven segment display is
now the preferred method to identify the Drive Enclosure.
Tip: The chassis ID in the Drive Enclosure identication display always matches
the ID shown in the GUI. Drive Enclosures are identied by the serial number
and the World Wide Name (WWN). Sometimes, the physical order in which the
Drive Enclosures are stacked and cabled in might dier from the cabling order
recommended in this document. If the Drive Enclosures appear out of order (not,
1 through 30 in sequence boom up), then the customer can change it through
the GUI. But the GUI and the identication display on the chassis must always
match.
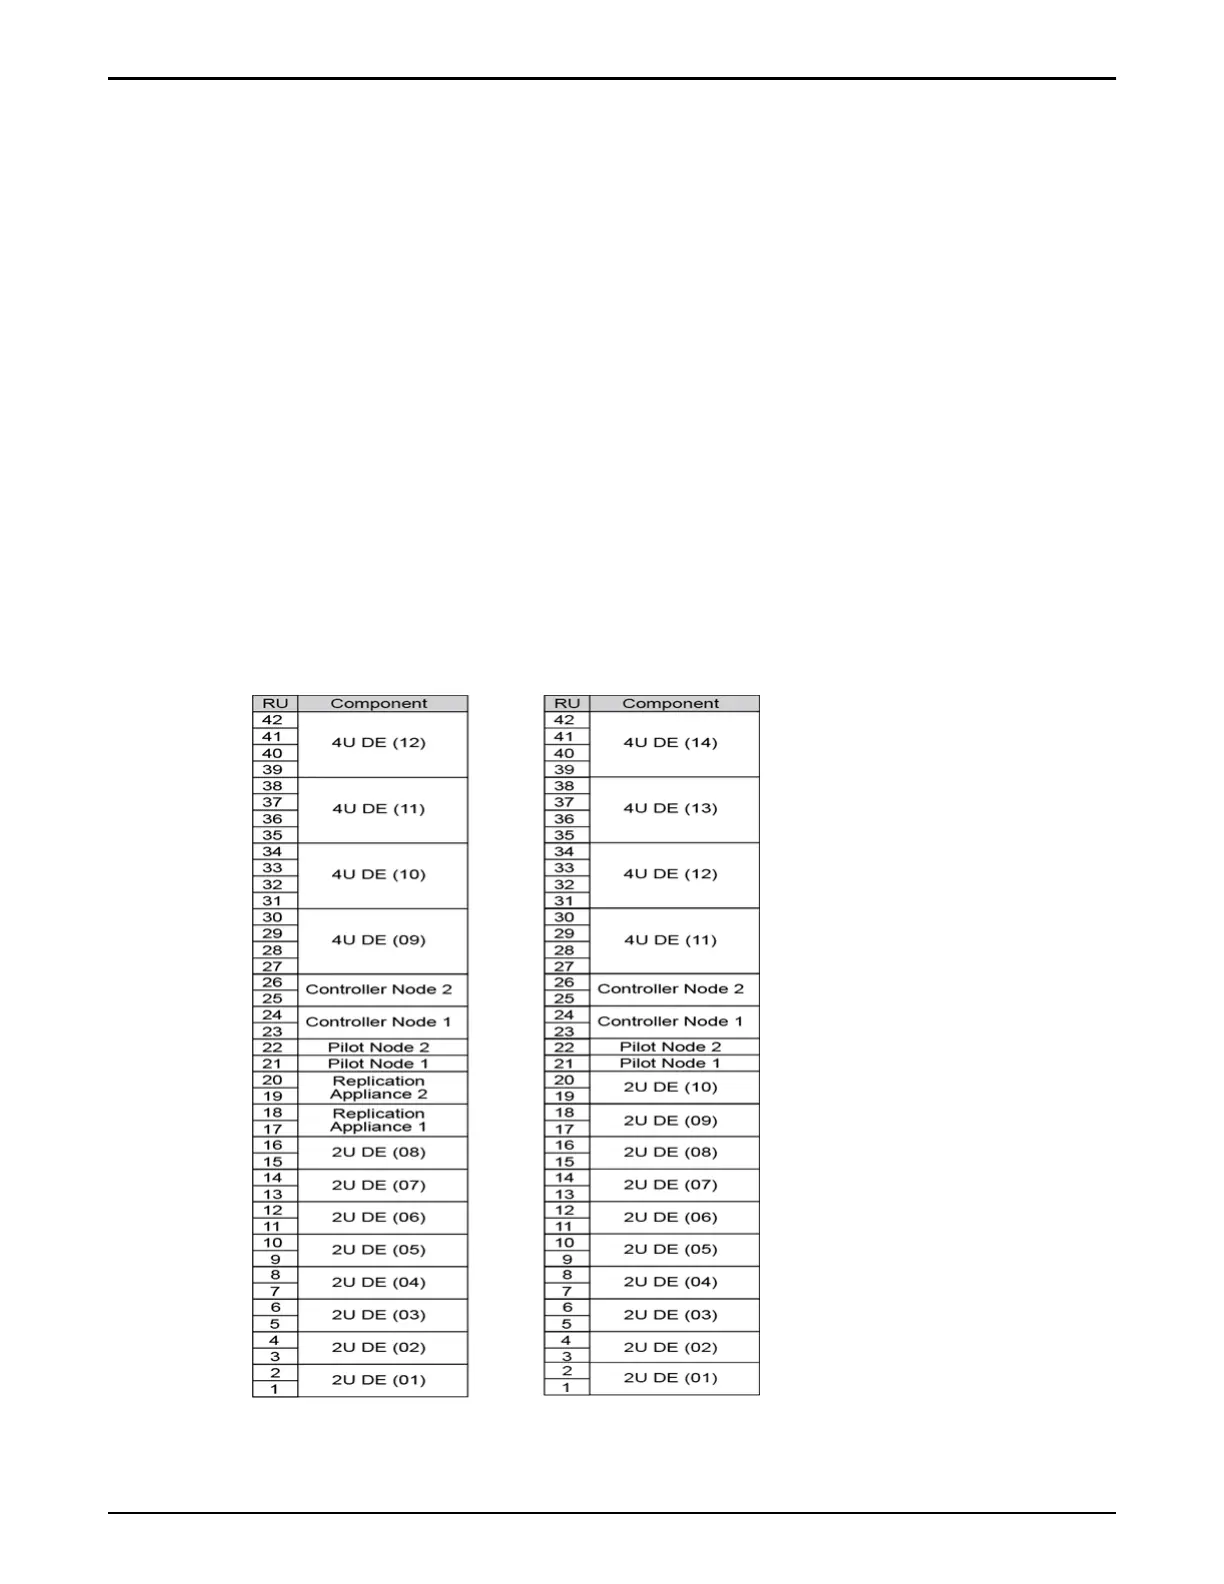
The Pilots, Controllers, and the Replication Engines must also be numbered
sequentially from the boom to the top of the rack. Refer to the following
example for more information on component numbering of the rack-ready
Oracle FS Systems.
The chassis ID numbers on the Controllers can also be manually changed from
the GUI.
Figure 10: Component numbering in Oracle FS Systems
Oracle FS1–2 Global Procedures
42