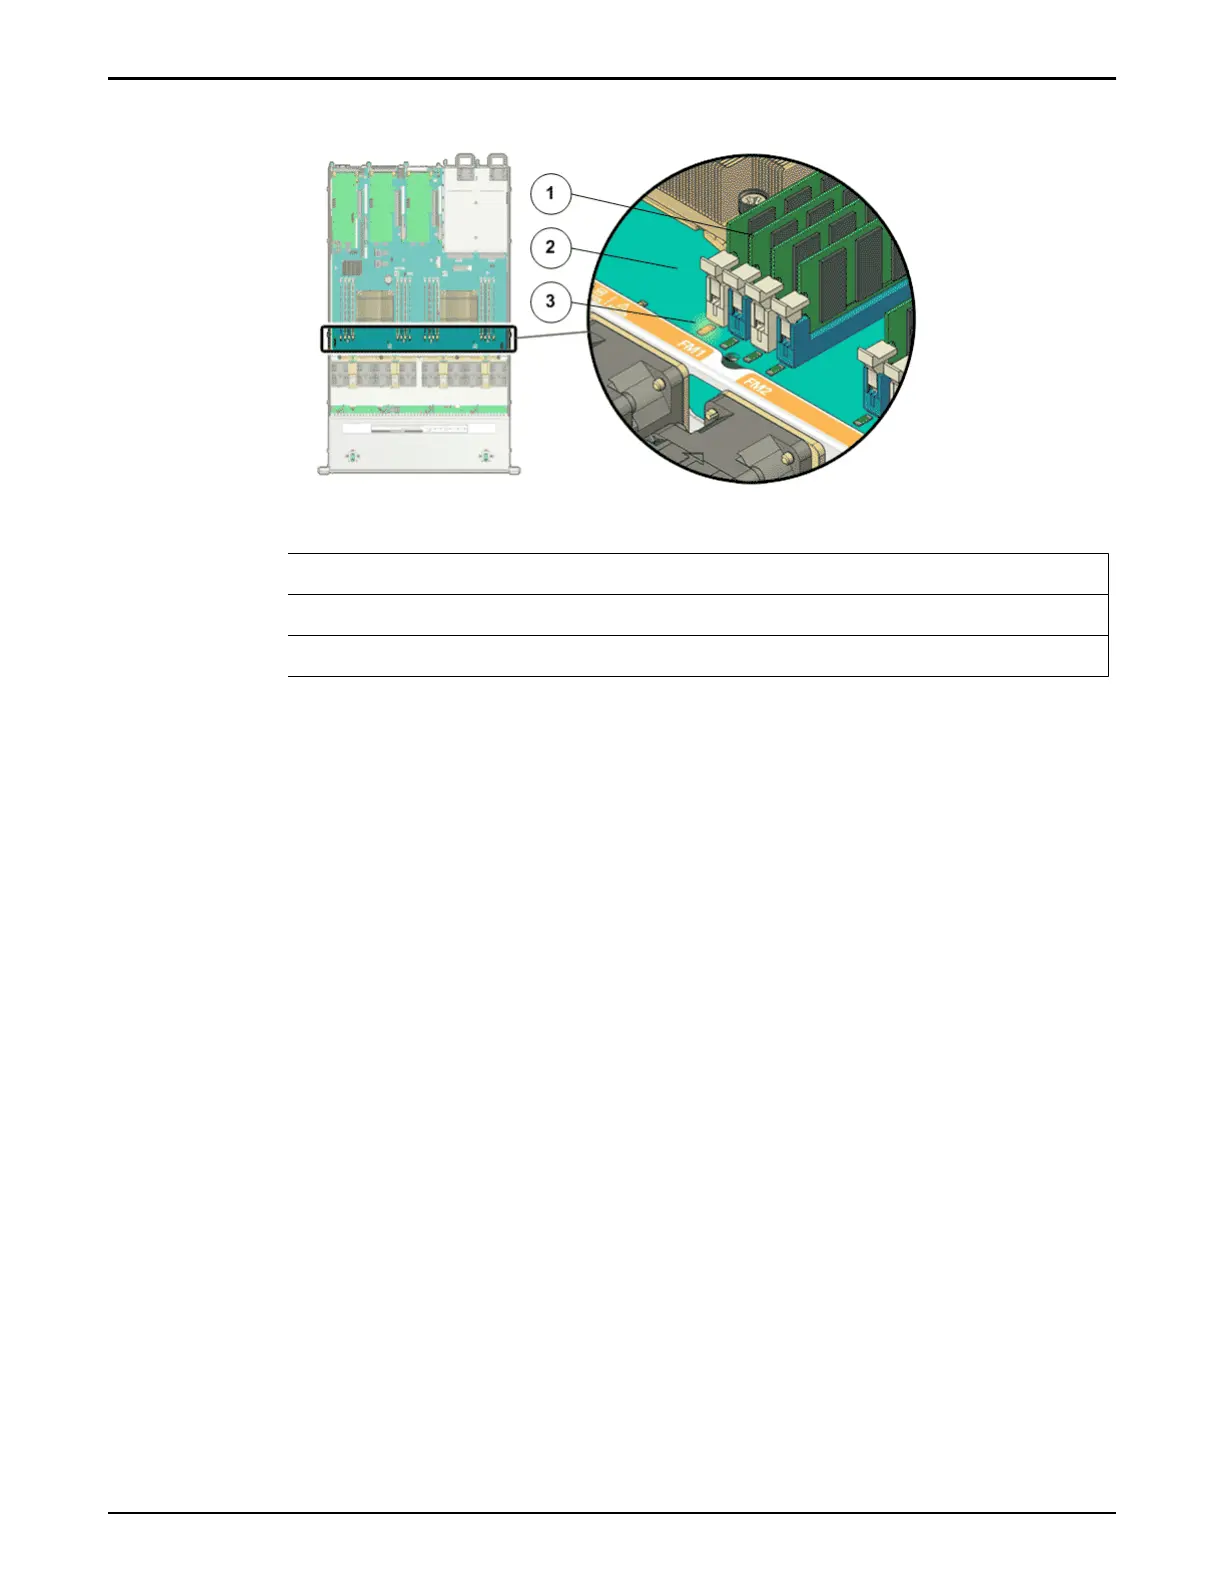
Figure 186: Location of the DIMMs on the Pilot motherboard
Legend
1 DIMMs
2 Motherboard
3 DIMM LED
Note: The illustration displays multiple DIMMs, but only tw
o DIMMs are
populated on the Pilot.
Note: If a DIMM is faulty, pressing the Fault Remind buon on the motherboard
signals the service processor to light the fault LEDs associated with the faulted
DIMMs.
Note: The DIMMs can be accessed only after removing the cover over the Pilot
chassis.
Note: To replace a DIMM, you do not need to remove the Pilot from the rack but
extend it along the Pilot rails using the cable management arm (CMA).
Procedure Overview
1 Prepare a Pilot for Component Replacement
2 Slide Pilot to Service Position
3 Power O the Pilot
4 Open Pilot Fan Door
5 Open Pilot Top Cover
6 Remove a Pilot DIMM
7 Insert a Pilot DIMM
8 Close Pilot Top Cover
9 Close Pilot Fan Door
10 Slide Pilot to Rack Position
Pilot Replacement Procedures
222