Note: Nev
er leave a DIMM slot unpopulated. Insert llers into empty slots
to ensure proper air ow inside the Controller.
Lower the Drive Compartment
1 Rotate the drive compartment and backplane back into position inside the
Controller and ensure that the alignment pins engage.
Note: To conrm that the backplane is locked into position, listen for an
audible click or feel the backplane engage with the Controller.
2 Secure the backplane inside the Controller by inserting the four Phillips
Number 2 thumb screws on the four sides of the backplane and tightening
them using a Phillips Number 2 screwdriver.
3 Reconnect all the cables that had been previously disconnected from the
backplane.
Cables that must be reconnected include:
•
SATA or drive cable
•
NV-DIMM cable
•
Motherboard to HDD backplane cable
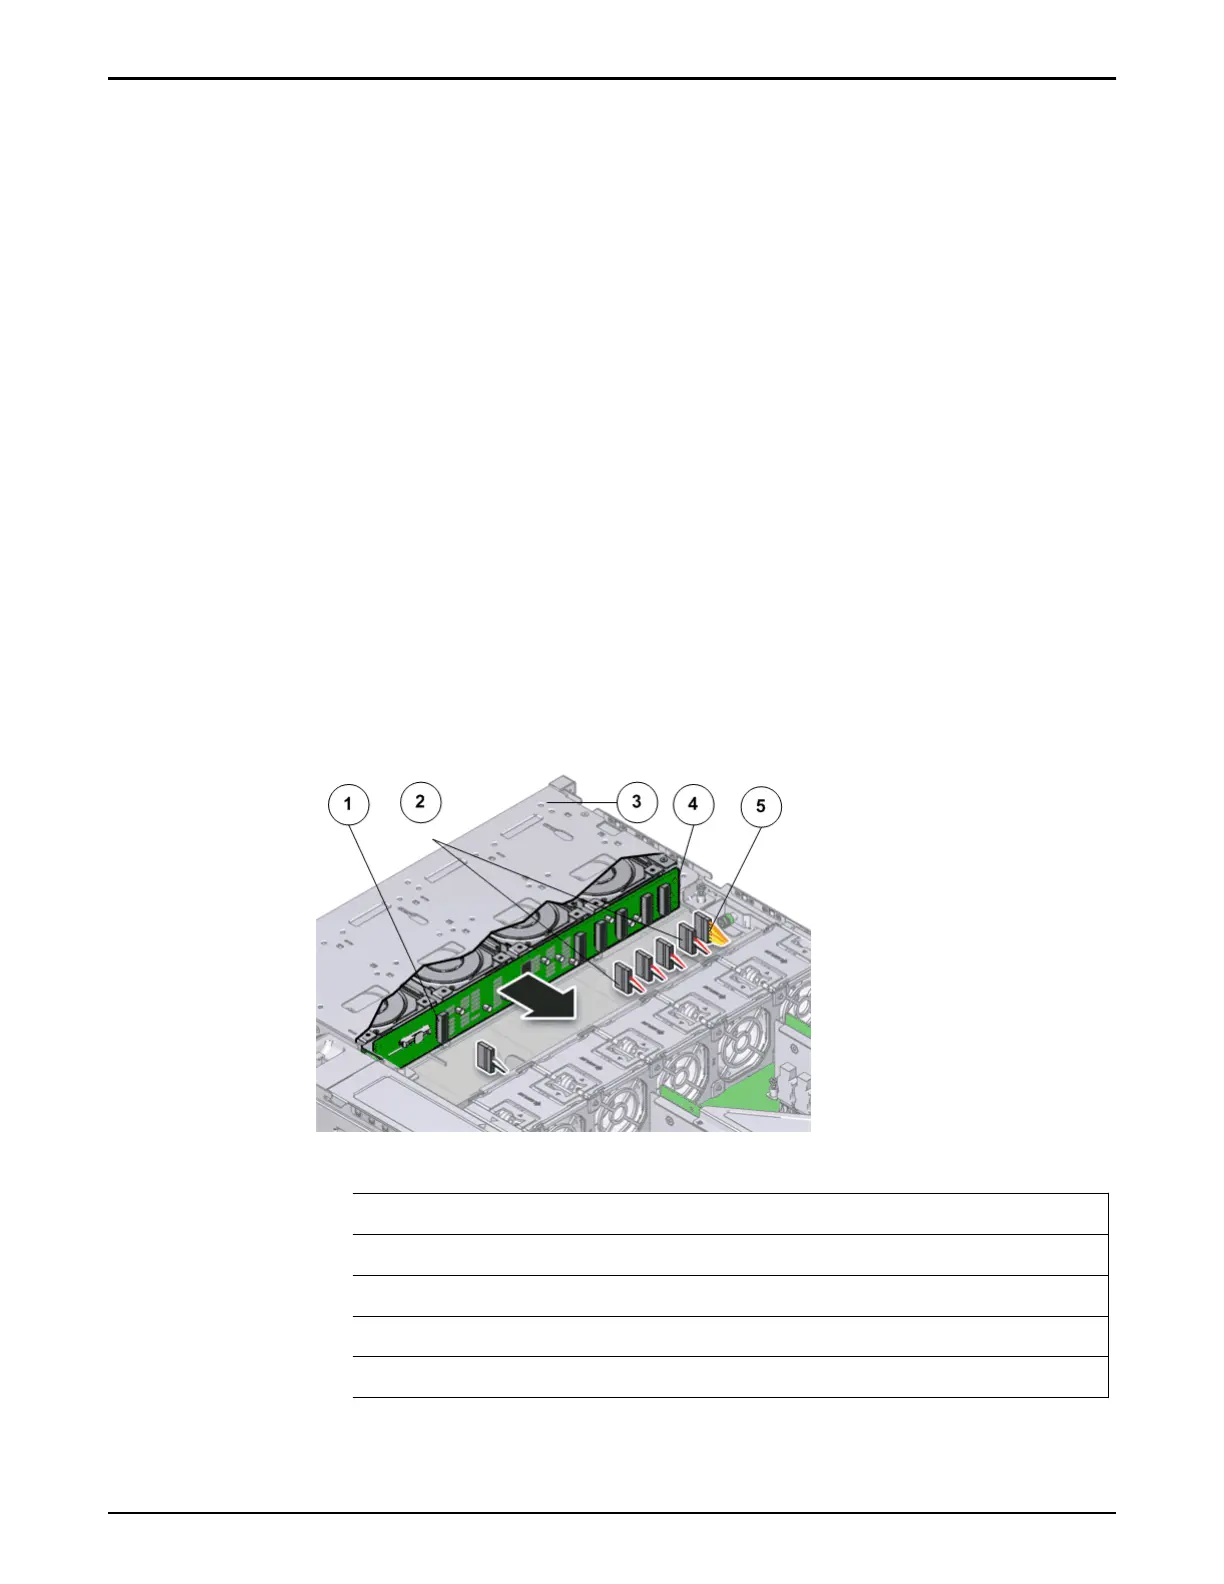
Figure 117: Reconnect cables to the backplane
Legend
1 SATA or drive cable
2 NV-DIMM cable
3 Drive compartment
4 Backplane boards
5 Motherboard to HDD backplane cable
Controller Replacement Procedures
149