Note: Place the component on an antistatic mat if it must be set aside for
any reason.
2
Transfer the internal bracket from the faulted SAS HBA to the replacement
SAS HBA.
Note: The new SAS HBA is not shipped with an internal bracket, which is
why the bracket must be transferred from the faulted SAS HBA to the
replacement HBA.
3 Orient the SAS HBA so that the brackets of the HBA align with the
alignment pin in the PCIe slot of the riser.
Important: Hold the SAS HBA by the edges. Do not touch the metal
contacts on the boom of the card.
4 Push the connectors on the edge of the SAS HBA into the PCIe slot by
pushing rmly to seat the card and apply rm pressure on each end of the
SAS HBA alternately until it clicks into place in the riser socket.
Caution: Support the SAS HBA and the riser as necessary to prevent
excessive exure. Otherwise, the SAS HBA or the riser card might break.
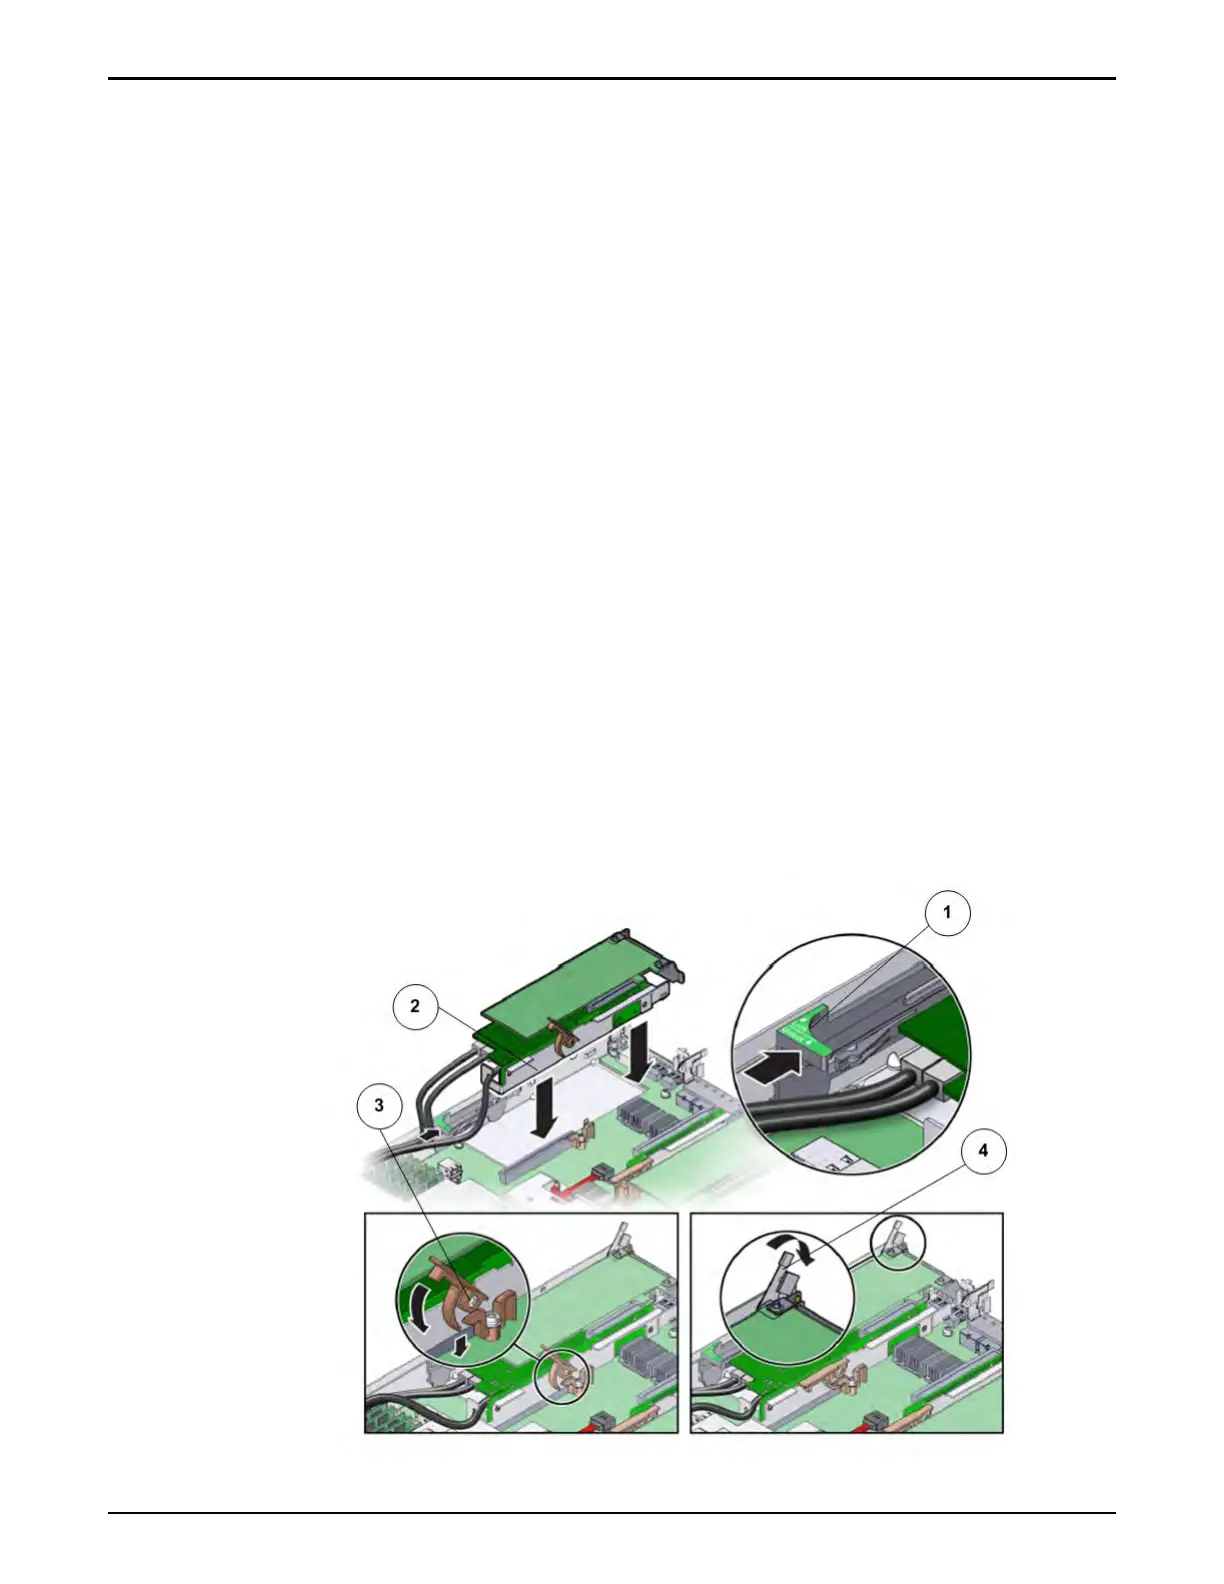
5 Guide the SAS cables that connects to the disk backplane through the
chassis mid-wall towards the front of the Pilot and reconnect the SAS cable
bundle into the into the internal HBA inside the riser.
6 Insert the riser into the PCIe slot on the Pilot motherboard and secure the
riser in position using the three locking mechanisms.
Figure 163: Pilot riser insertion
Pilot Replacement Procedures
194