Insert a Power Supply
1
Unpack the component from its shipping carton.
Note: Place the component on an antistatic mat if it must be set aside for
any reason.
2 Align the replacement power supply with the empty power supply
compartment.
3 Slide the power supply into the bay until it is fully seated.
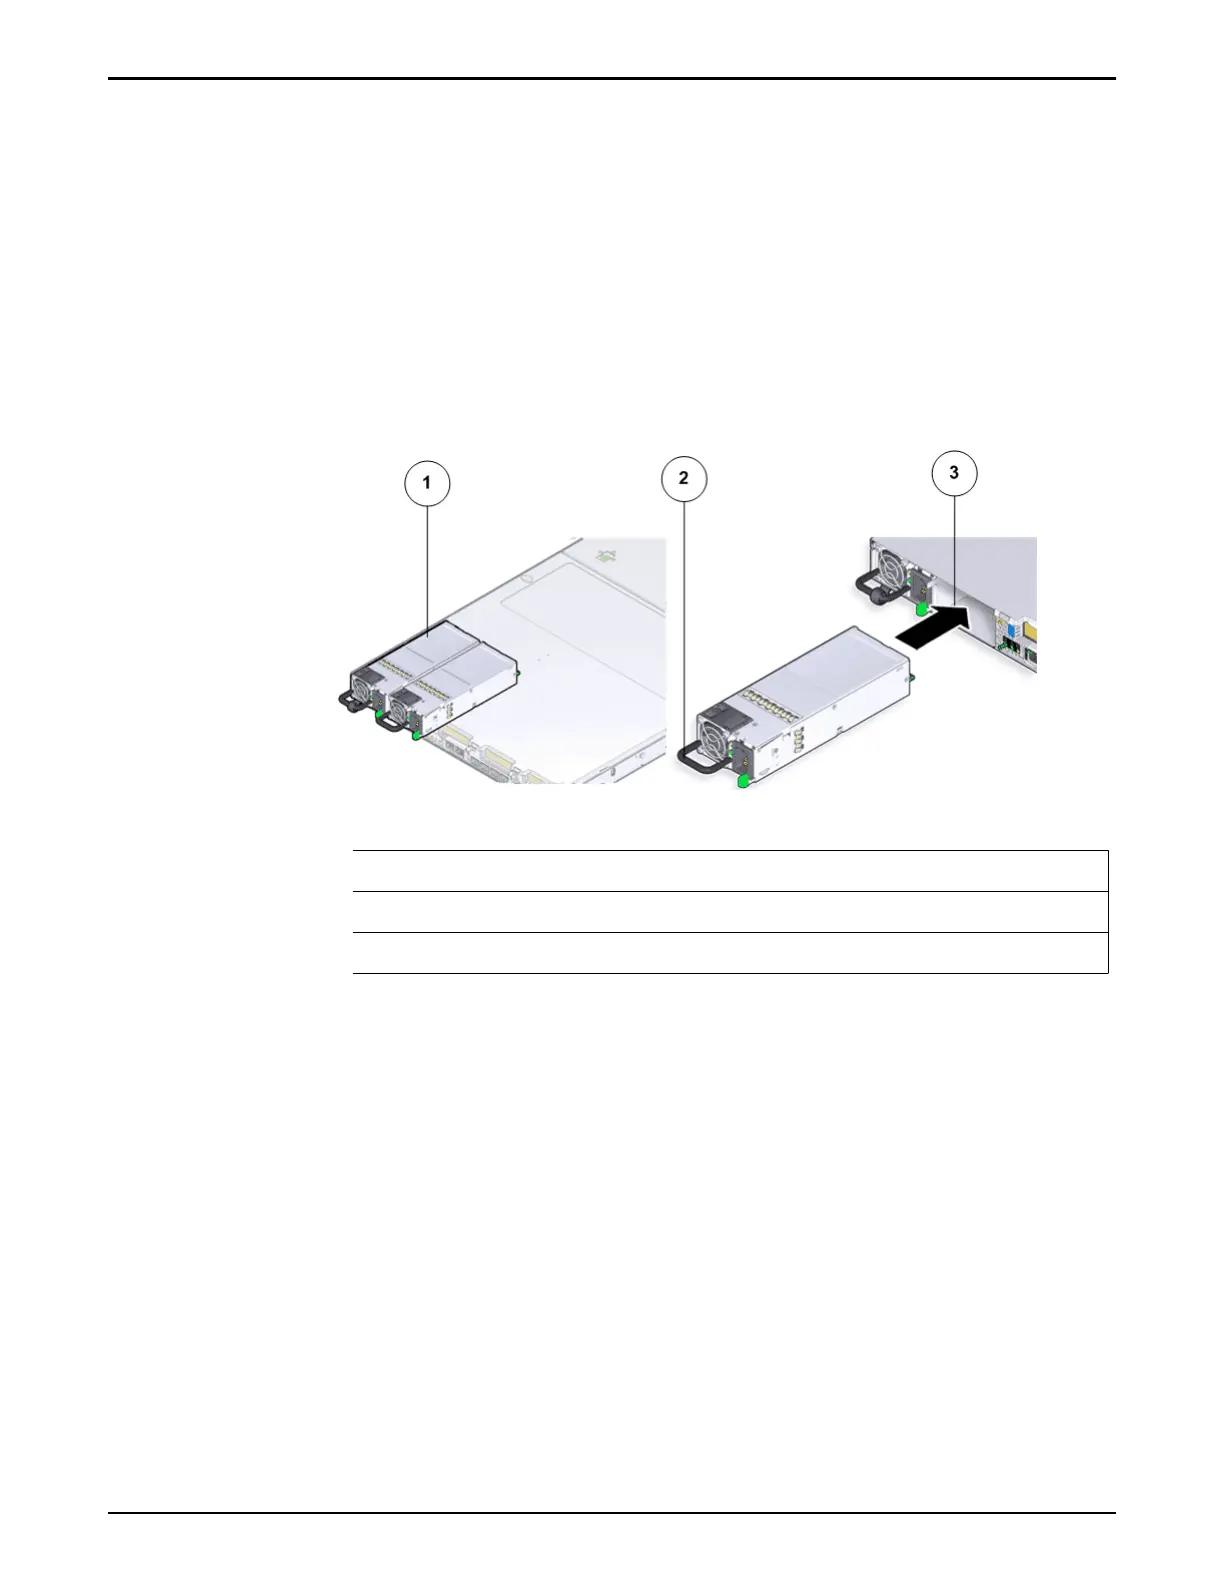
Figure 177: Power supply insertion
Legend
1 Power supplies (PS0 and PS1)
2 Power supply handle
3 Power supply compartment
Note: Listen for an audible click or feel the pow
er supply engage to
conrm that the power supply is properly seated.
4 Re-connect the power cord into the replacement power supply.
5 Aach the power cord velcro to the power supply.
Note: If you pulled the Pilot out of the rack to make it easier to remove the
power supply, push the Pilot into the rack until the slide-rail locks at the
front of the Pilot engage the slide-rail assemblies.
Verify Power Supply Replacement on a Pilot
1 Return to Guided Maintenance and click Finish.
Guided Maintenance closes and the GUI displays the Pilot Overview page.
2 From the Pilot Overview page, review the status of the Pilot.
A status of Normal requires no action.
Pilot Replacement Procedures
212