screw hole on the rail, then the Drive Enclosure is not seated. You
must reinsert the Driv
e Enclosure.
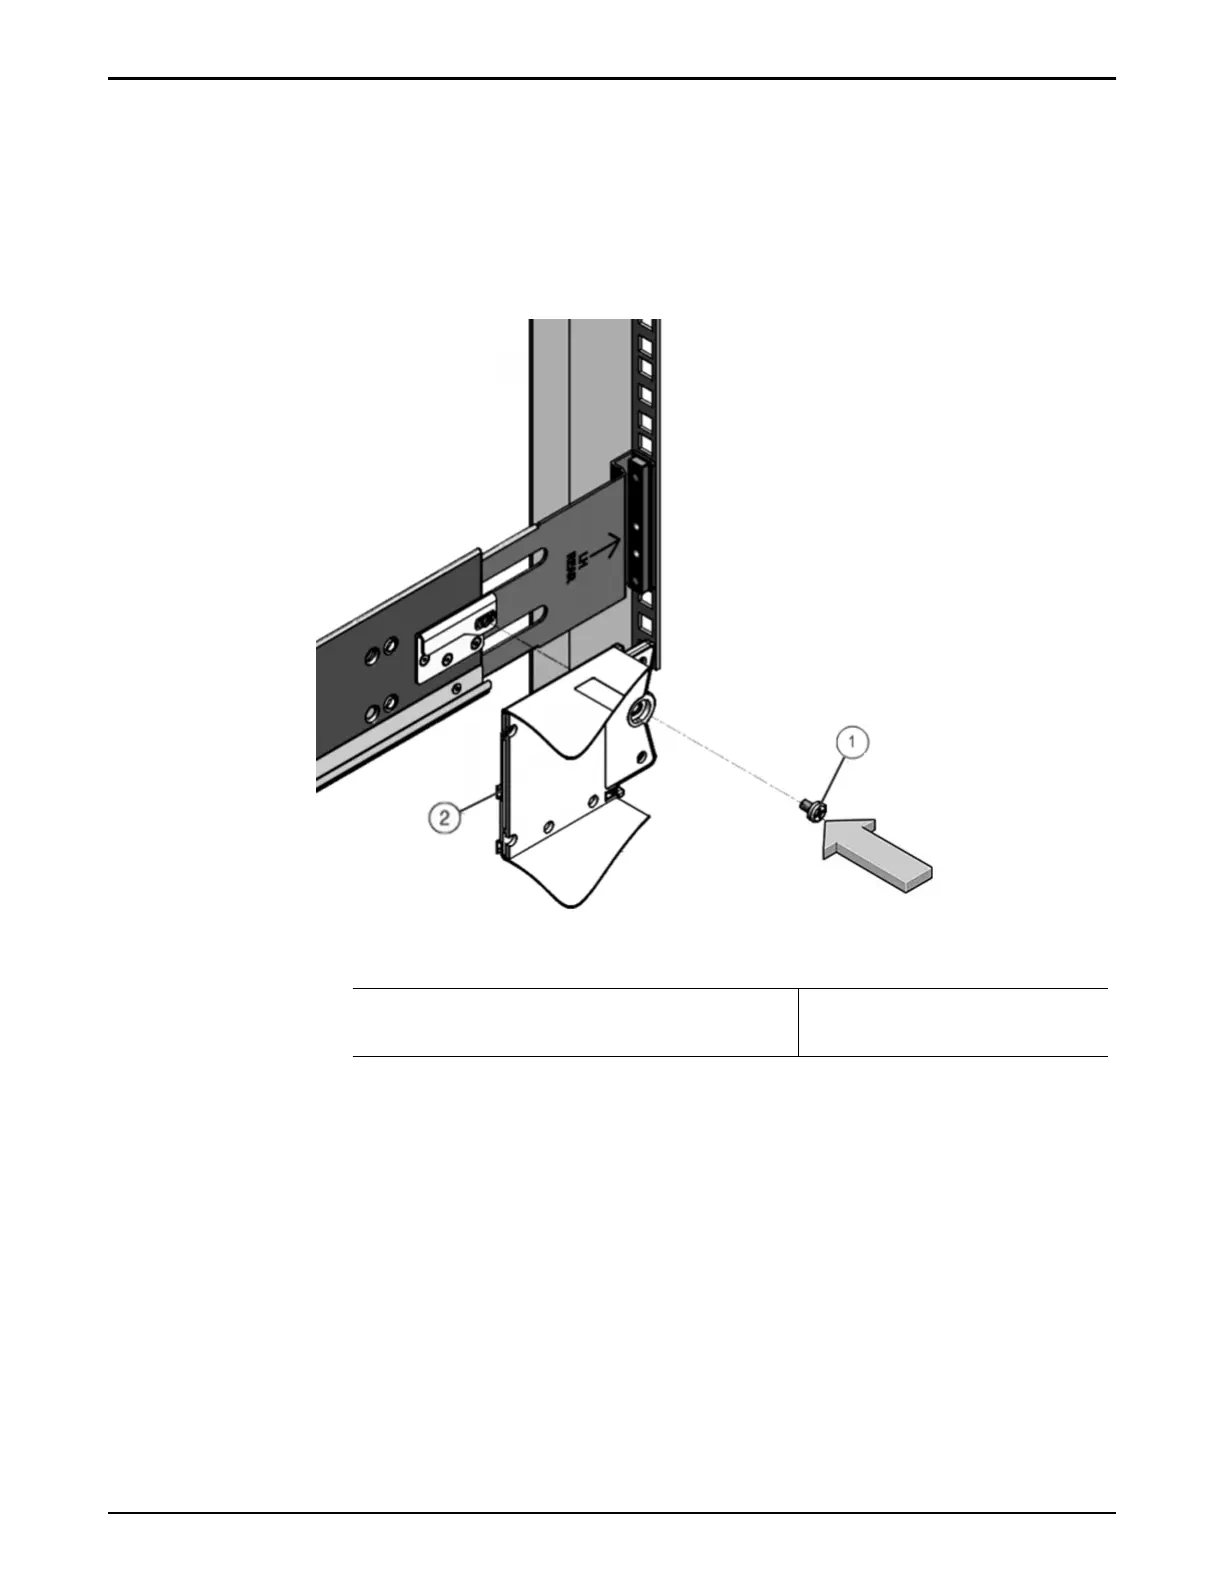
5 On both sides of the Drive Enclosure, insert a Phillips Number 2 pan head
screw with patch lock through the hole at the back of the Drive Enclosure
and secure it into the screw hole on the rail.
Figure 45: Back of the Drive Enclosure and Rail secured
Legend
1 Phillips Number 2 pan head screw with
patch lock
2 Back of the Drive Enclosure
Important: If y
ou insert the screw through the hole at the back of the Drive
Enclosure and the screw does not align with the screw hole on the rail,
then the Drive Enclosure is not seated. You must reinstall the Drive
Enclosure.
6 Remove the front-side caps on both sides of the Drive Enclosure and secure
a Phillips 13mm head hex ange screw.
Note: The front-side cap on the right side of the Drive Enclosure contains
the RFID tag, which uniquely identies the Drive Enclosure. Take care not
to mix up the right front-side caps among Drive Enclosures.
Oracle FS1–2 Global Procedures
77