After replacing the I/O module, you will be required to restore the SAS
interface connectors to the same conguration as prior to replacement.
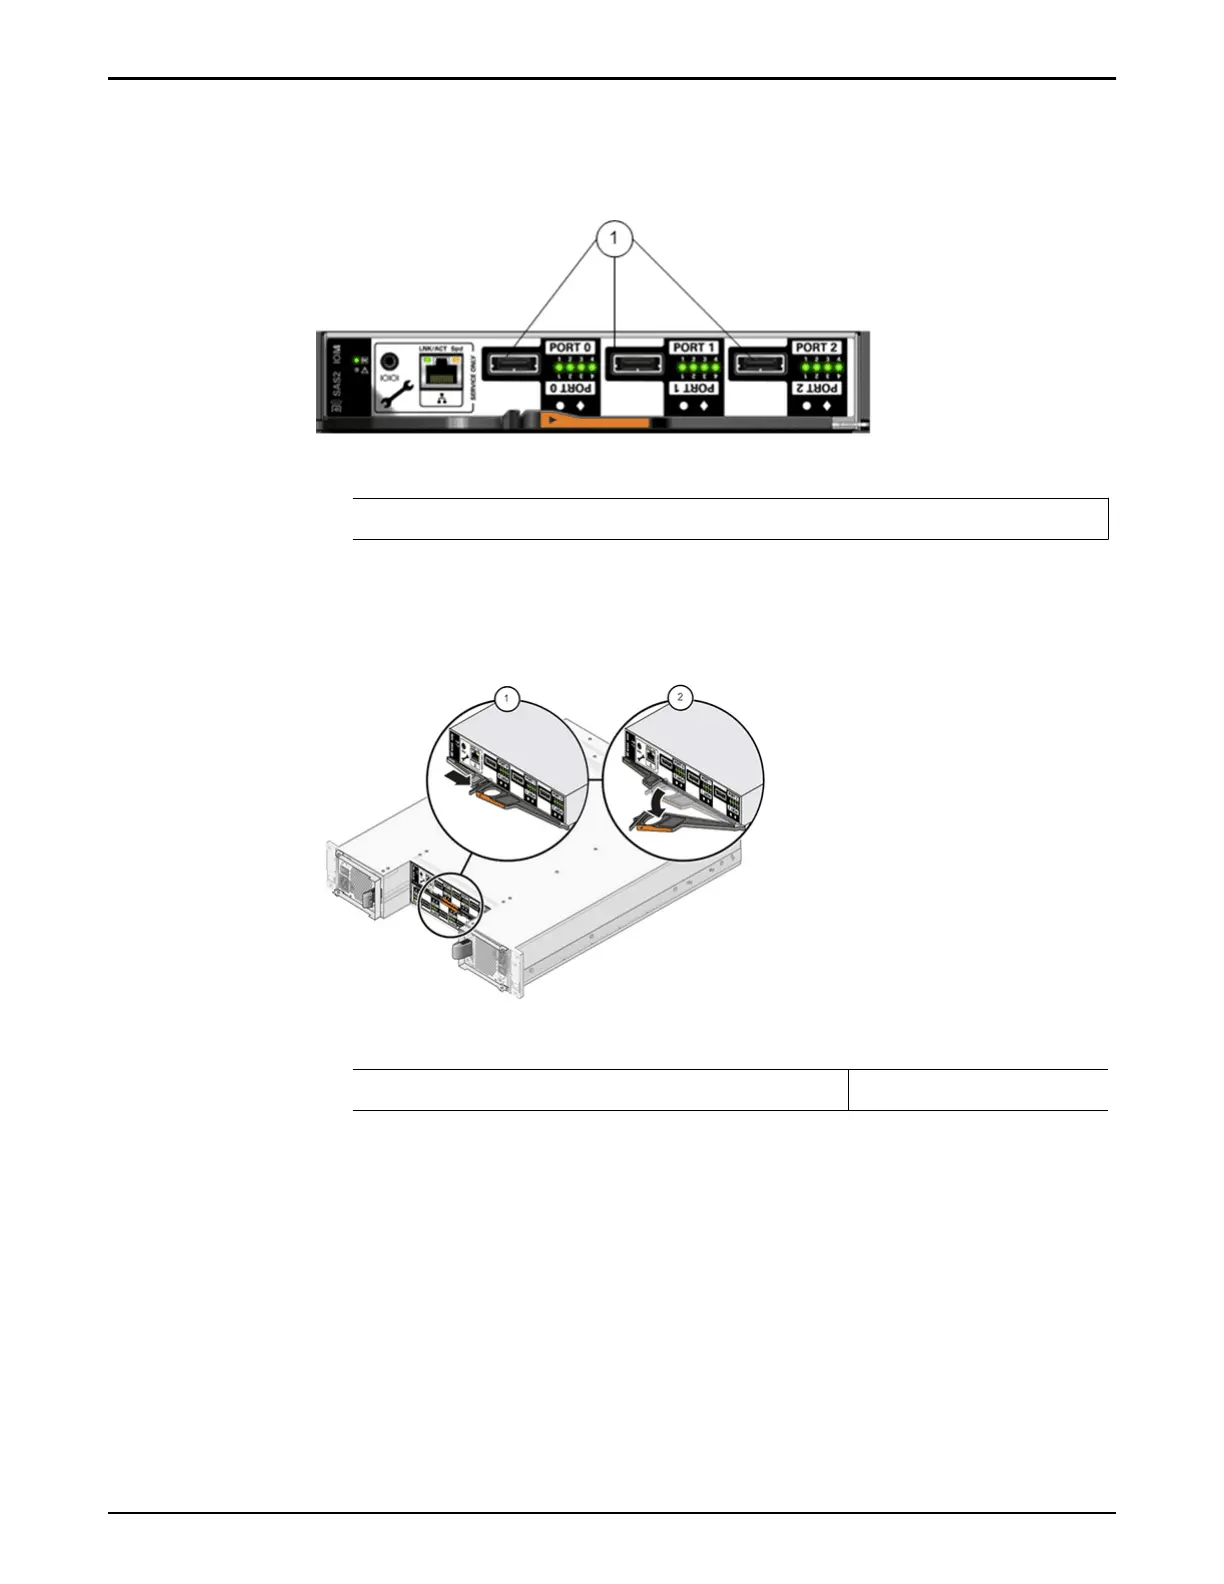
Figure 134: I/O module SAS connector ports
Legend
1 SAS connector ports
2 Using y
our thumb and forenger, squeeze the release buon toward the
lever hole to release the lever.
Figure 135: Remove the I/O module
Legend
1 Release buon 2 Lever
3 Pull the lever and remove the I/O module from the Drive Enclosure.
Note: Be careful not to damage the connector pins.
Insert an I/O Module
1
With the lever of the I/O module in the open position, slide the I/O module
into the Drive Enclosure chassis.
Note: Be careful not to damage the connector pins.
Drive Enclosure Replacement Procedures
165