Chapter 8: INSTALLATION AND SETTING PROCEDURES (HARDWARE)
1. RM-200XF AND RM-200X MICROPHONES
8-13
1.6. RM-200X Expansion With the Addition of the RM-210 (Installed on a Flat Surface)
When adding an RM-210 Remote Microphone Extension to expand the RM-200X, use the RM-210's Extension
cable and included Linkage Bracket to link the 2 microphones.
[Necessary hardware]
The parts required to add the RM-210 are included with the unit.
Linkage Bracket A ................................ 2
Linkage Bracket B ................................ 1
Screw ................................................. 12
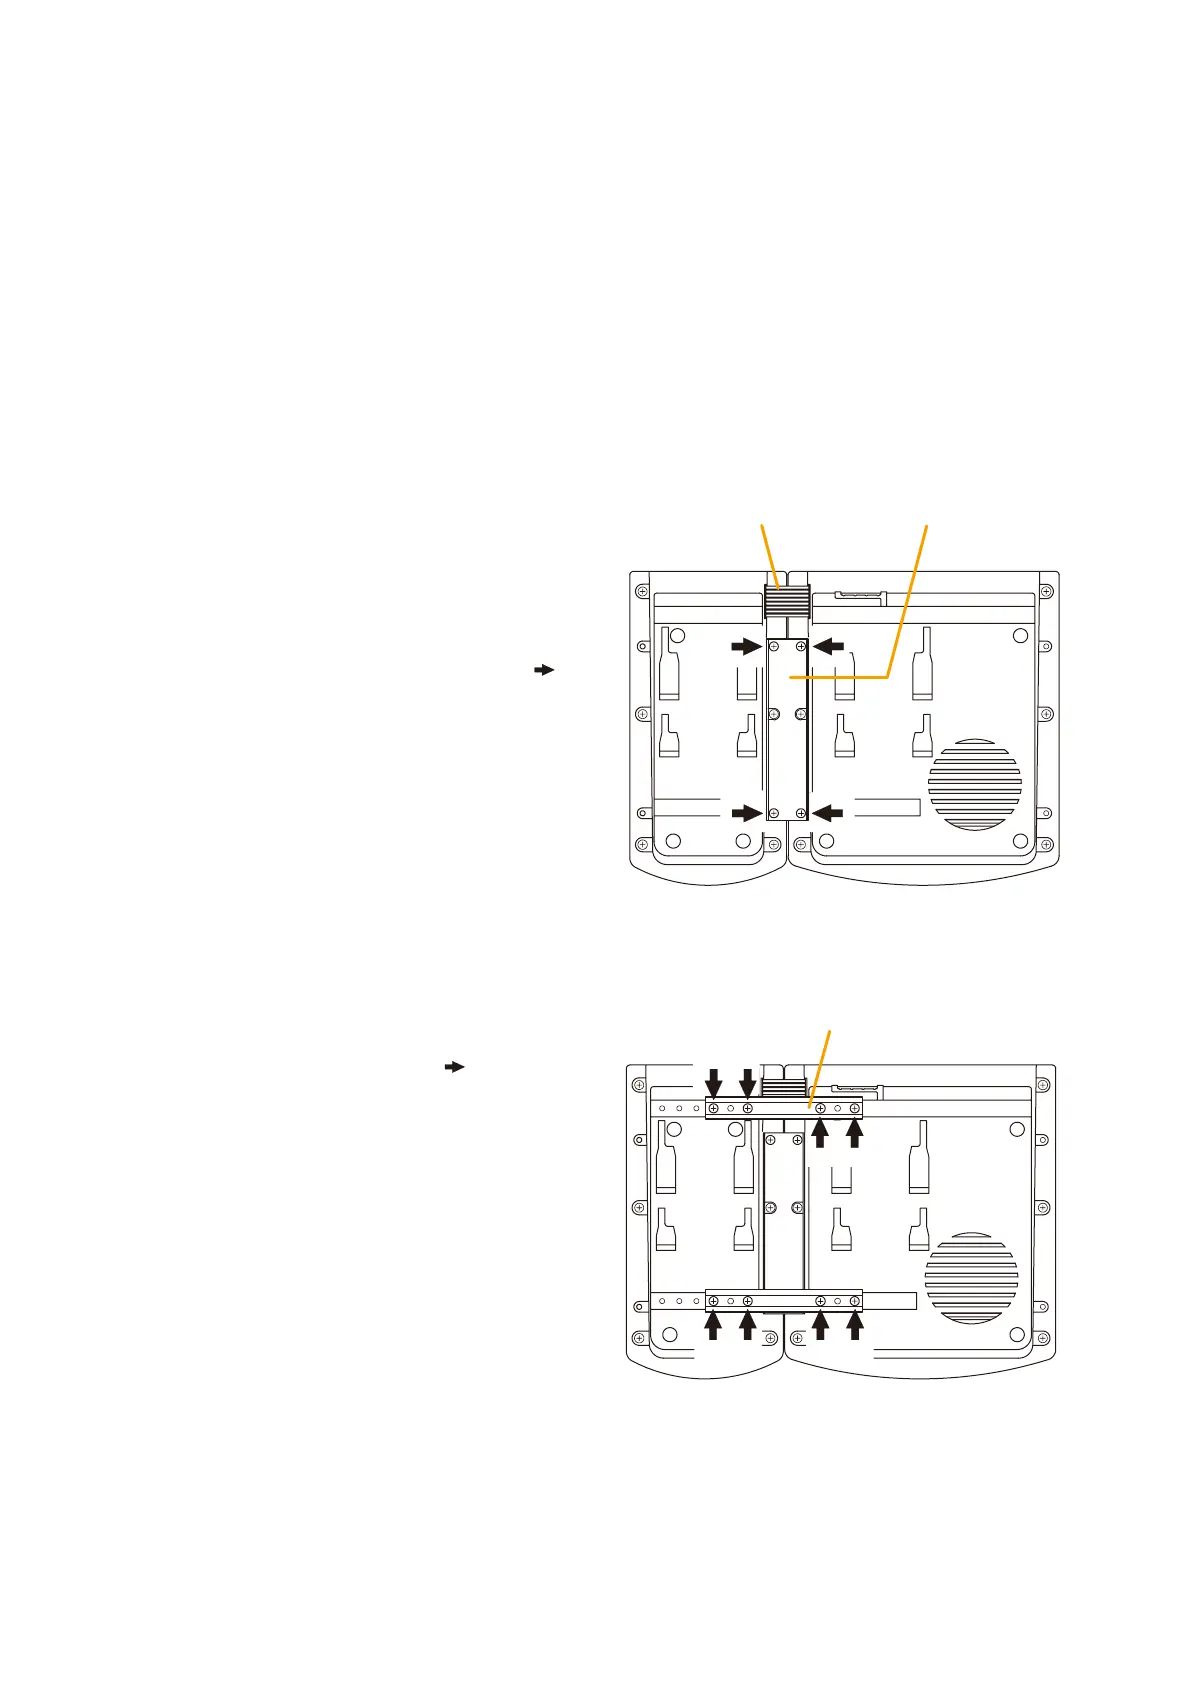
Step 1. Turn over both the RM-200X and the RM-210, and keep them in close contact with each other.
Extension cable
RM-210
RM-200X
Linkage Bracket B
[Bottom side]
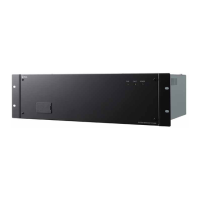
Linkage Bracket A
RM-210
RM-200X
[Bottom side]
Notes
• Because the Linkage Bracket A is provided with 2 spare screw holes, use them to link the 2 units if the
designated screw threaded holes are damaged.
• If incorrect or loose connection is found between both units, loosen all the bracket fixing screws to disassemble
the units and then link them again with the screws.
Step 2. Connect between both units using the
extension cable.
Step 3. Using 4 supplied screws (marked with [
]
in the gure) and Linkage Bracket B,
link both units together.
Step 4. Using 8 supplied screws ([ ] marking)
and 2 pieces of Linkage Bracket A,
fix both units securely.