Chapter 8: INSTALLATION AND SETTING PROCEDURES (HARDWARE)
1. RM-200XF AND RM-200X MICROPHONES
8-6
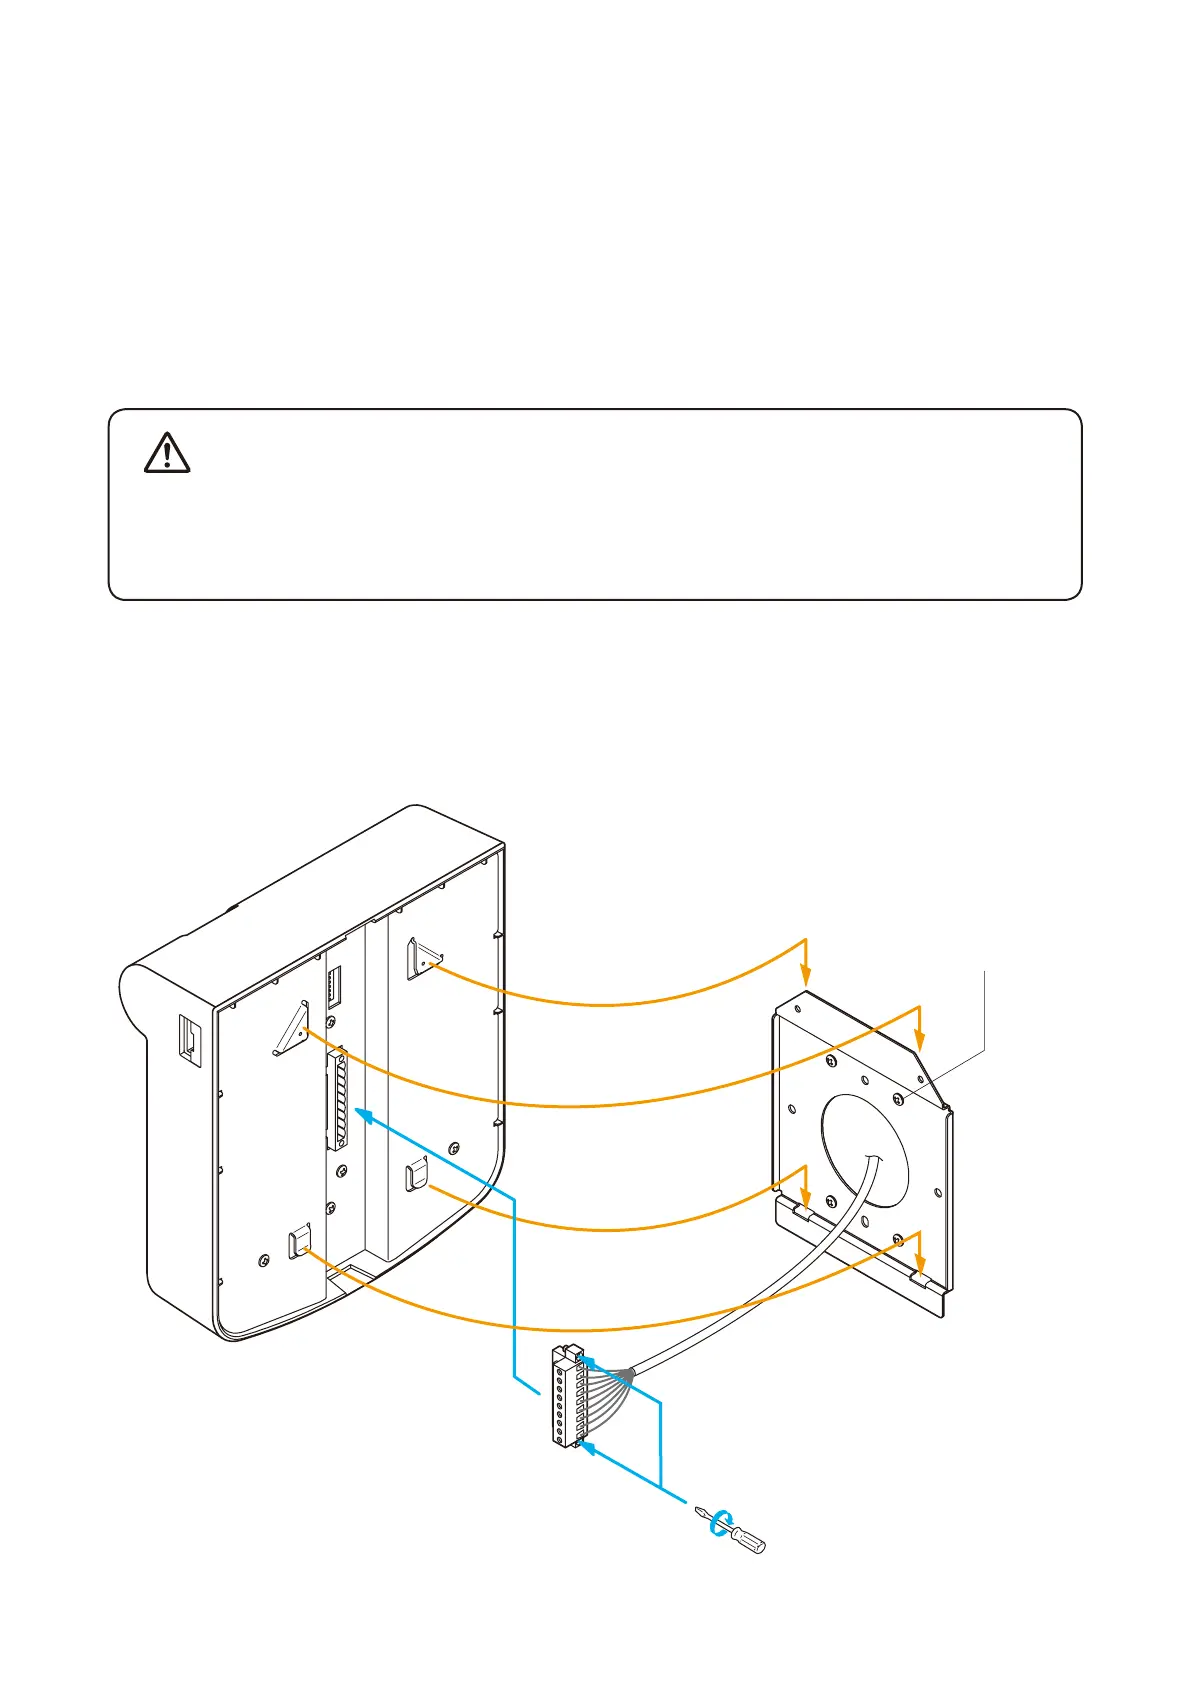
1.2. RM-200XF Wall Mounting
[Necessary mounting hardware]
The parts required for mounting the RM-200XF to a wall are included with the unit as accessories.
Wall mounting bracket .................. 1 (supplied with the RM-200XF)
Wall mounting screw .................... 2 (supplied with the RM-200XF)
Box mounting screw ..................... 2 (supplied with the RM-200XF)
Step 1. Attach the wall-mounting bracket to the wall.
EXTENSION
9P plug-in screw terminal
(supplied with the RM-200XF)
Wall mounting bracket
(supplied with the RM-200XF)
Wall mounting screw
(supplied with the RM-200XF)
RM-200XF
1
3
2
• Installtheunitonlyinalocationthatcanstructurallysupporttheweightoftheunitandthemounting
bracket. Doing otherwise may result in the unit falling down and causing personal injury and/or
property damage.
• Besuretouseatleast2screwswhenmountingthebrackettothewall.
Step 2. Wire the supplied 9P plug-in screw terminal, and plug it into the LINK terminal on the bottom surface of
th e RM -200XF.
Step 3. Hook the bottom of the RM-200XF onto the installed mounting bracket.
WARNING