Chapter 8: INSTALLATION AND SETTING PROCEDURES (HARDWARE)
2. VX-2000, VX-200XR, VX-200XI, AND EV-200
8-16
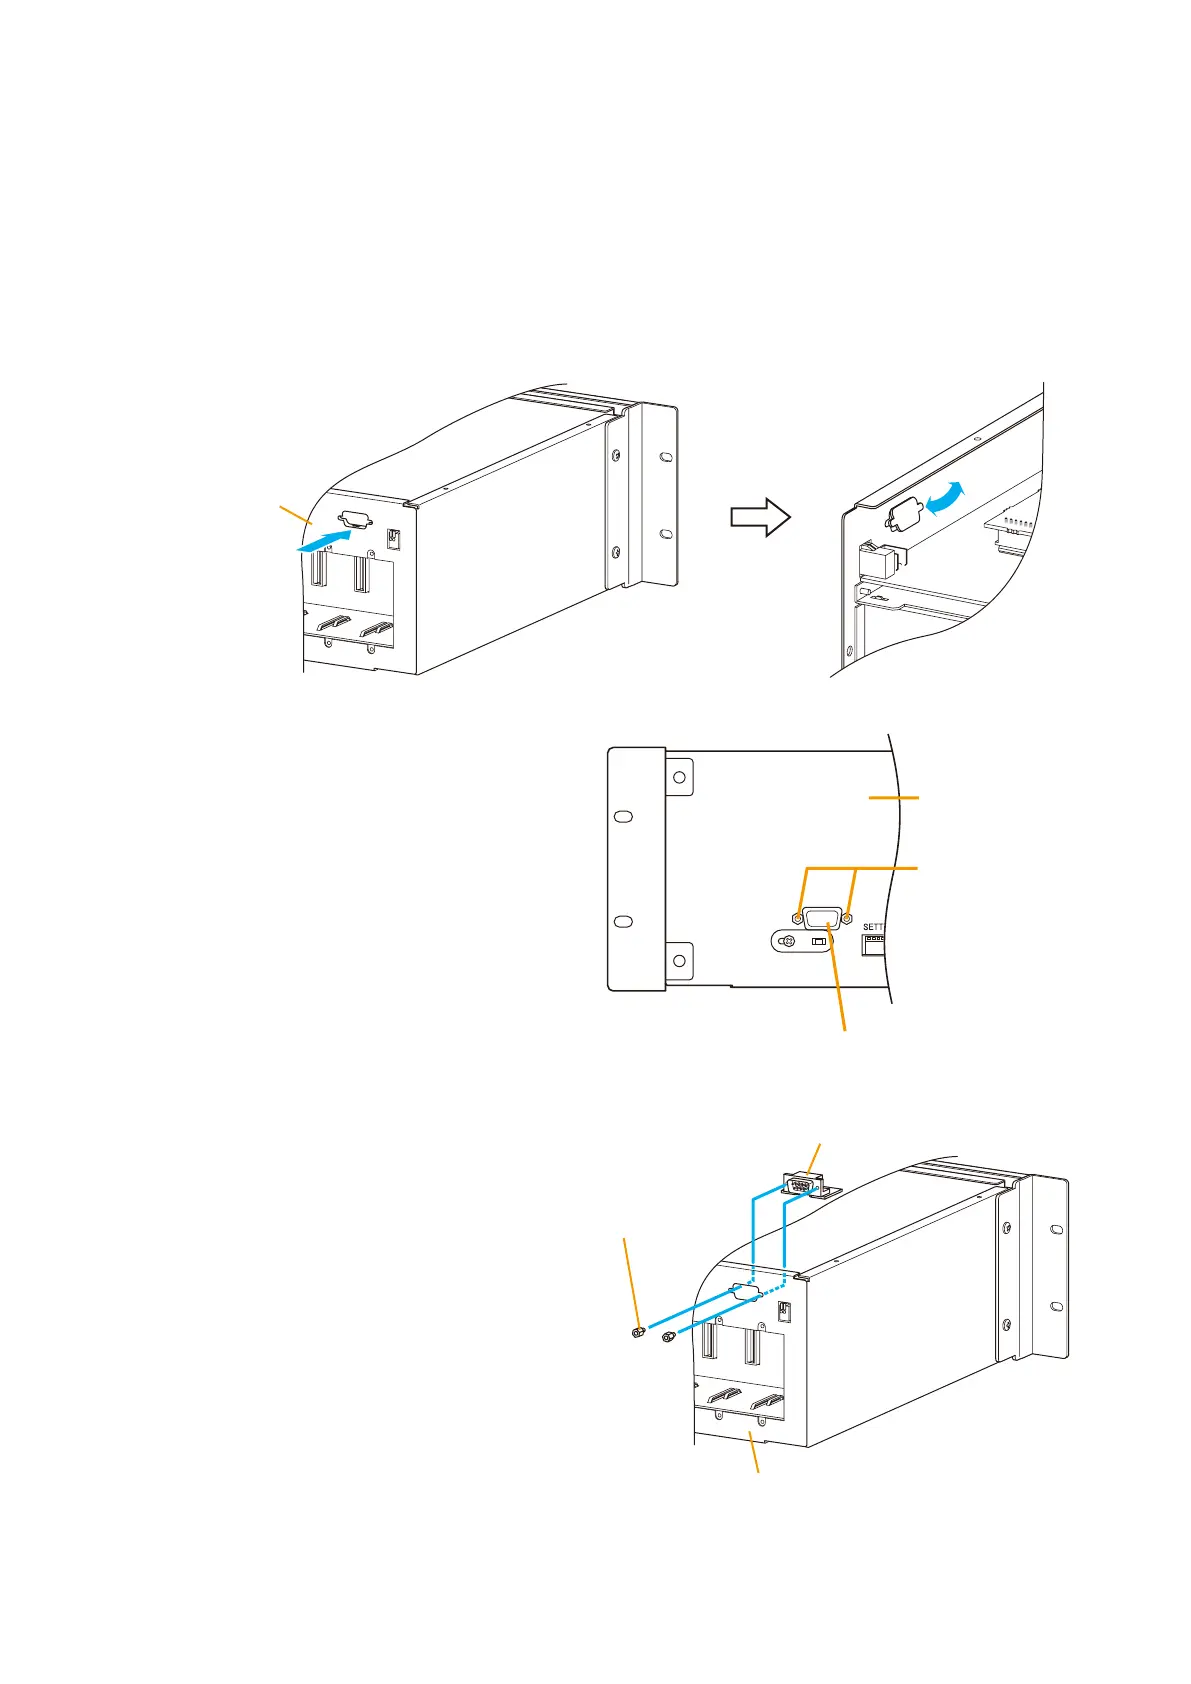
2.2. Changing the RS-232C Connector Location
The RS-232C connector located in the pocket on the VX-2000 System Manager front panel can be relocated
to the VX-2000's rear panel.
Step 1. Remove both the top and front panels.
Refer to
p. 8-15 "2.1. Removing the VX-2000's Top and Front Panels."
Step 2. Press on the blank panel over the rear-mounted RS-232C connector receptacle from the outside. Then,
wrench it off from the inside.
VX-2000
Rear panel
VX-2000
Hexagonal sleeves
(2 pieces)
RS-232C connector
Rear panel
RS-232C
Hexagonal sleeves
(2 pieces)
RS-232C connector
Panel chasis
Step 6. Replace both the top and front panels.
Step 5. Screw the RS-232C connector to the
rear panel using the hexagonal sleeves
removed in Step 3.
Step 3. Unscrew the hexagonal sleeves (2 pieces)
holding the RS-232C connector, and detach
the RS-232C connector (with circuit board
attached) from the panel chassis.
Step 4. Cut a cable tie with nippers.
Note
Take care not to pinch the RS-232C cable between the top panel and chassis.