Automatic Zero Setting Test
Product Reference Guide
77
Automatic Zero Setting Test
This test verifies that the scanner/scale automatic zero setting mechanism is
operating correctly.
Preparing the Scanner/Scale for Calibration
1. Assure that the scanner/scale is stable.
2. Power up the scanner/scale.
3. Allow the unit to reach temperature equilibrium for at least one hour. If the
scanner/scale is already at room temperature, allow at least 15 minutes to
acclimate.
4. Remove all weight from the weighing surface and ensure that there are no
obstructions in the debris chutes of the scanner/scale.
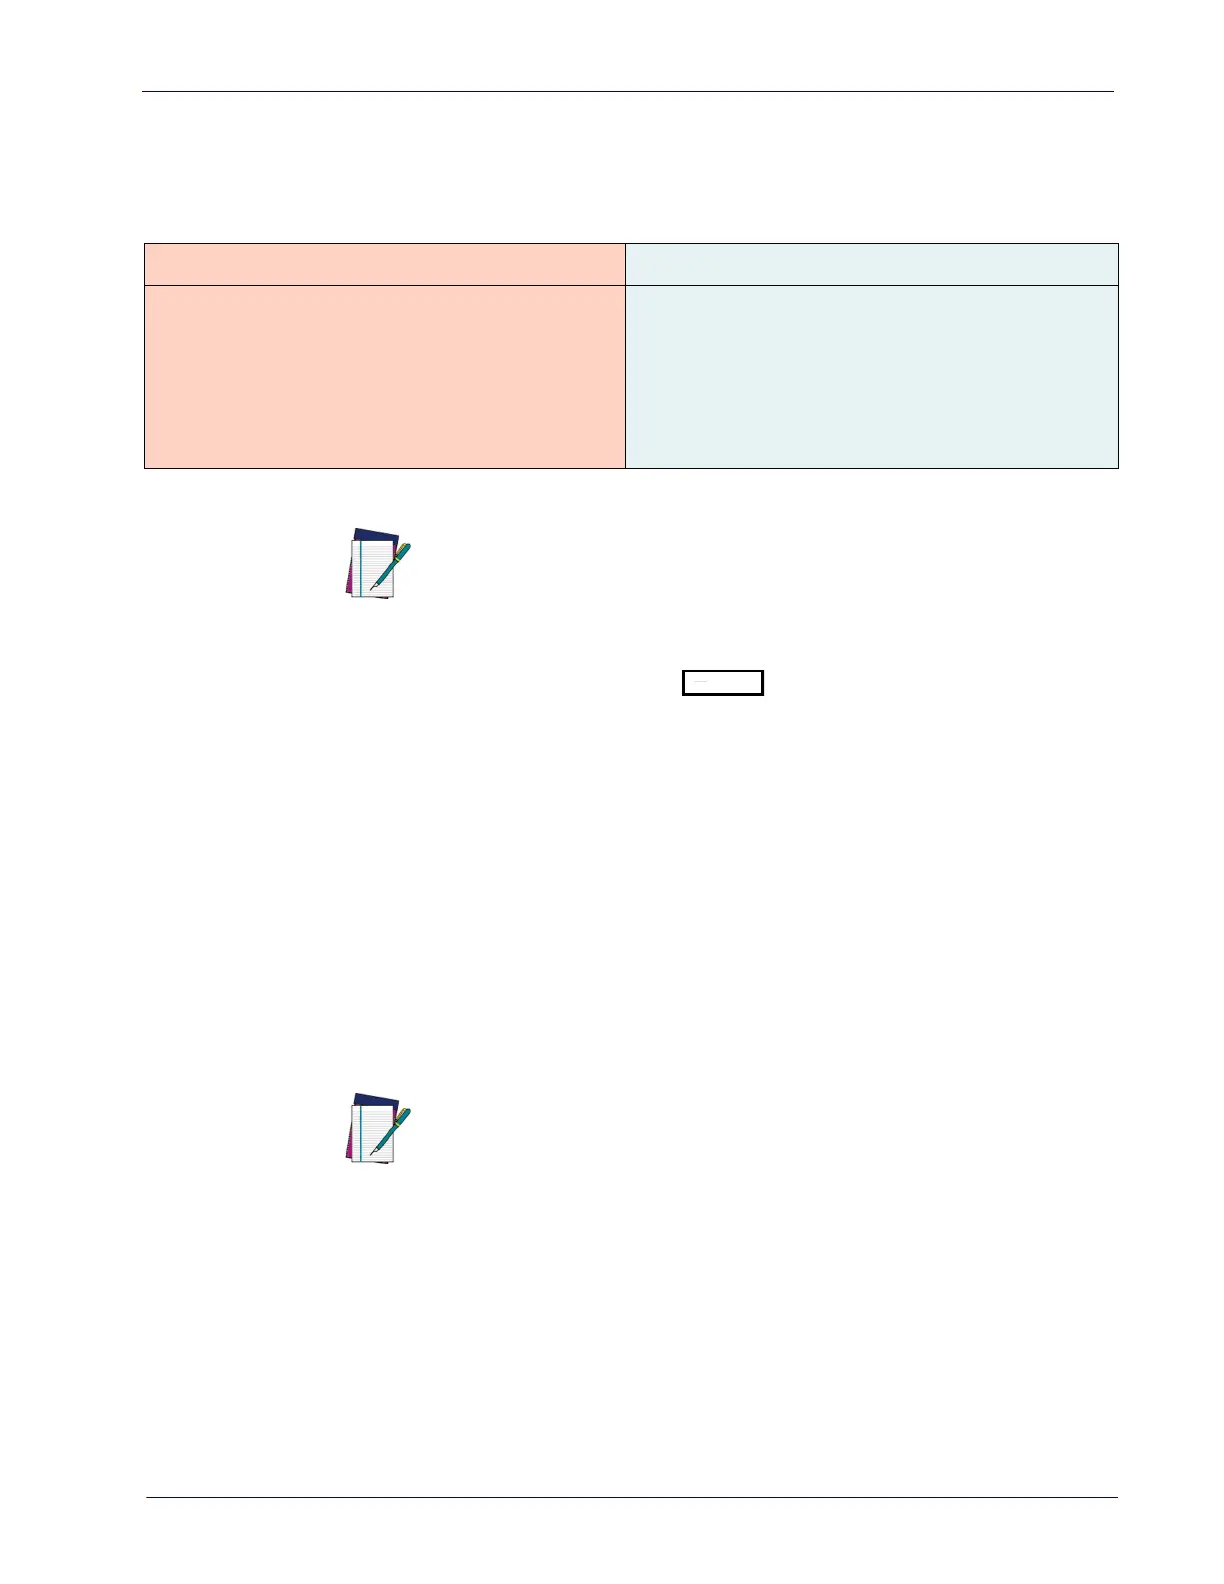
SINGLE INTERVAL DUAL INTERVAL
Place 0.006 pounds (3 grams for metric) on
the center of the weighing platform. The
entire weight must be placed on the weighing
platform at once for this test to be valid. The
Yellow LED should go Off and the Remote
Display should read 0.01 pounds (0.005 kilo
-
grams).
Place 0.0035 pounds (1.6 grams for metric) on
the center of the weighing platform. The entire
weight must be placed on the weighing plat
-
form at once for this test to be valid. The Zero
lamp should go Off and the Remote Display
should read 0.005 pounds (0.002 kilograms).
NOTE
The scanner/scale has an adaptive zero capture mechanism that
re-zeros the scale over time if there is a slow change in the zero
level; thus, if all the weight is not placed on the weighing surface
at one time, the Zero lamp will remain On and the Remote Display
will read 0.00 pounds or 0.000 pounds (0.000 kilograms). When
the weight is removed, the Zero lamp will turn off and the display
will show a minus sign
. Press the Zero switch to rezero
the scale.
NOTE
Ignore any message on the POS display.
 Loading...