Enter/Exit Programming Mode
Product Reference Guide
205
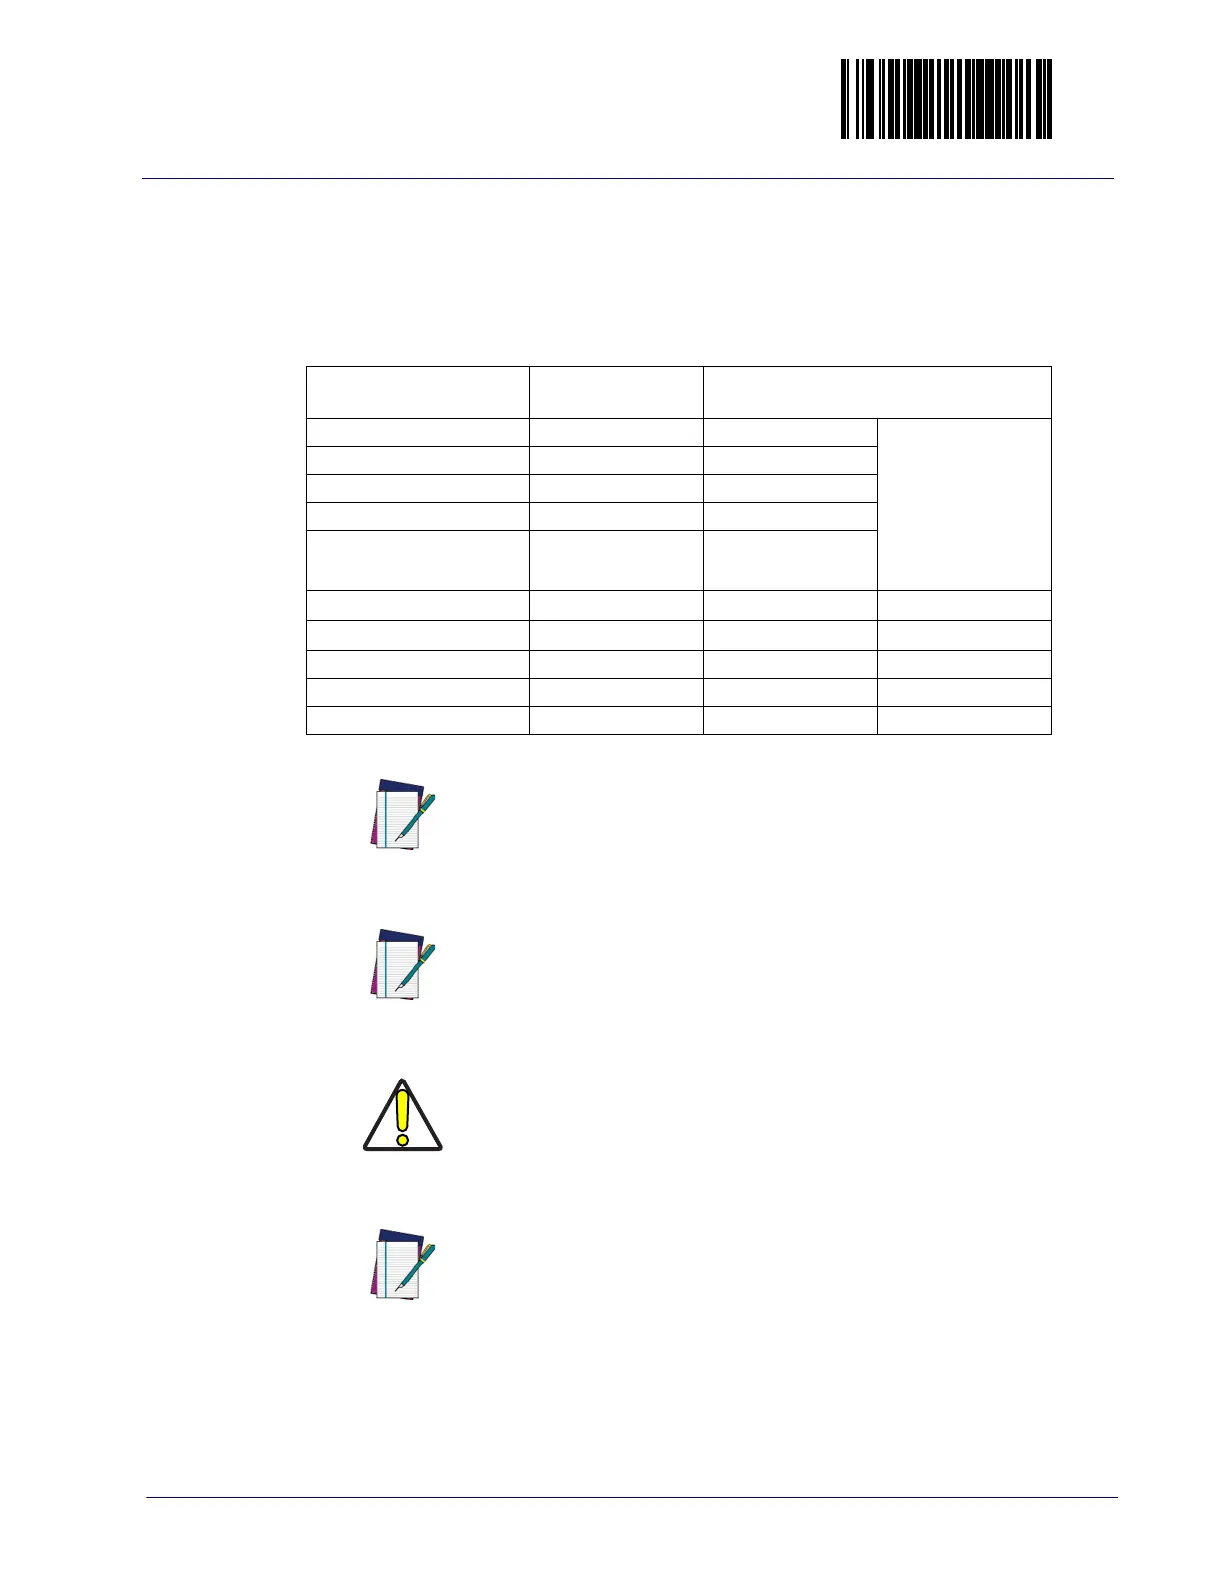
Interface Type
Specifies the current scanner interface. To access a scanner’s interface identifi-
cation number, place the scanner in Scanner Diagnostic Mode and view the 7-
segment FRU display (reference
Chapter 2, Scale Diagnostic Mode, for more
information). Selections are:
INTERFACE (I/F)
TYPE
I/F I.D.
NUMBER
NOT USER-SELECTABLE
RS-232 Standard
05
System Interface 7-segment FRU
display indicates 0
at start-up (accom
-
panied by trill beep
for approx. 2 sec
-
onds)
RS-232 Wincor-Nixdorf
12
RS-232 Single Cable
20
USB OEM
45
IBM
Port 17
04
IBM
Port 5B
08
IBM
Port 9B
23
USB Keyboard
35
USB-TEC
0D
USB COM
47
NOTE
A new scanner may have been shipped from the factory with a
Null Interface (no interface type selected) to ensure system
compatibility at installation. In this case, the correct Interface
Type programming bar code must be scanned first before the
scanner can be used with a POS system.
NOTE
If the scanner’s interface type must be changed, always be sure
that interface configuration is the FIRST item scanned during a
programming session. (Selecting an interface type resets ALL
other configuration items to the factory default for that inter
-
face type.)
CAUTION
Great care should be taken to select the correct interface type,
since you can cause damage to the scanner and/or POS termi
-
nal by attempting to change to an incompatible interface.
ALWAYS make interface selections with the host cable DIS
-
CONNECTED.
NOTE
When an interface is selected, the scanner loads the configura-
tion for that interface as the selection is made. Any custom
configurations done in the previous interface will not be carried
over to the configuration for the new interface.
 Loading...